Creating a generic part
Making a part generic is a powerful way to add versatility to your parts and increase their reusability. A generic part is one where the specific properties of a part, such as a footprint and 3D model, can be determined later while always maintaining the fundamental properties of the part.
Before beginning to design your own generic part, search Flux's built-in part library to see if there is an option that already fit your needs.
To create a generic part, follow the instructions below:
- Open a new project in Flux or fork a part that you wish to make generic.
- Make sure the pin numbers on the terminals of the part are numbered correctly. This is important for the footprint to be loaded properly. (e.g A resistor usually have 2 terminals should have pin number value of 1 for the terminal P1 and pin number value of 2 for the terminal P2).
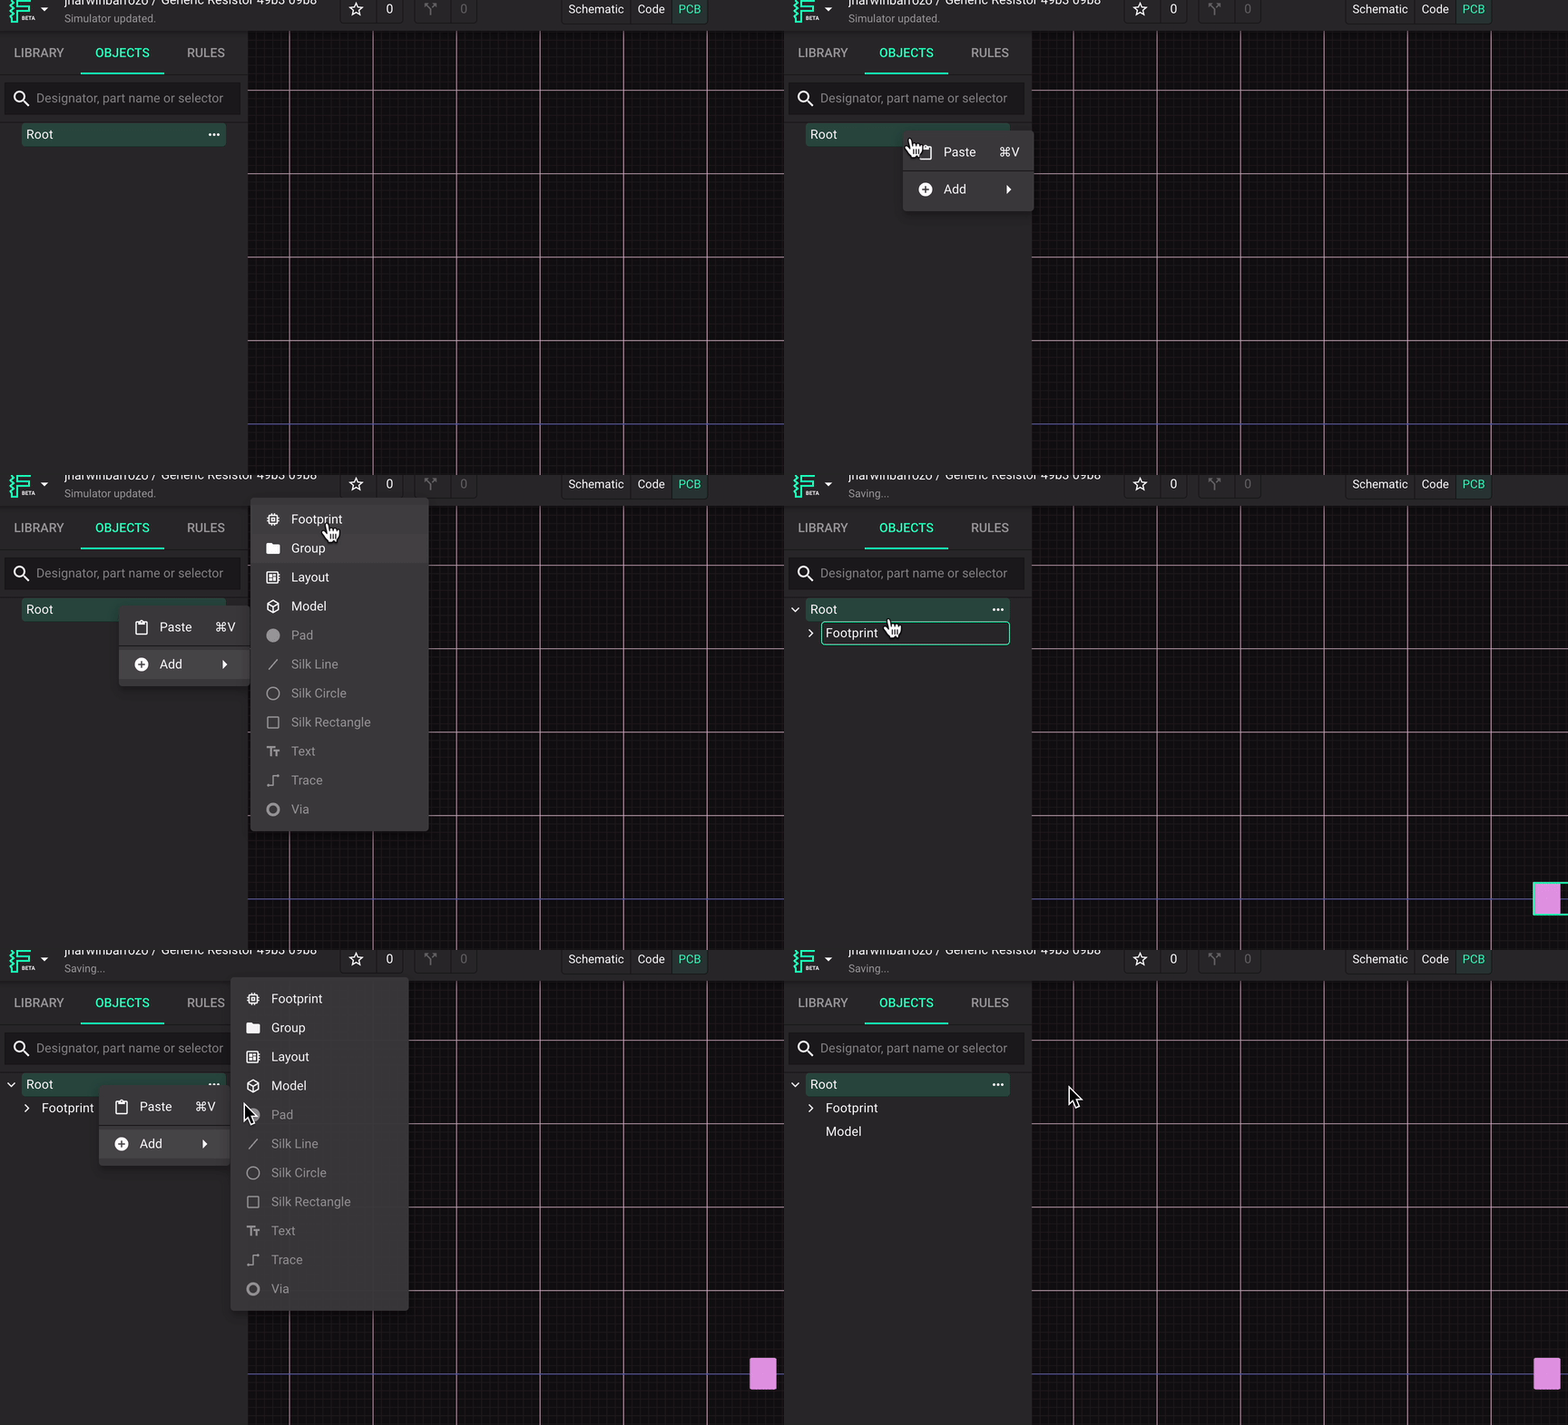
- Make sure your part has a footprint and model node as shown below. If you don't see footprint and model nodes in the Objects panel, just right click on the Root folder then add footprint and/or model from there. Also, the object ID's of these nodes will be important when it comes to the code for generics (don't worry, it is already written for you!).
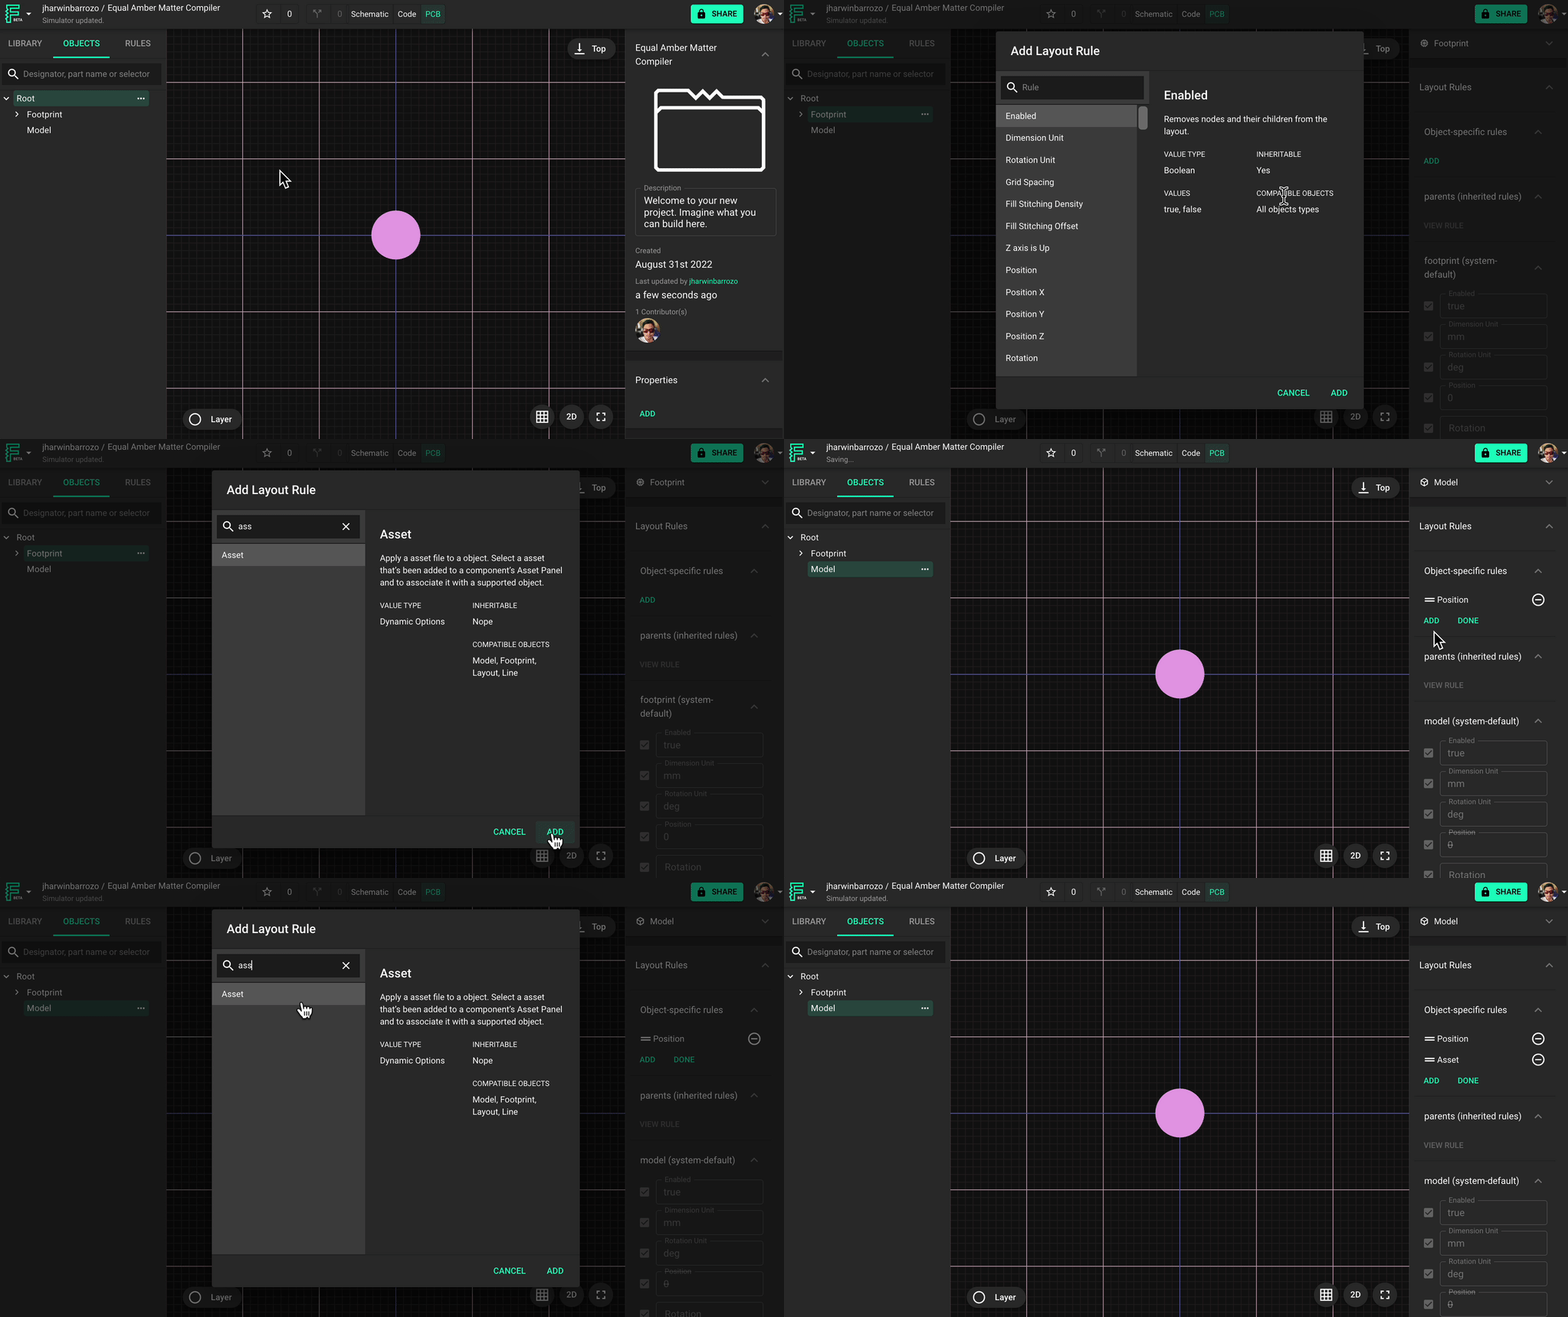
- Add the "Asset" object-specific rule to both the footprint and the model nodes. This is what allows the footprint and model to be imported from a file. Here's what you need to know about adding assets.
- Open the Manage Assets panel then upload all of the generic footprints and models as assets to the project. These will be the forms that your part can take.
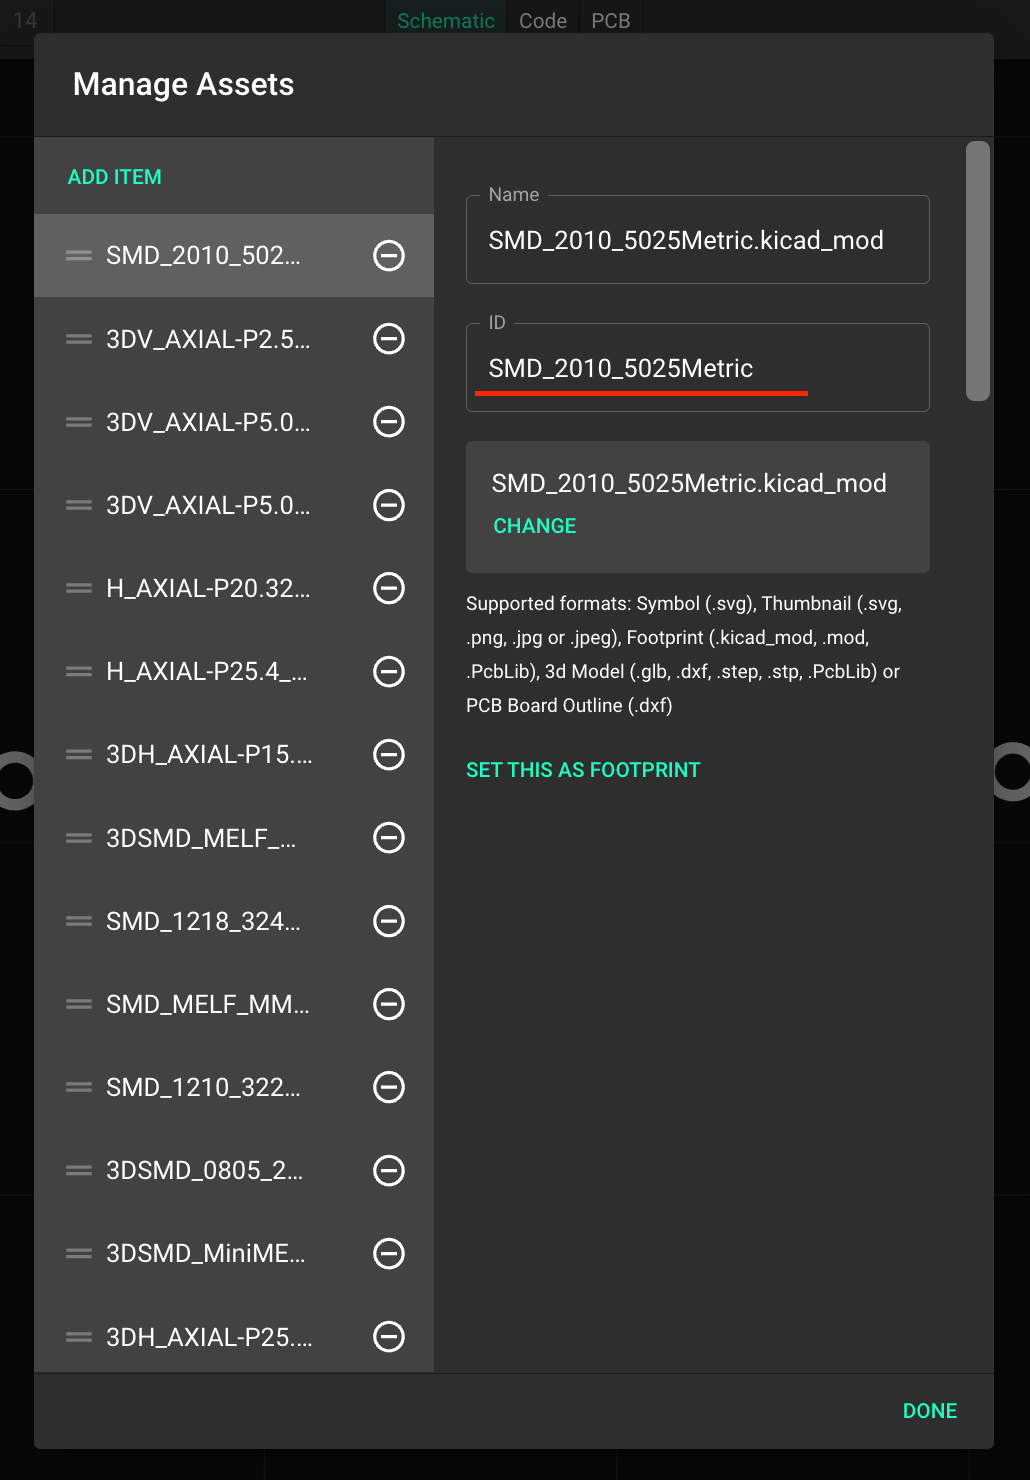
- Make sure that the asset ID of each footprint is a concise description of the footprint itself. This is what will have to be entered to select that specific footprint for the part. For example: SMD_2010_5025Metric is any surface mounted devices (SMD) 0.20 inch long and 0.10 inch wide (5.0 mm long and 2.5 mm wide)
- The asset ID of the 3D model should be the same as the appropriate footprint ID. For example: 3DSMD2010_5025Metric.
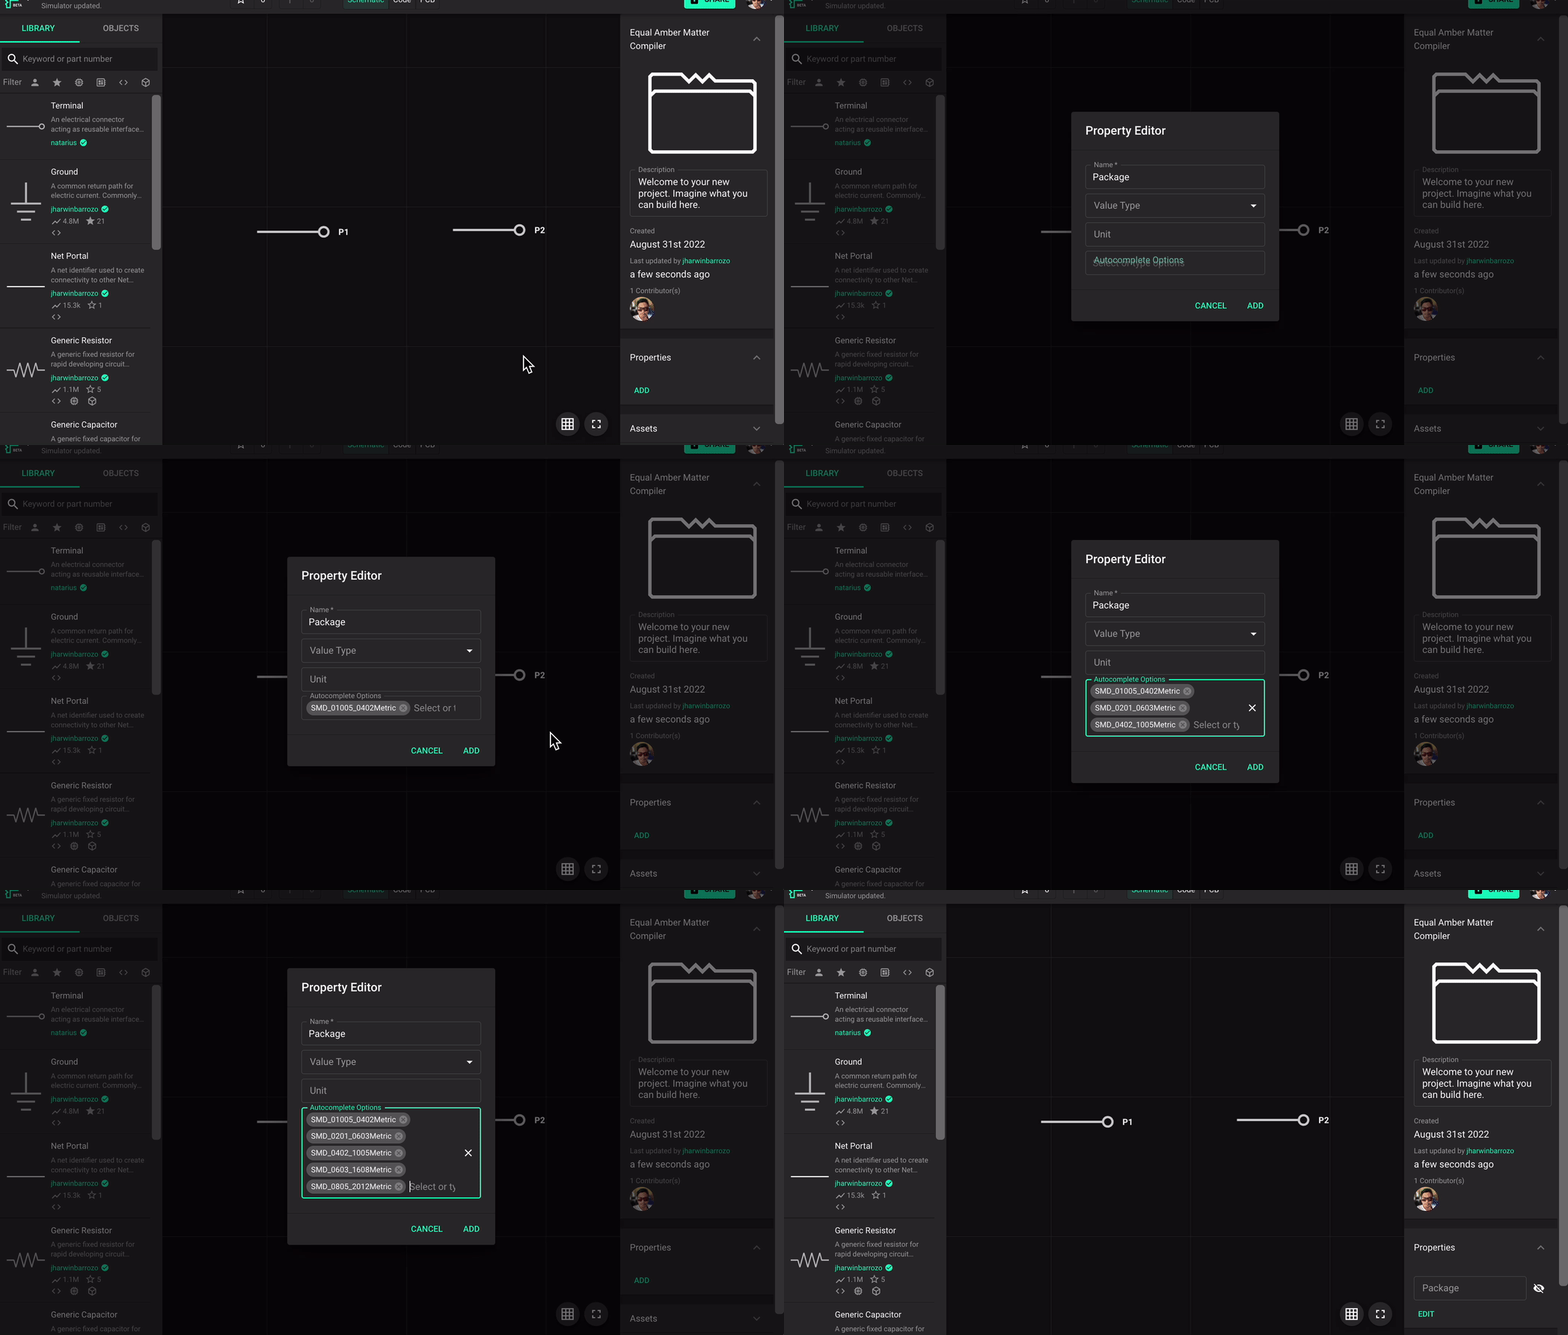
- In the project properties tab on the right hand side of the schematic editor (when nothing is selected) create a new property called "Package" This is where you need to put all the id of the asset as Autocomplete options.
- Go into code editor. Below is all of the code that is needed to implement generics for your part. All you have to do is copy paste this into your generic part's code section.
x
// Footprint node and Model node IDconst footprintID = "<FOOTPRINT NODE ID HERE>";const modelID = "<MODEL NODE ID HERE>";// Declare specific footprint and model node based on their ID as a PcbLayoutNodeconst footprintNode = flux.getNodeById(footprintID) as PcbLayoutNode;const modelNode = flux.getNodeById(modelID) as PcbLayoutNode;// This will sort and return an array of all available assets in the project with file type .kicad_modconst footprintAssetNotSorted = flux.assets.filter((asset) => asset.fileType === "kicad_mod").map((asset) => asset.name);const footprintAssetId = footprintAssetNotSorted.sort();// This will sort and return an array of all available assets in the project with file type .stepconst modelAssetIdNotSorted = flux.assets.filter((asset) => asset.fileType === "step").map((asset) => asset.name);const modelAssetId = modelAssetIdNotSorted.sort();// This checks if footprint and model node has Asset ruleif (footprintNode || modelNode) { const assetFootprintRule = footprintNode.rules.find((rule) => rule.key === "asset"); const assetModelRule = modelNode.rules.find((rule) => rule.key === "asset"); // First, look for property that is named "Package", then use its value to // set the Asset rule value for footprint node and model node. flux.on("setup", () => { const property = flux.properties.find((prop) => prop.name === "Package"); if (property) { changeFootprintAsset(property.value); changeModelAsset(property.value) } }); // Listen to any change in the Package property, if change has been detected // set the Asset rule value for footprint node and model node. flux.on("propertyChange", (event: PropertyChangeEvent) => { if (event.property_name === "Package") { changeFootprintAsset(event.value); changeModelAsset(event.value); flux.notify(event.property_name + " changed to " + event.value, { variant: "success", }); } }); // Given a package property value, this set the correct assetID for footprint node function changeFootprintAsset(propertyValue: any) { if (assetFootprintRule) { for (let i = 0; i < footprintAssetId.length; i++){ if (propertyValue === footprintAssetId[i]){ assetFootprintRule.value = footprintAssetId[i]; footprintNode.name = footprintAssetId[i]; break; } else { // Else, if user didn't selected any pre-set value from the dropdown, // default to 0603 Package assetFootprintRule.value = "SMD_0603_1608Metric"; footprintNode.name = "SMD_0603_1608Metric"; }; } } } // Given a package property value, this set the correct assetID for a model node function changeModelAsset(propertyValue: any) { if (assetModelRule) { for (let i = 0; i < modelAssetId.length; i++){ if (propertyValue === footprintAssetId[i]){ flux.notify(footprintAssetId[i], {variant: "success",}); assetModelRule.value = modelAssetId[i]; modelNode.name = modelAssetId[i]; break; } else { // Else, if user didn't selected any pre-set value from the dropdown, // default to 0603 Package assetModelRule.value = "3DSMD_0603_1608Metric"; modelNode.name = "3DSMD_0603_1608Metric"; }; } } }};- Once you pasted the code above, the only thing you will have to modify is the footprint and model ID that are required at the top of the code. The underlined text below is the object ID of the footprint node.
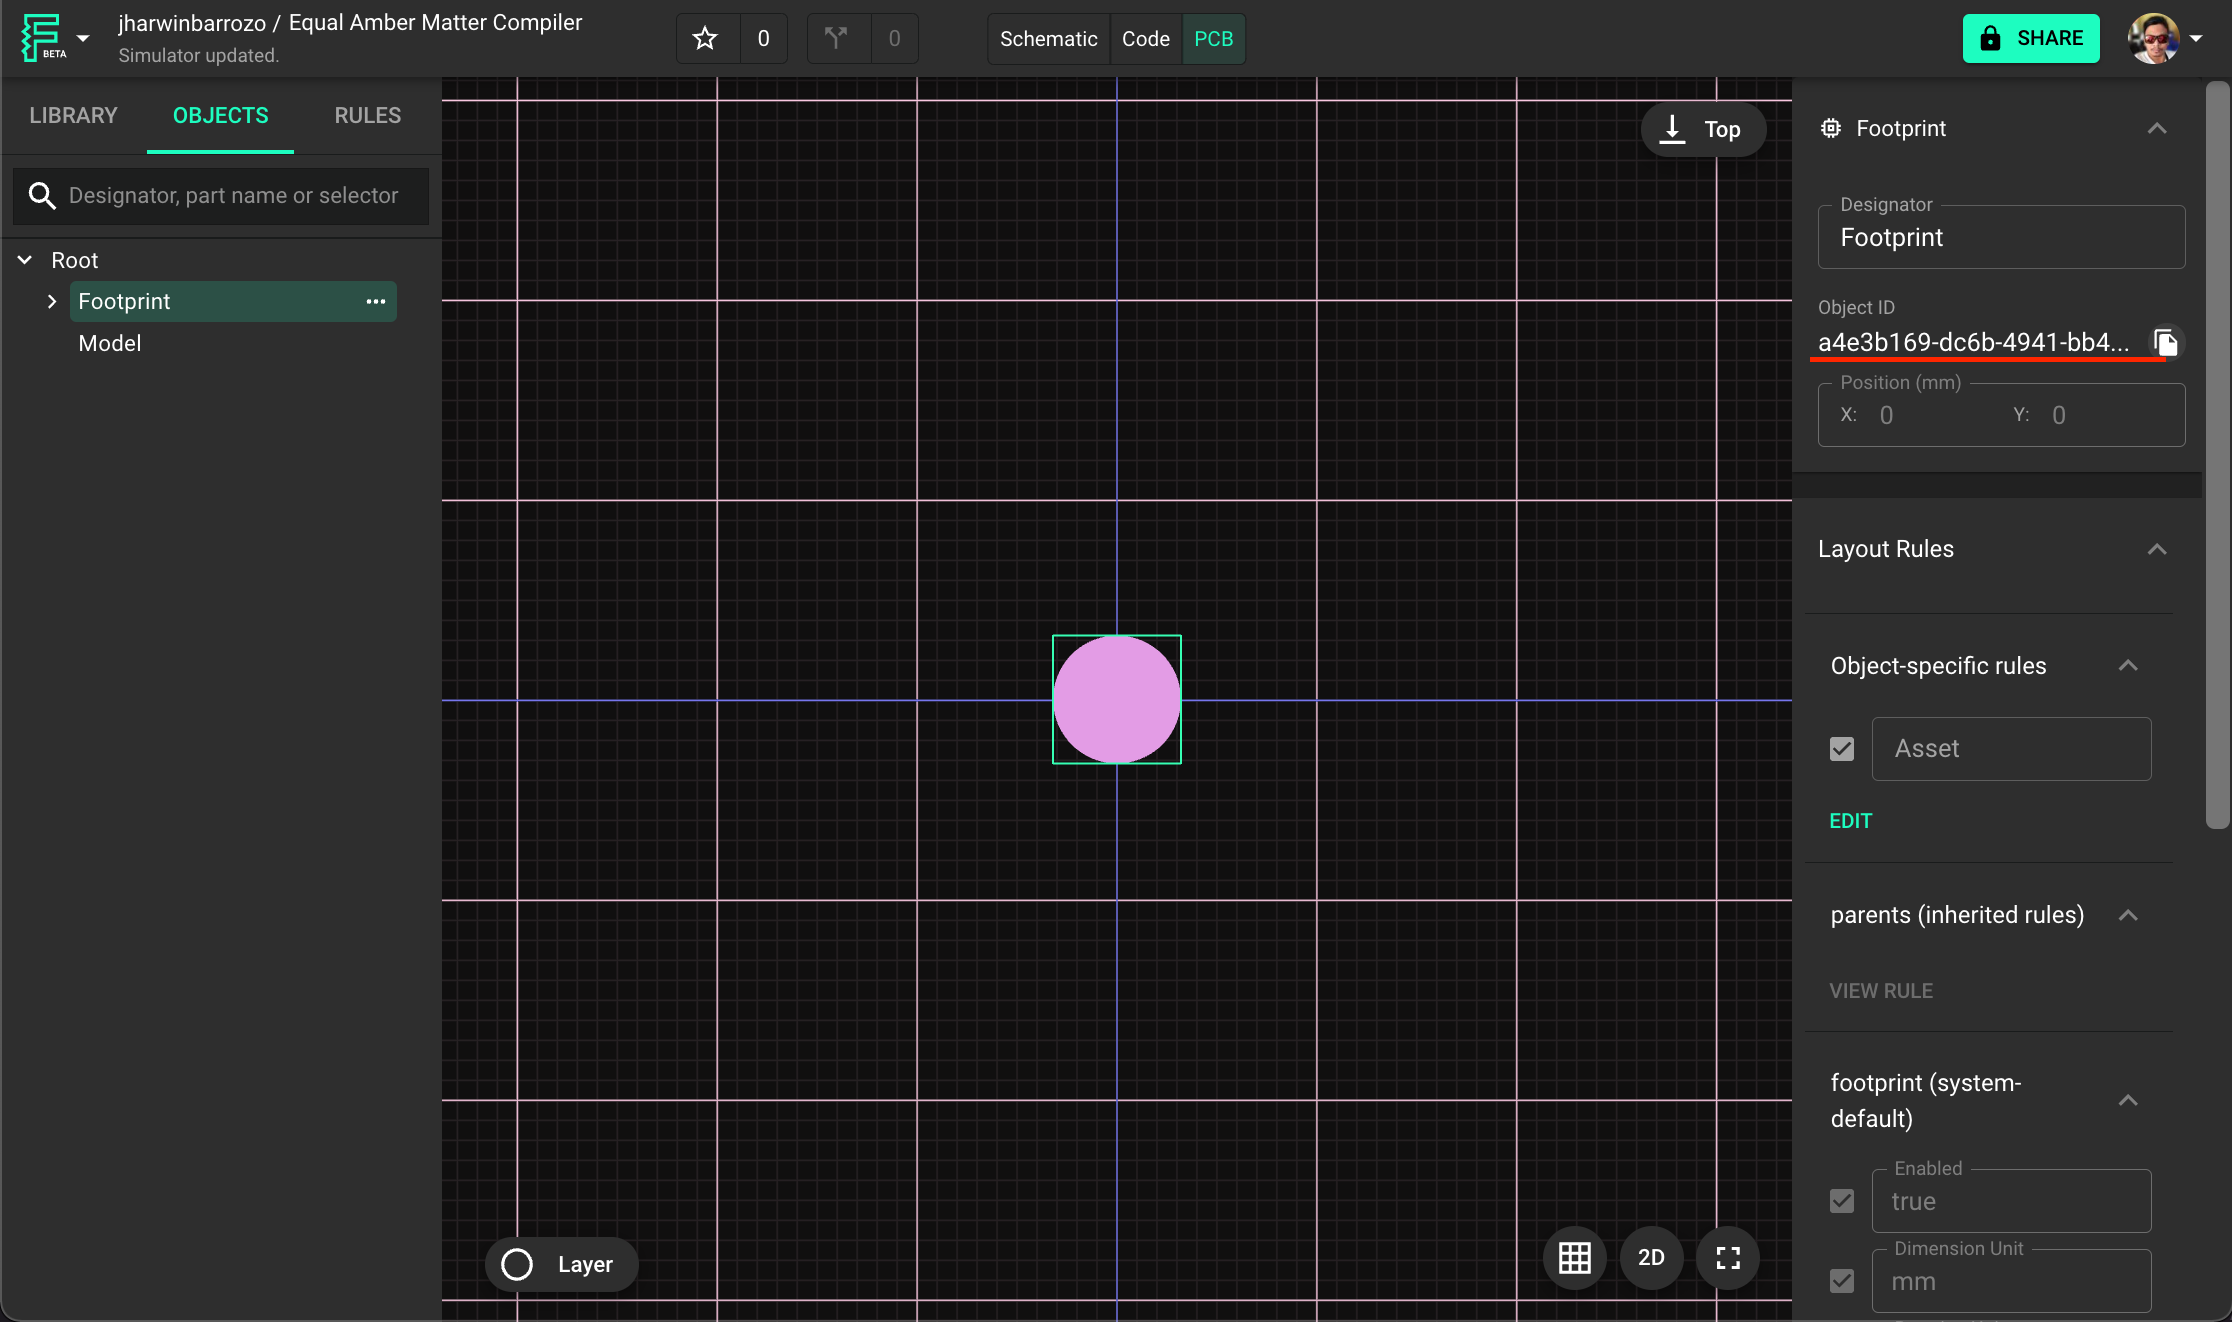
Object ID of Footprint node
Below is just an example.
// Footprint node and Model node IDconst footprintID = "a4e3b169-dc6b-4941-bb49-bebd1c2c19e8.defaultFootprint";const modelID = "3d59e9a9-6410-8a17-e49e-984f31beee43";- To set a default footprint and model for the generic part, add the ID of the desired asset to the footprint and model asset object-specific rule of the part. This will be the initial footprint and model until it is changed via the "Package" property. The package property as well should be set to the default ID before the part is published.
- Publish the part and use it in other projects. To change the footprint, just enter the ID of the asset you would like it to take form of and it will change the footprint and model appropriately.
Was this page helpful?