Define copper-free regions on any layer
Overview
In some cases you may be designing a PCB that requires a copper cutout. For example when using an IC that contains an antenna that cannot have any underlying copper on any layers beneath it. This tutorial will explain how to accomplish this in Flux.
There are two options for creating copper cutouts:
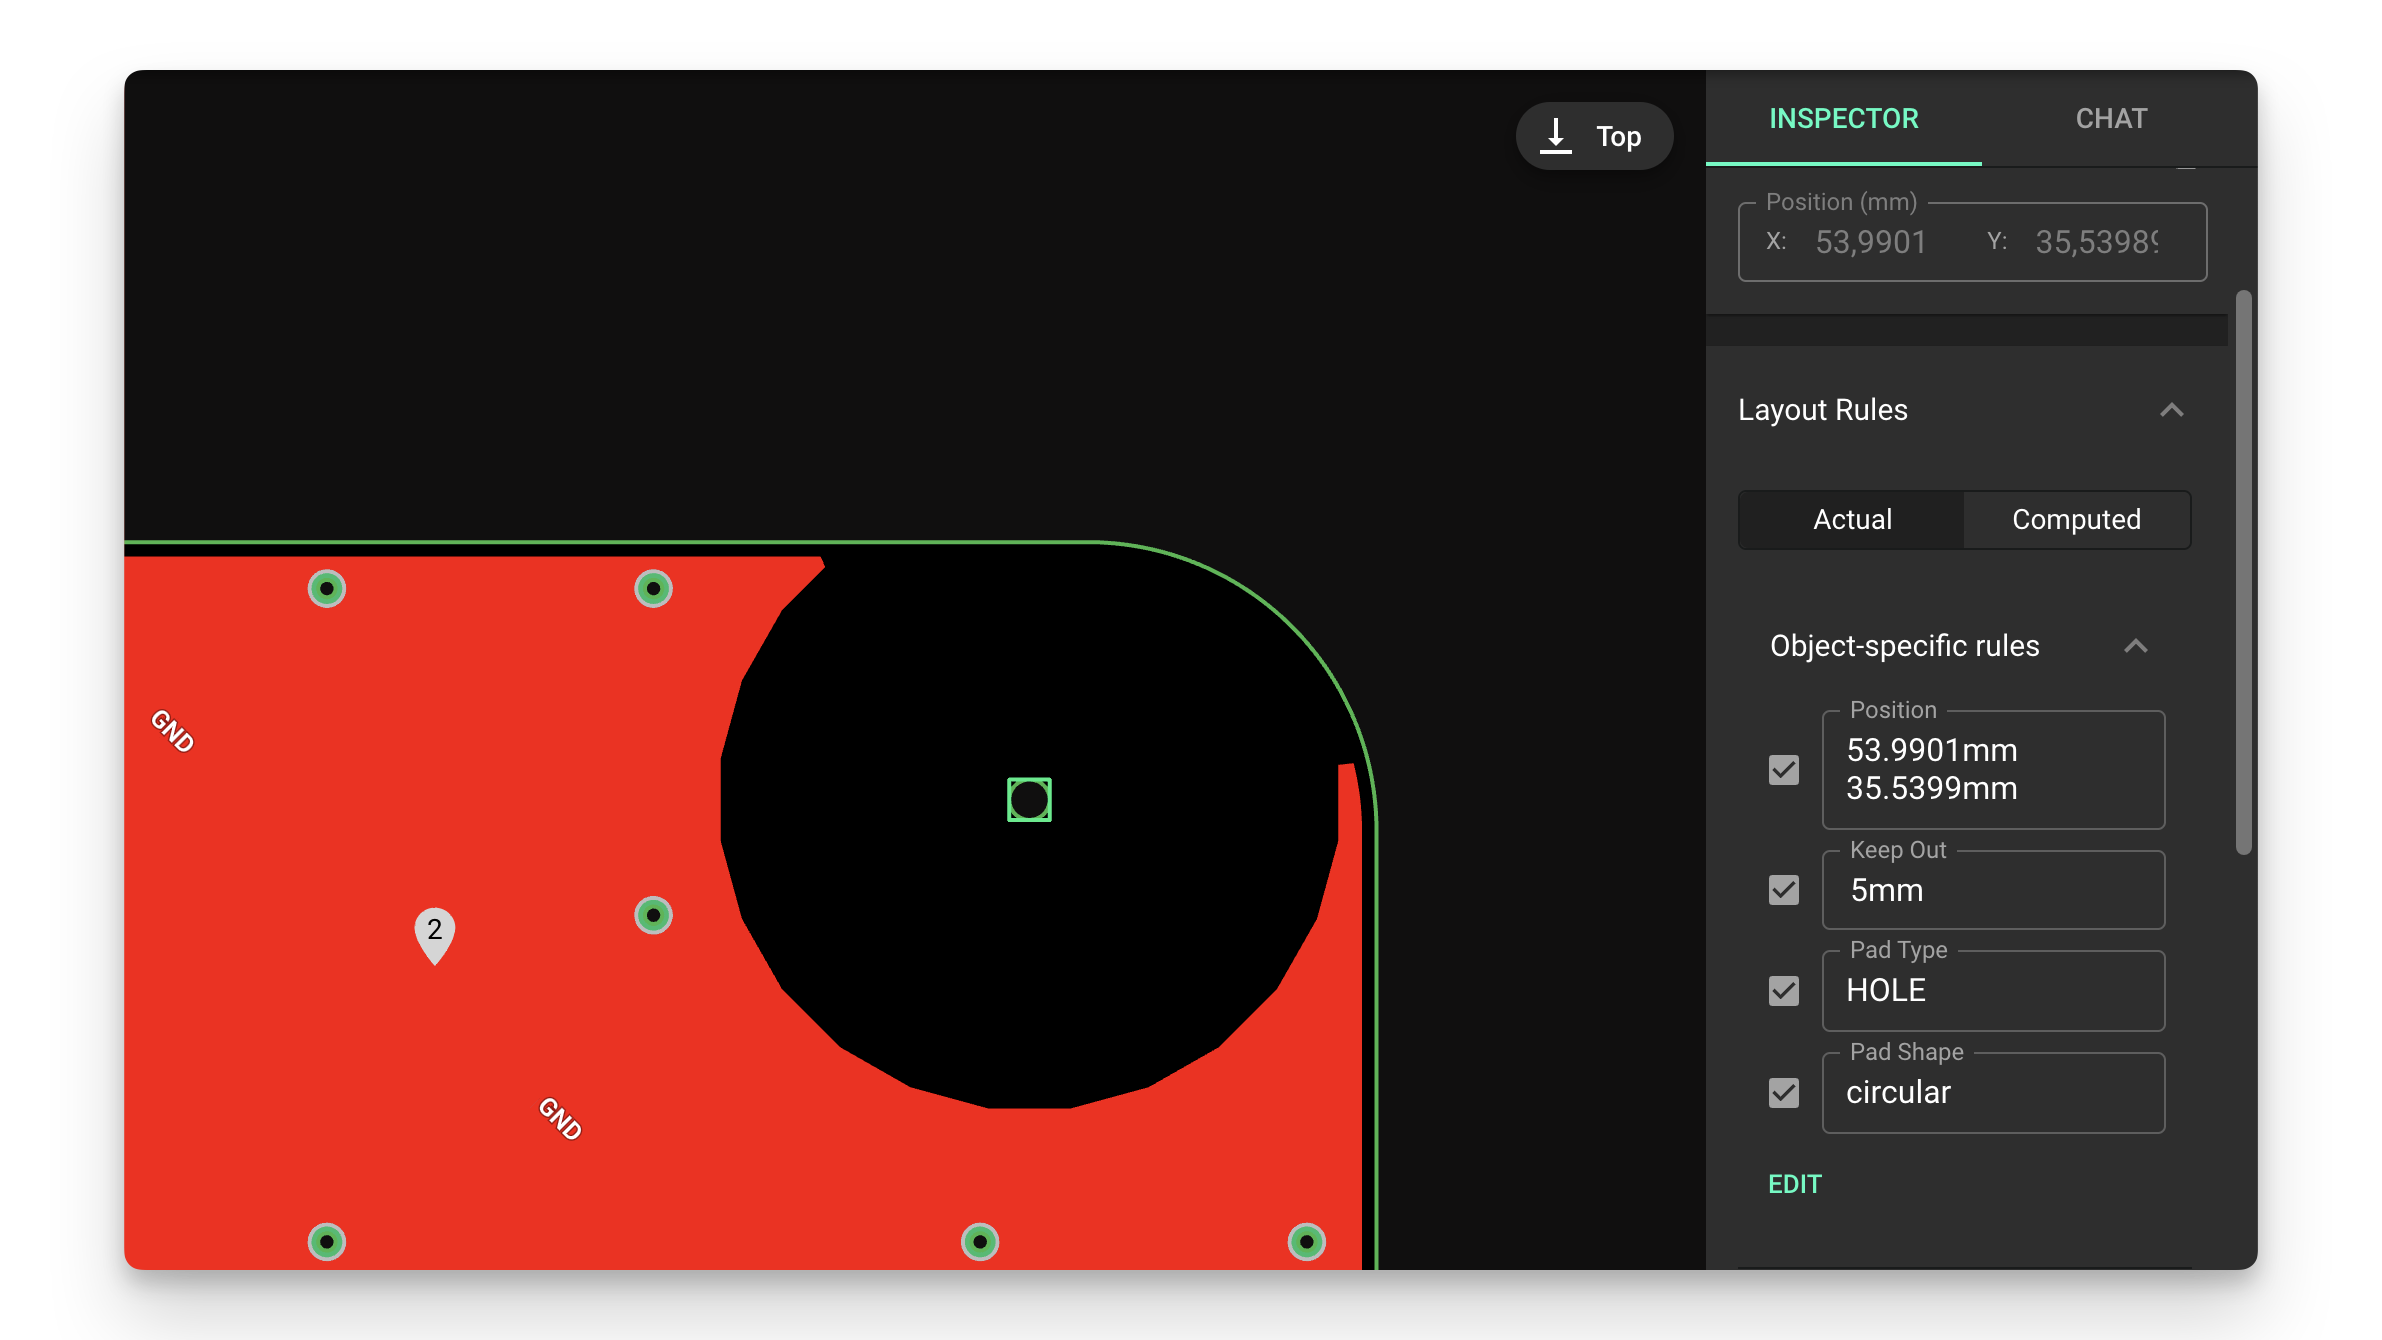
Keep Out Rule: can be applied to any object. Will keep copper fills (and any other object) away from the element that the rule is applied to.
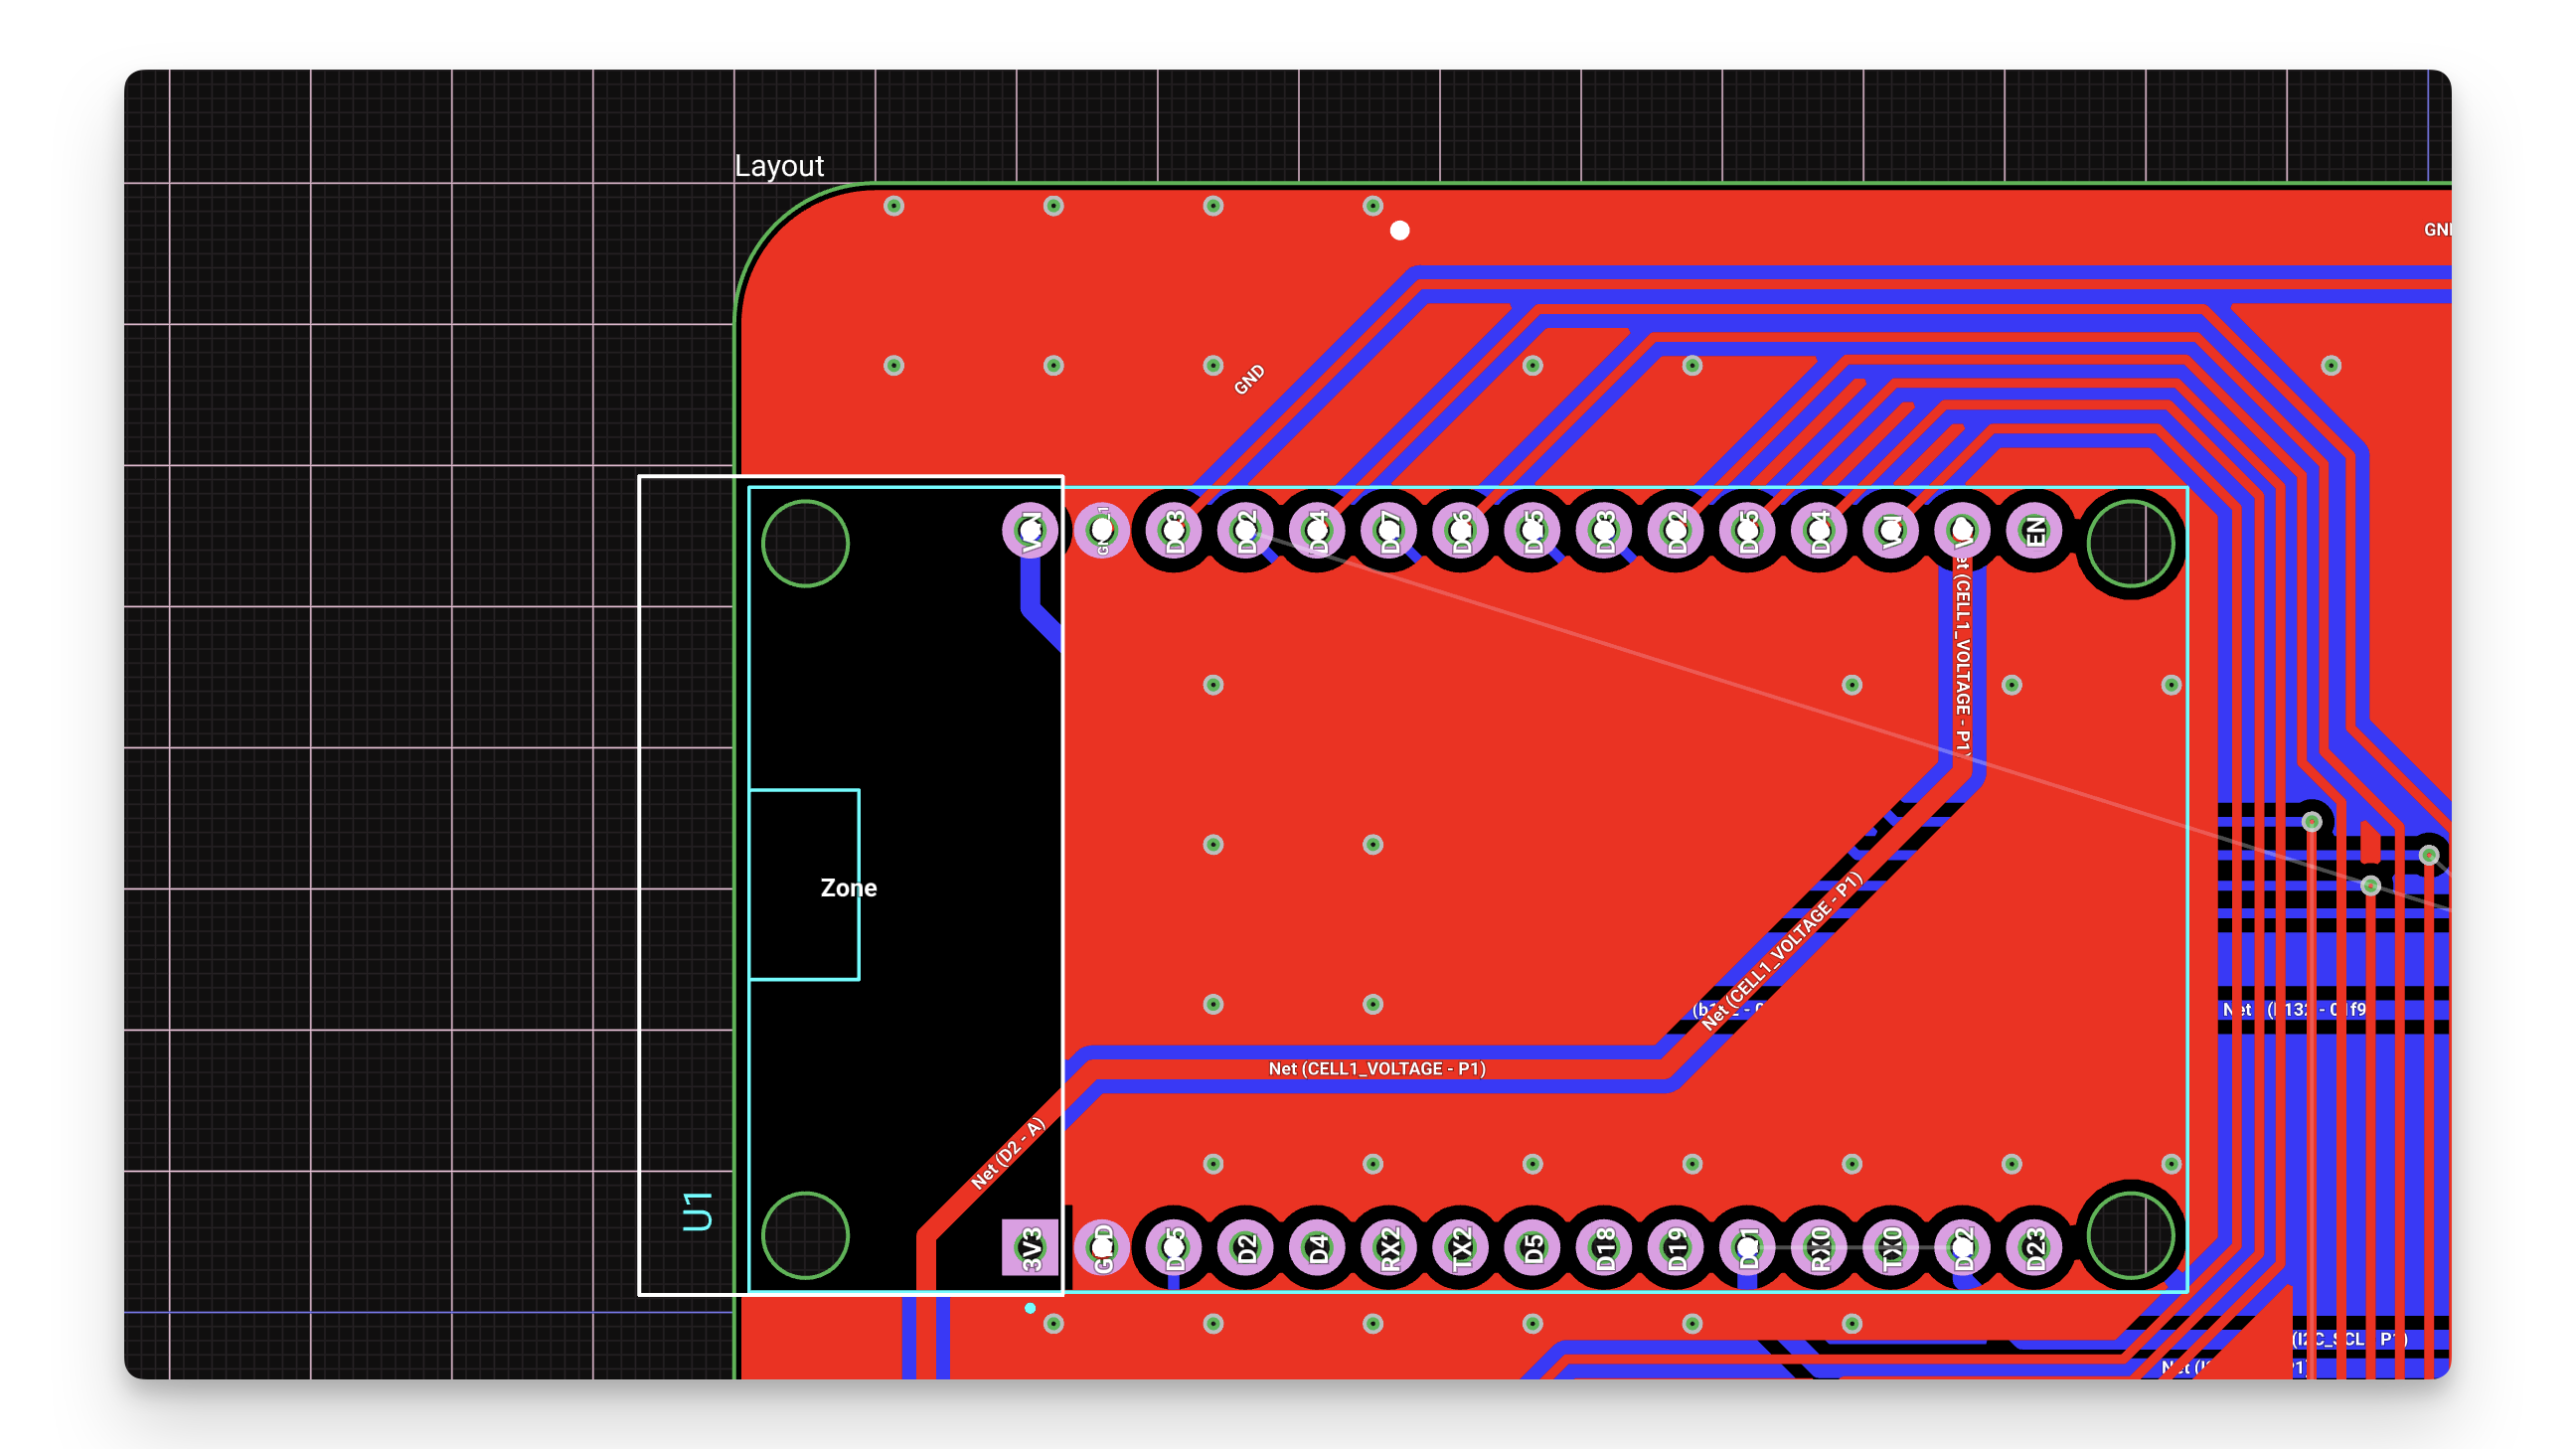
Zones: is an object on its own. Can be placed on the design and configured to create a cutout on any layer.
Keep Out Rule
In the case where you’d like to create a copper cutout around a pre-existing element simply add a Keep Out rule. This will push the auto-generated copper planes away from the part at the distance specified. The keep out rule will only be applied to the layer where the object exists. To create multi-layer cutouts, you'll need to use a zone.
Select the object to create a copper fill around (such as an SMA connector or a mounting hole.)
Navigate to the layout rules on the right and add a keep out rule.
Add the keep out size. Remember you can select different x and y keep outs by typing
10mm 5mmFlux should automatically regenerate the copper fill, thus creating a copper cut-out around the component
Zones
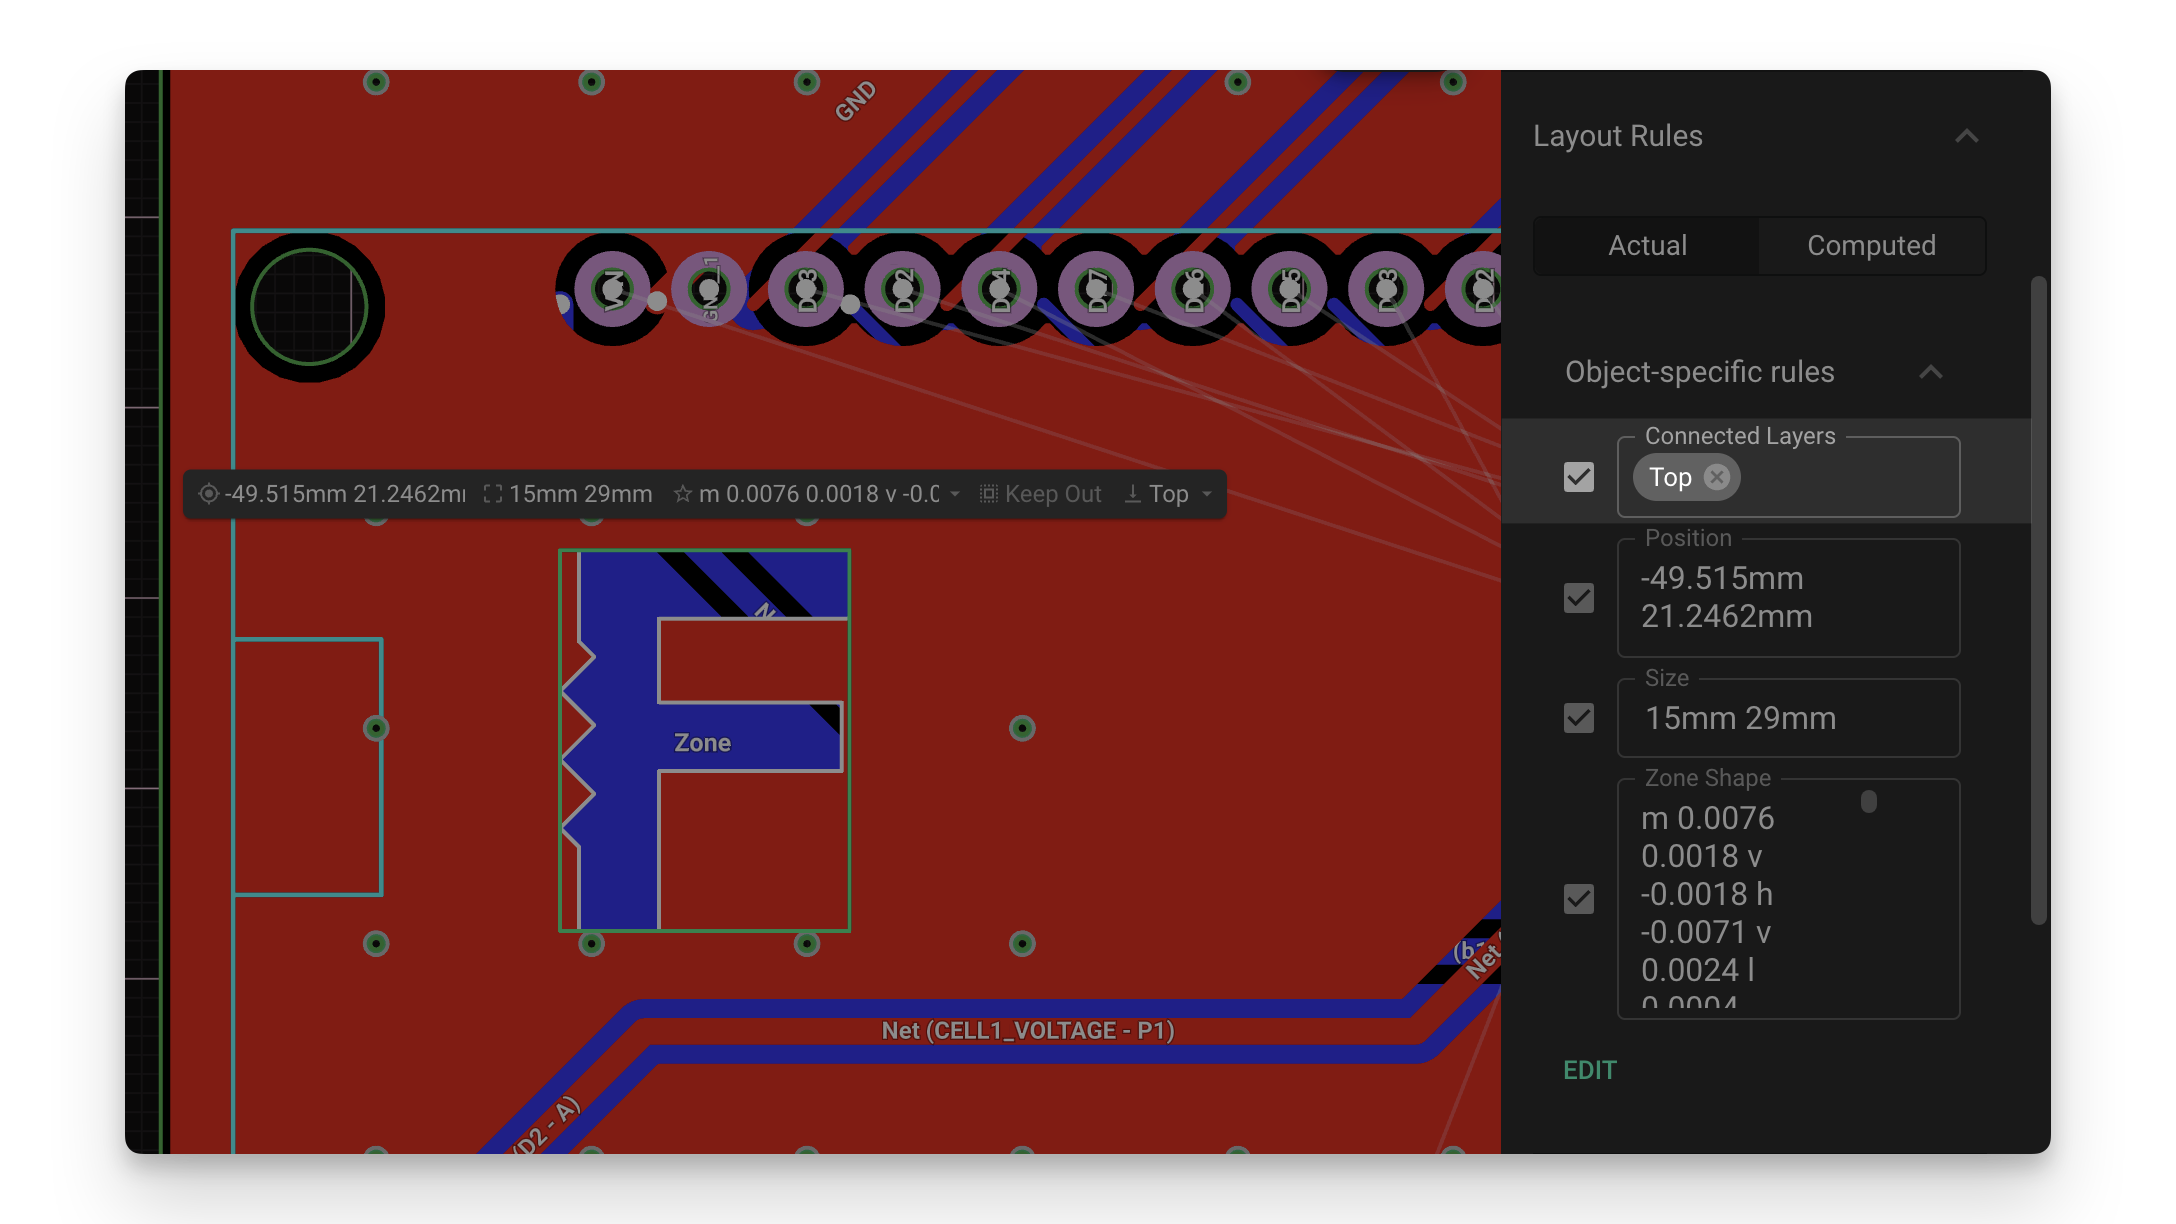
Zones are elements whose unique purpose is to create keep out regions with any shape or size, and on any layer.
Adding a Zone
To add a new zone:
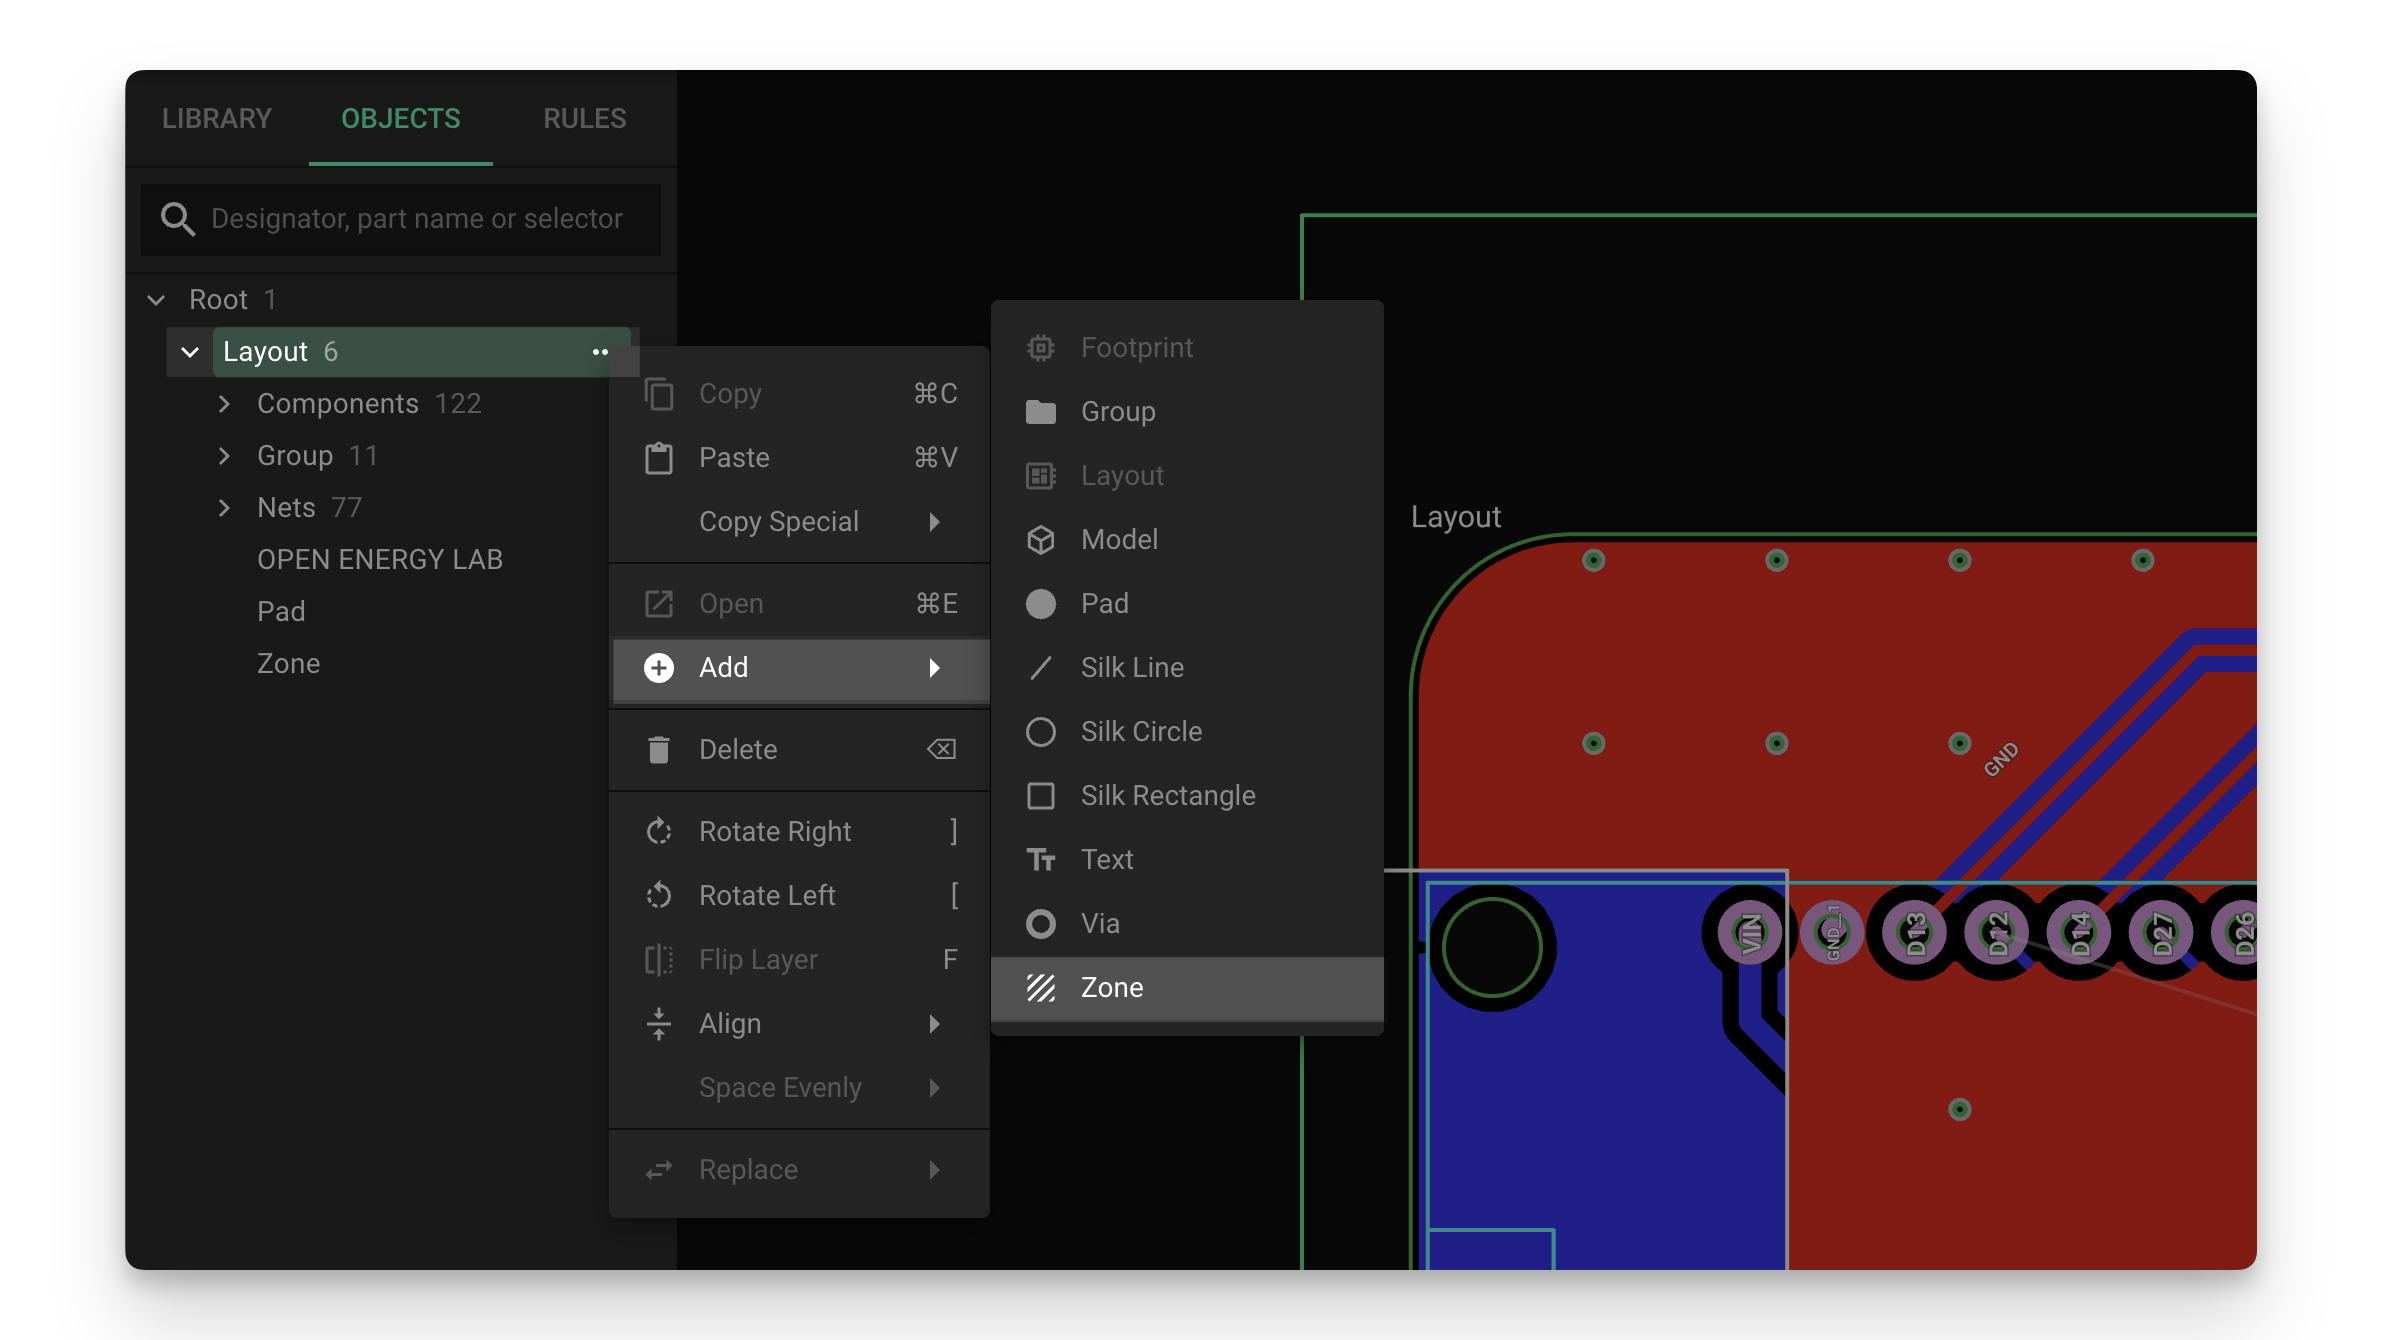
Find the object menu in the PCB editor
Click on the three dots menu next to the layout object
Select Add->Zone
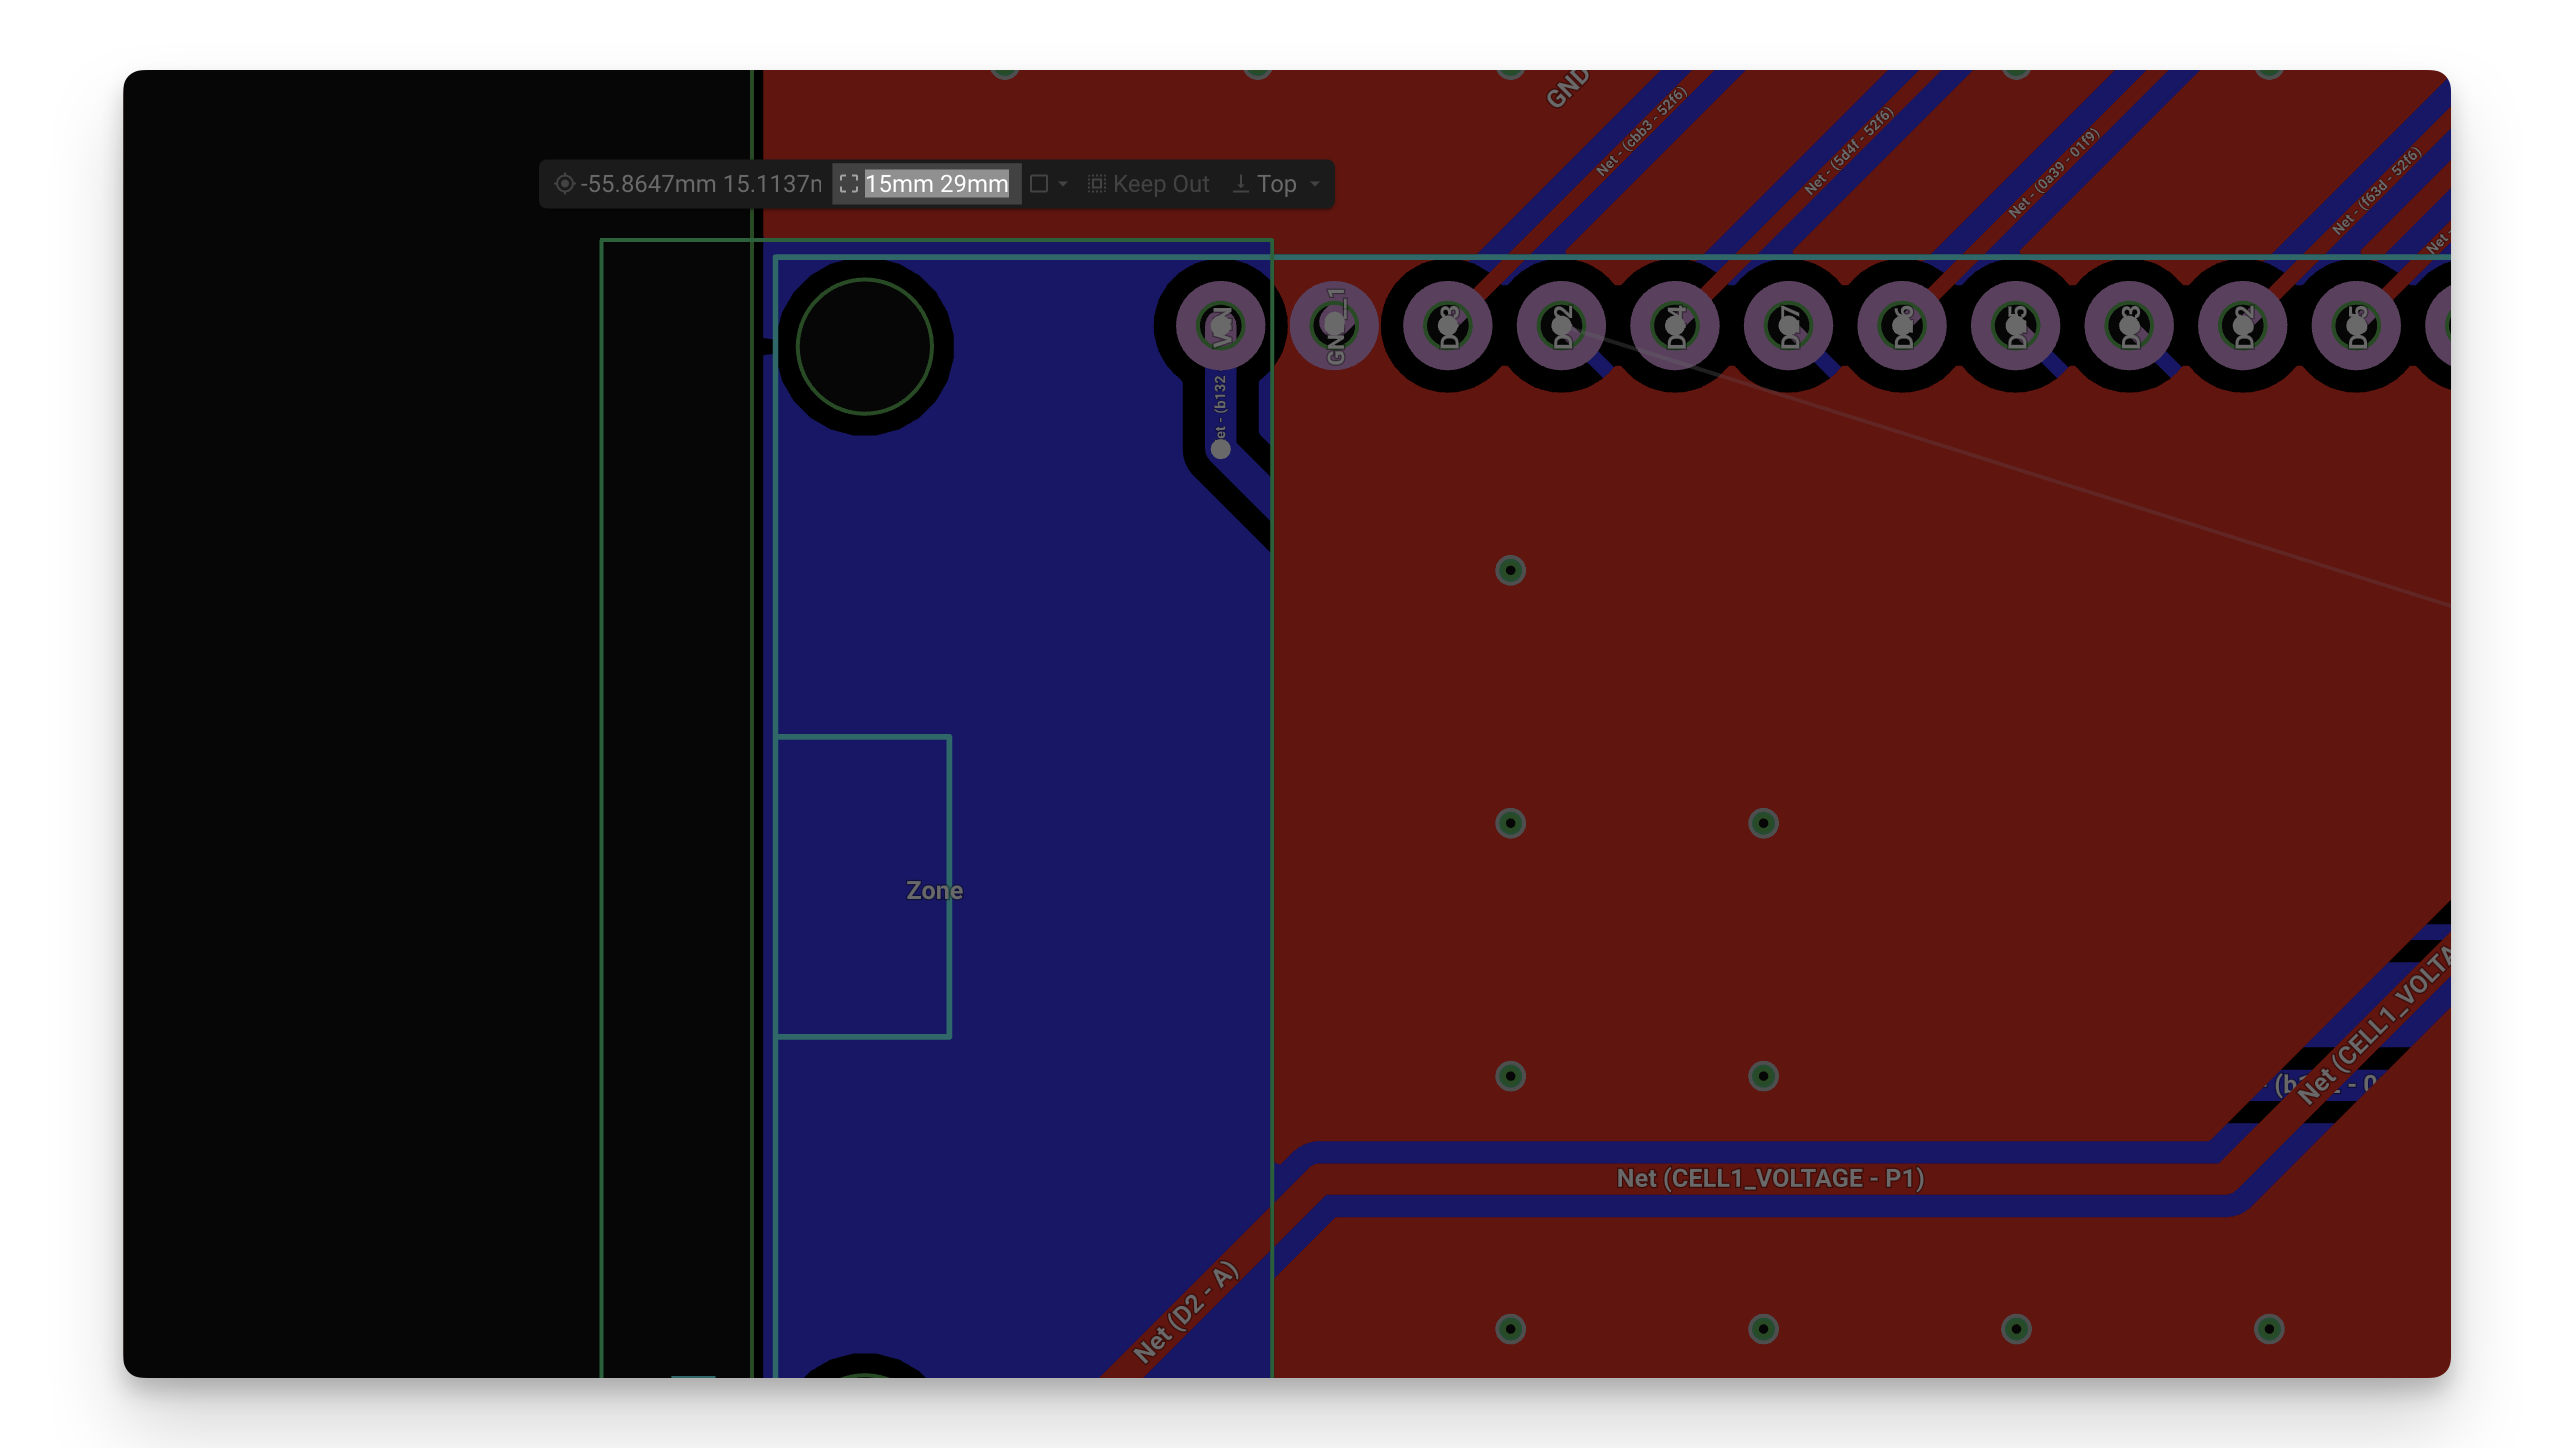
Adjusting the Size
To adjust the zone size, select the zone and use the size menu in the toolbox. Remember you can select different x and y sizes by typing 15mm 29mm .
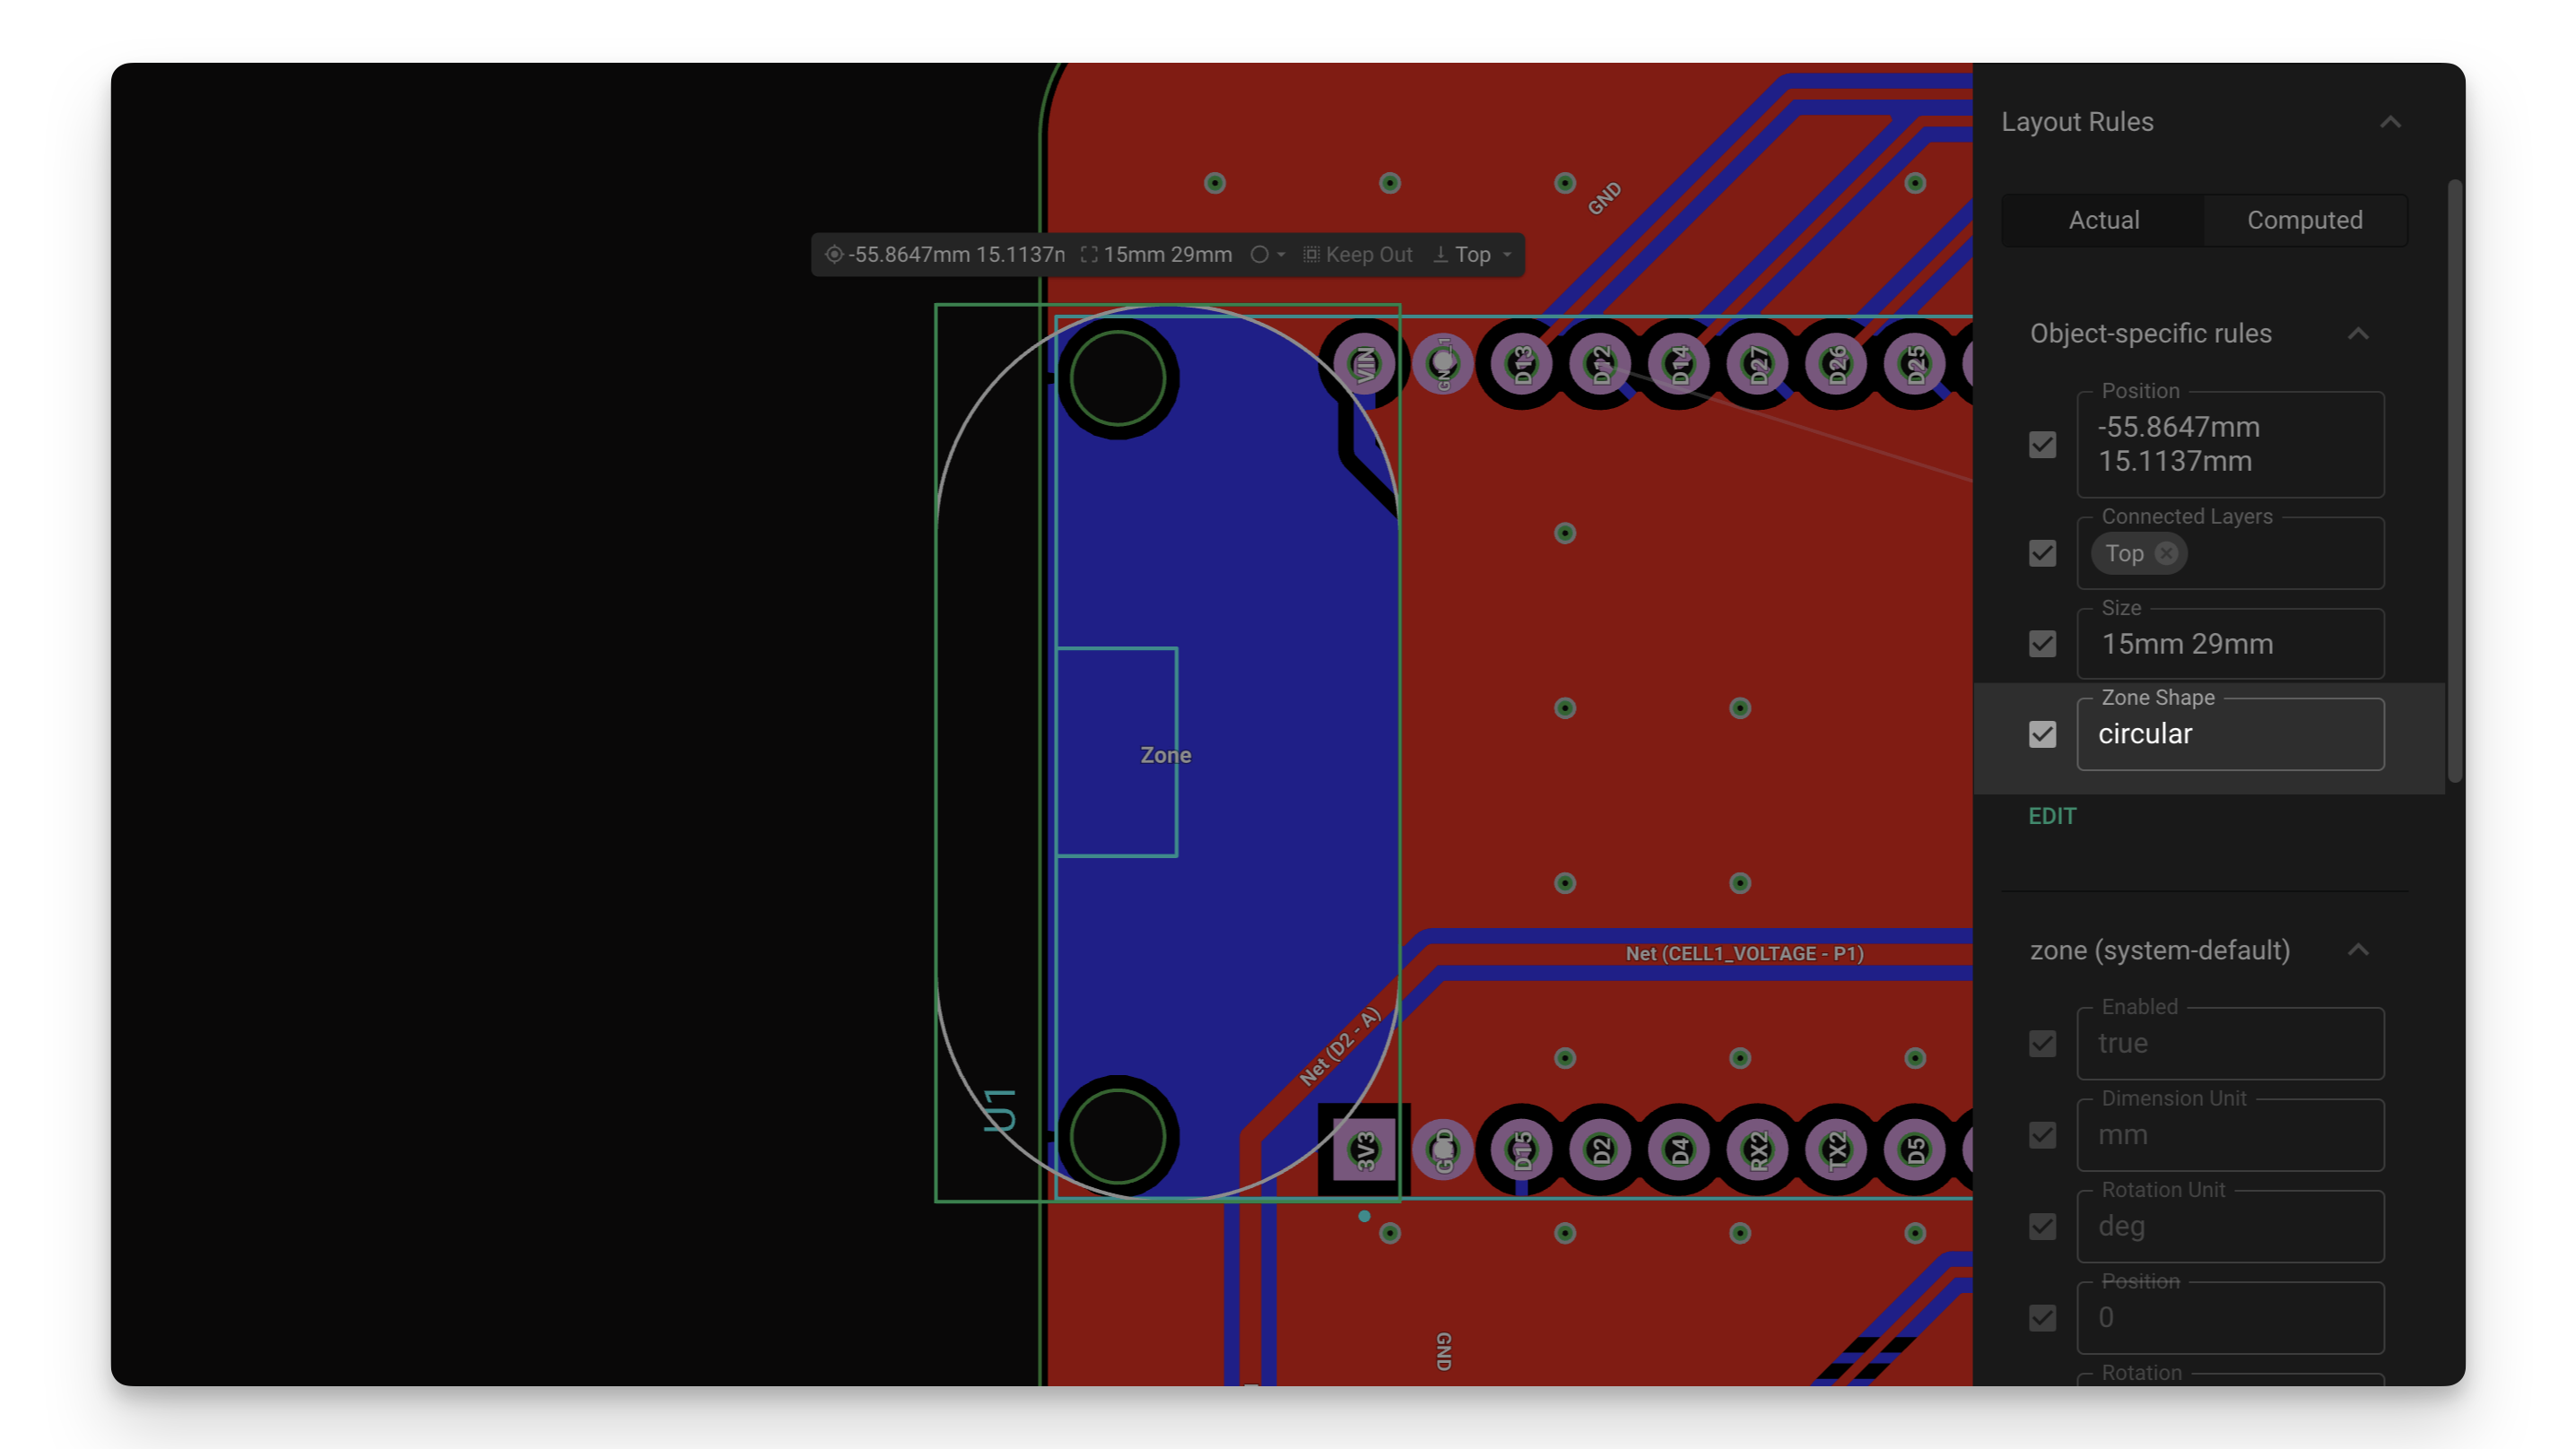
Modifying the Shape
Zones can easily be adjusted to be rectangular or circular by adding a Zone Shape rule.
Select the zone
Navigate to the layout rules on the right and add a "Zone Shape" rule.
Simply type
circularorrectangularin the "Zone Shape" text box.
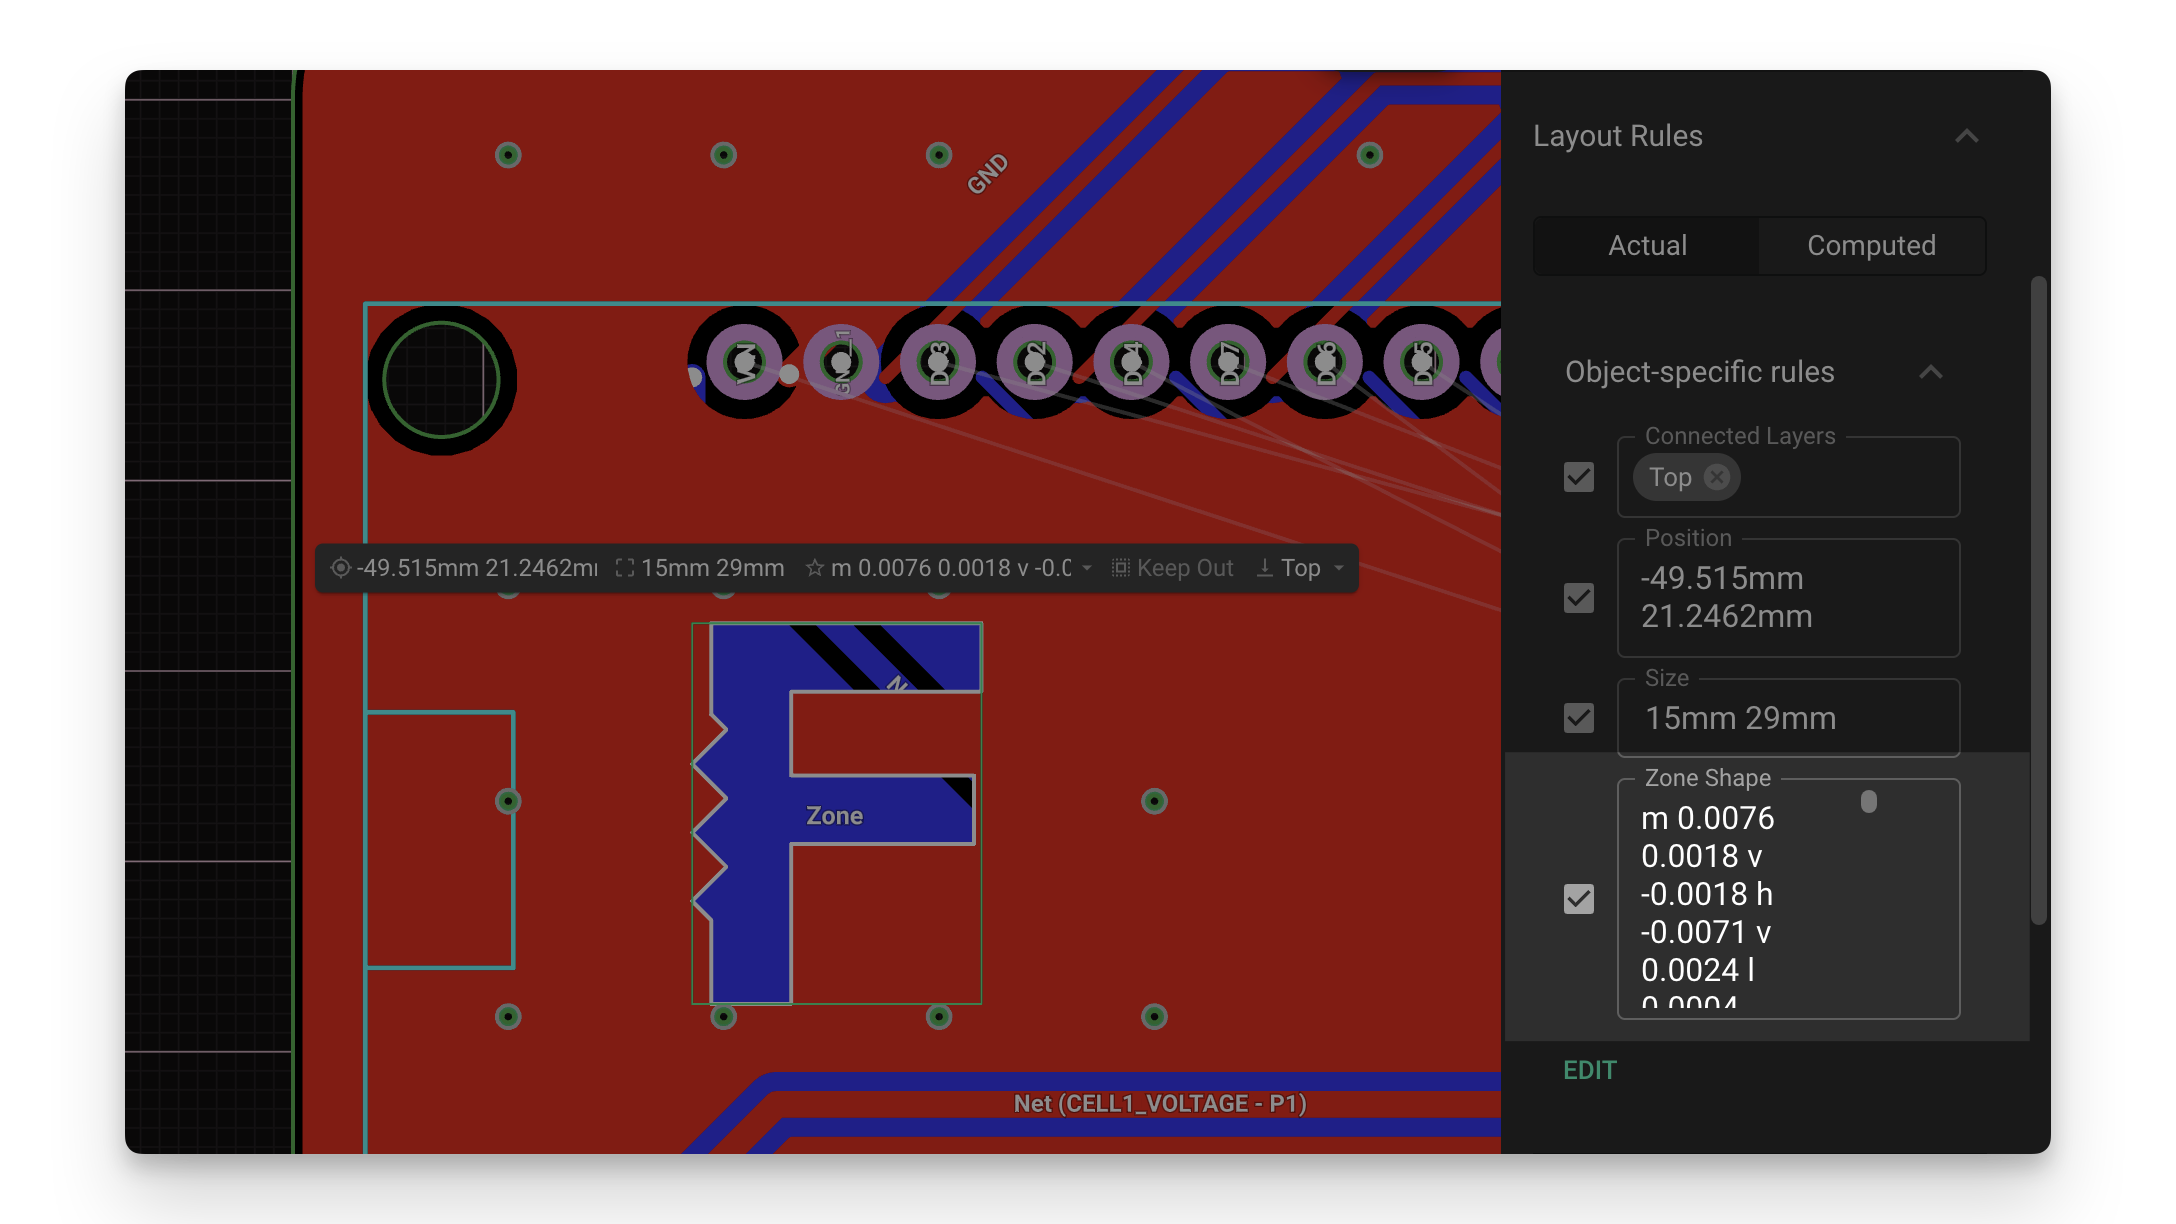
Custom shapes
Zones can be modified to follow any shape. To do so, you'll need an SVG or DXF file. We have a full tutorial on Creating Custom Shapes in Flux if you want to learn more about creating custom shapes.
Selecting Target Layers
By default, zones are configured to apply to every layer in your design. To configure the zone for specific layers:
Select the zone
Navigate to the layout rules on the right and add a "Connected Layers" rule.
Click on the text box and select the layers you want to apply the keep out zone to.