Are you an Upverter user considering Flux? We've got you covered with Flux: a browser-based PCB design software that offers a faster, more efficient, and user-friendly design experience.
We know switching EDA tools is a hassle, especially if you've been using the same tool developing printed circuit boards for a while. Over time, you tend to develop muscle memory for the user interface and keyboard shortcuts, making it difficult to adjust to a new tool with a different layout. That's why this article aims to provide a step-by-step guide for switching from Upverter to Flux, including an overview of the differences and helpful tips to make the transition as smooth as possible.
The good news is that Flux has most of the features you like about Upverter, so you won't feel like you're starting from scratch. By the end of this tutorial, we're confident you'll feel at home with Flux! Electronics engineering has never been easier.
Ready to get started? Create an account first!
Everything you love about Upverter and more
Flux has all the features you are used to in Upverter, with some must-have additions for a modern ECAD tool, like version control, modules, and a built-in simulator. Flux's features make it suitable for STEM educators, students, small teams, professionals, and even larger organizations.
Browser-based integrated workflow
Flux offers a fully integrated workflow within the web browser, from schematic design to PCB layout. By keeping everything within the web browser, you can continue your work on the same devices you are already familiar with, which can ease the transition.

Version control
Flux saves every single change into a version control engine. This guarantees you’ll be able to revert any changes made to the project since its creation.

Library of parts
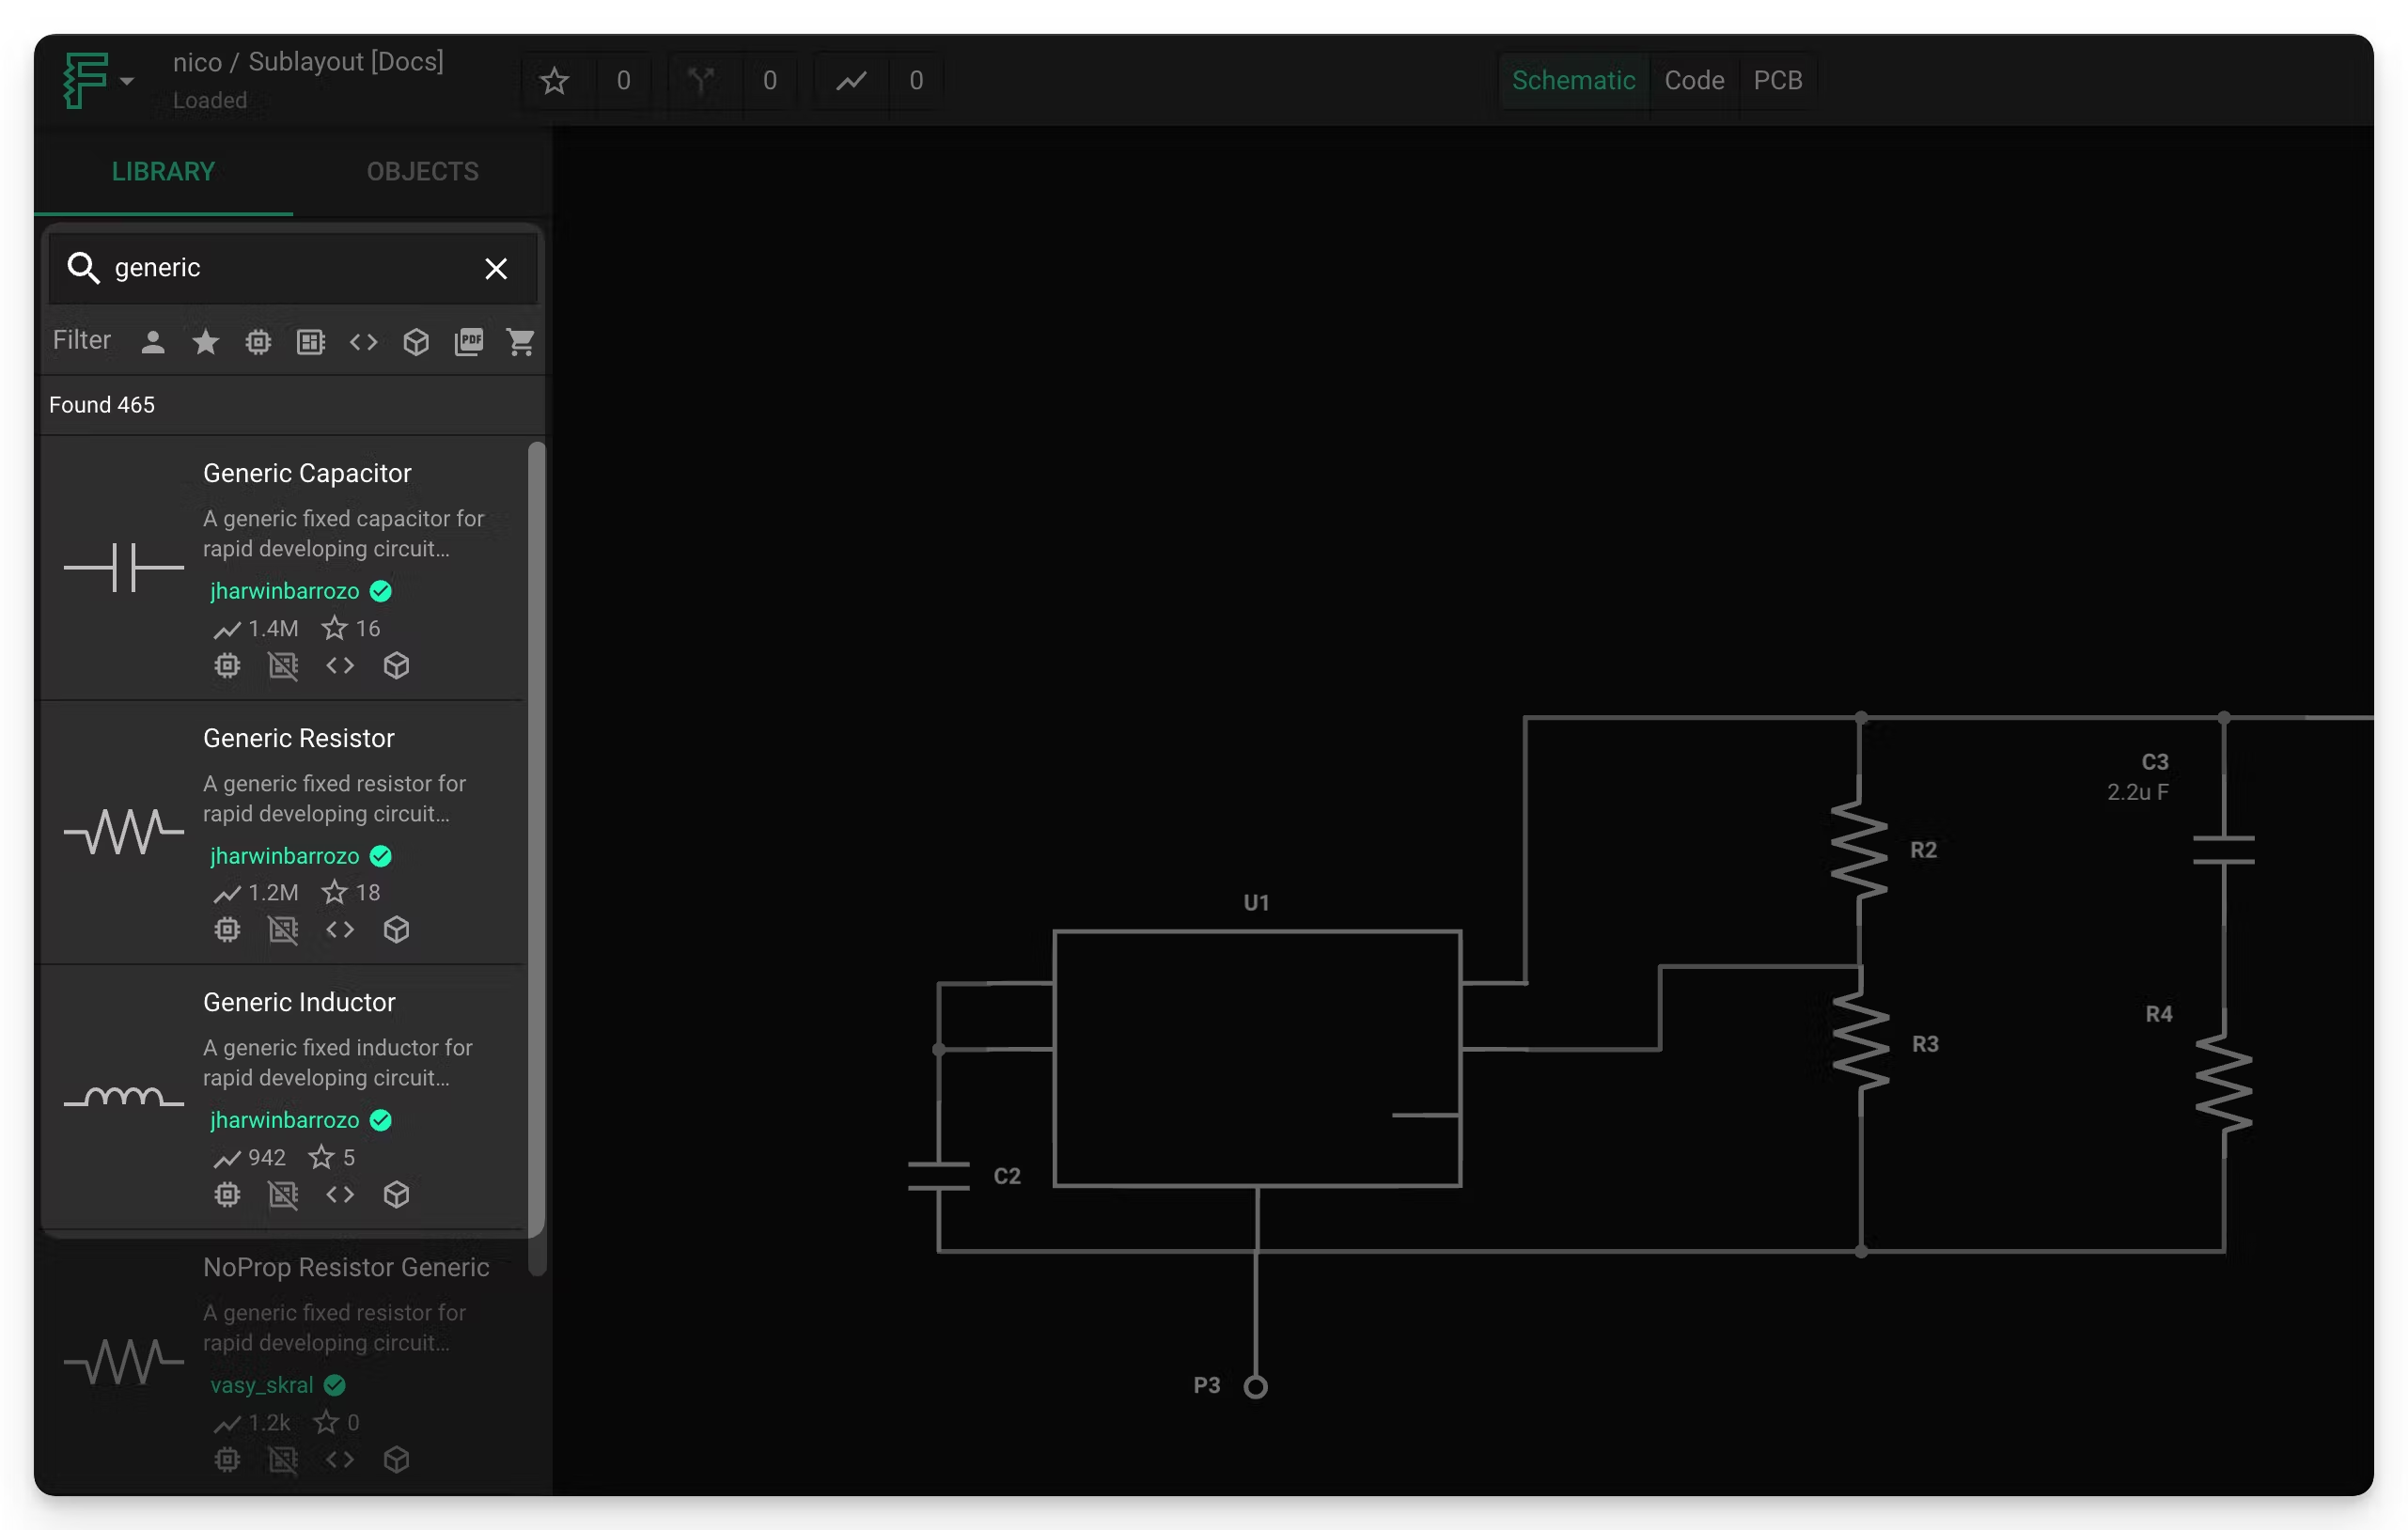
Flux has a couple unique features in its utilization of libraries, which we’ll cover in the next section. Still, both Flux and Upverter tools offer a ready-to-use library that helps reduce time wasted creating new parts. Simply type the part you’re looking for in the search bar, or use keywords to broaden the search. You can also use the filters below the search box to narrow your search.

Generic parts
Generic parts allow you to drop a generic resistor, capacitor, or inductor in your canvas and save the footprint, value, and manufacturer part number (MPN) selection for later. Once you decide which footprint, value, or MPN you need, you can directly modify the properties, and Flux will adjust the corresponding elements.
Modules
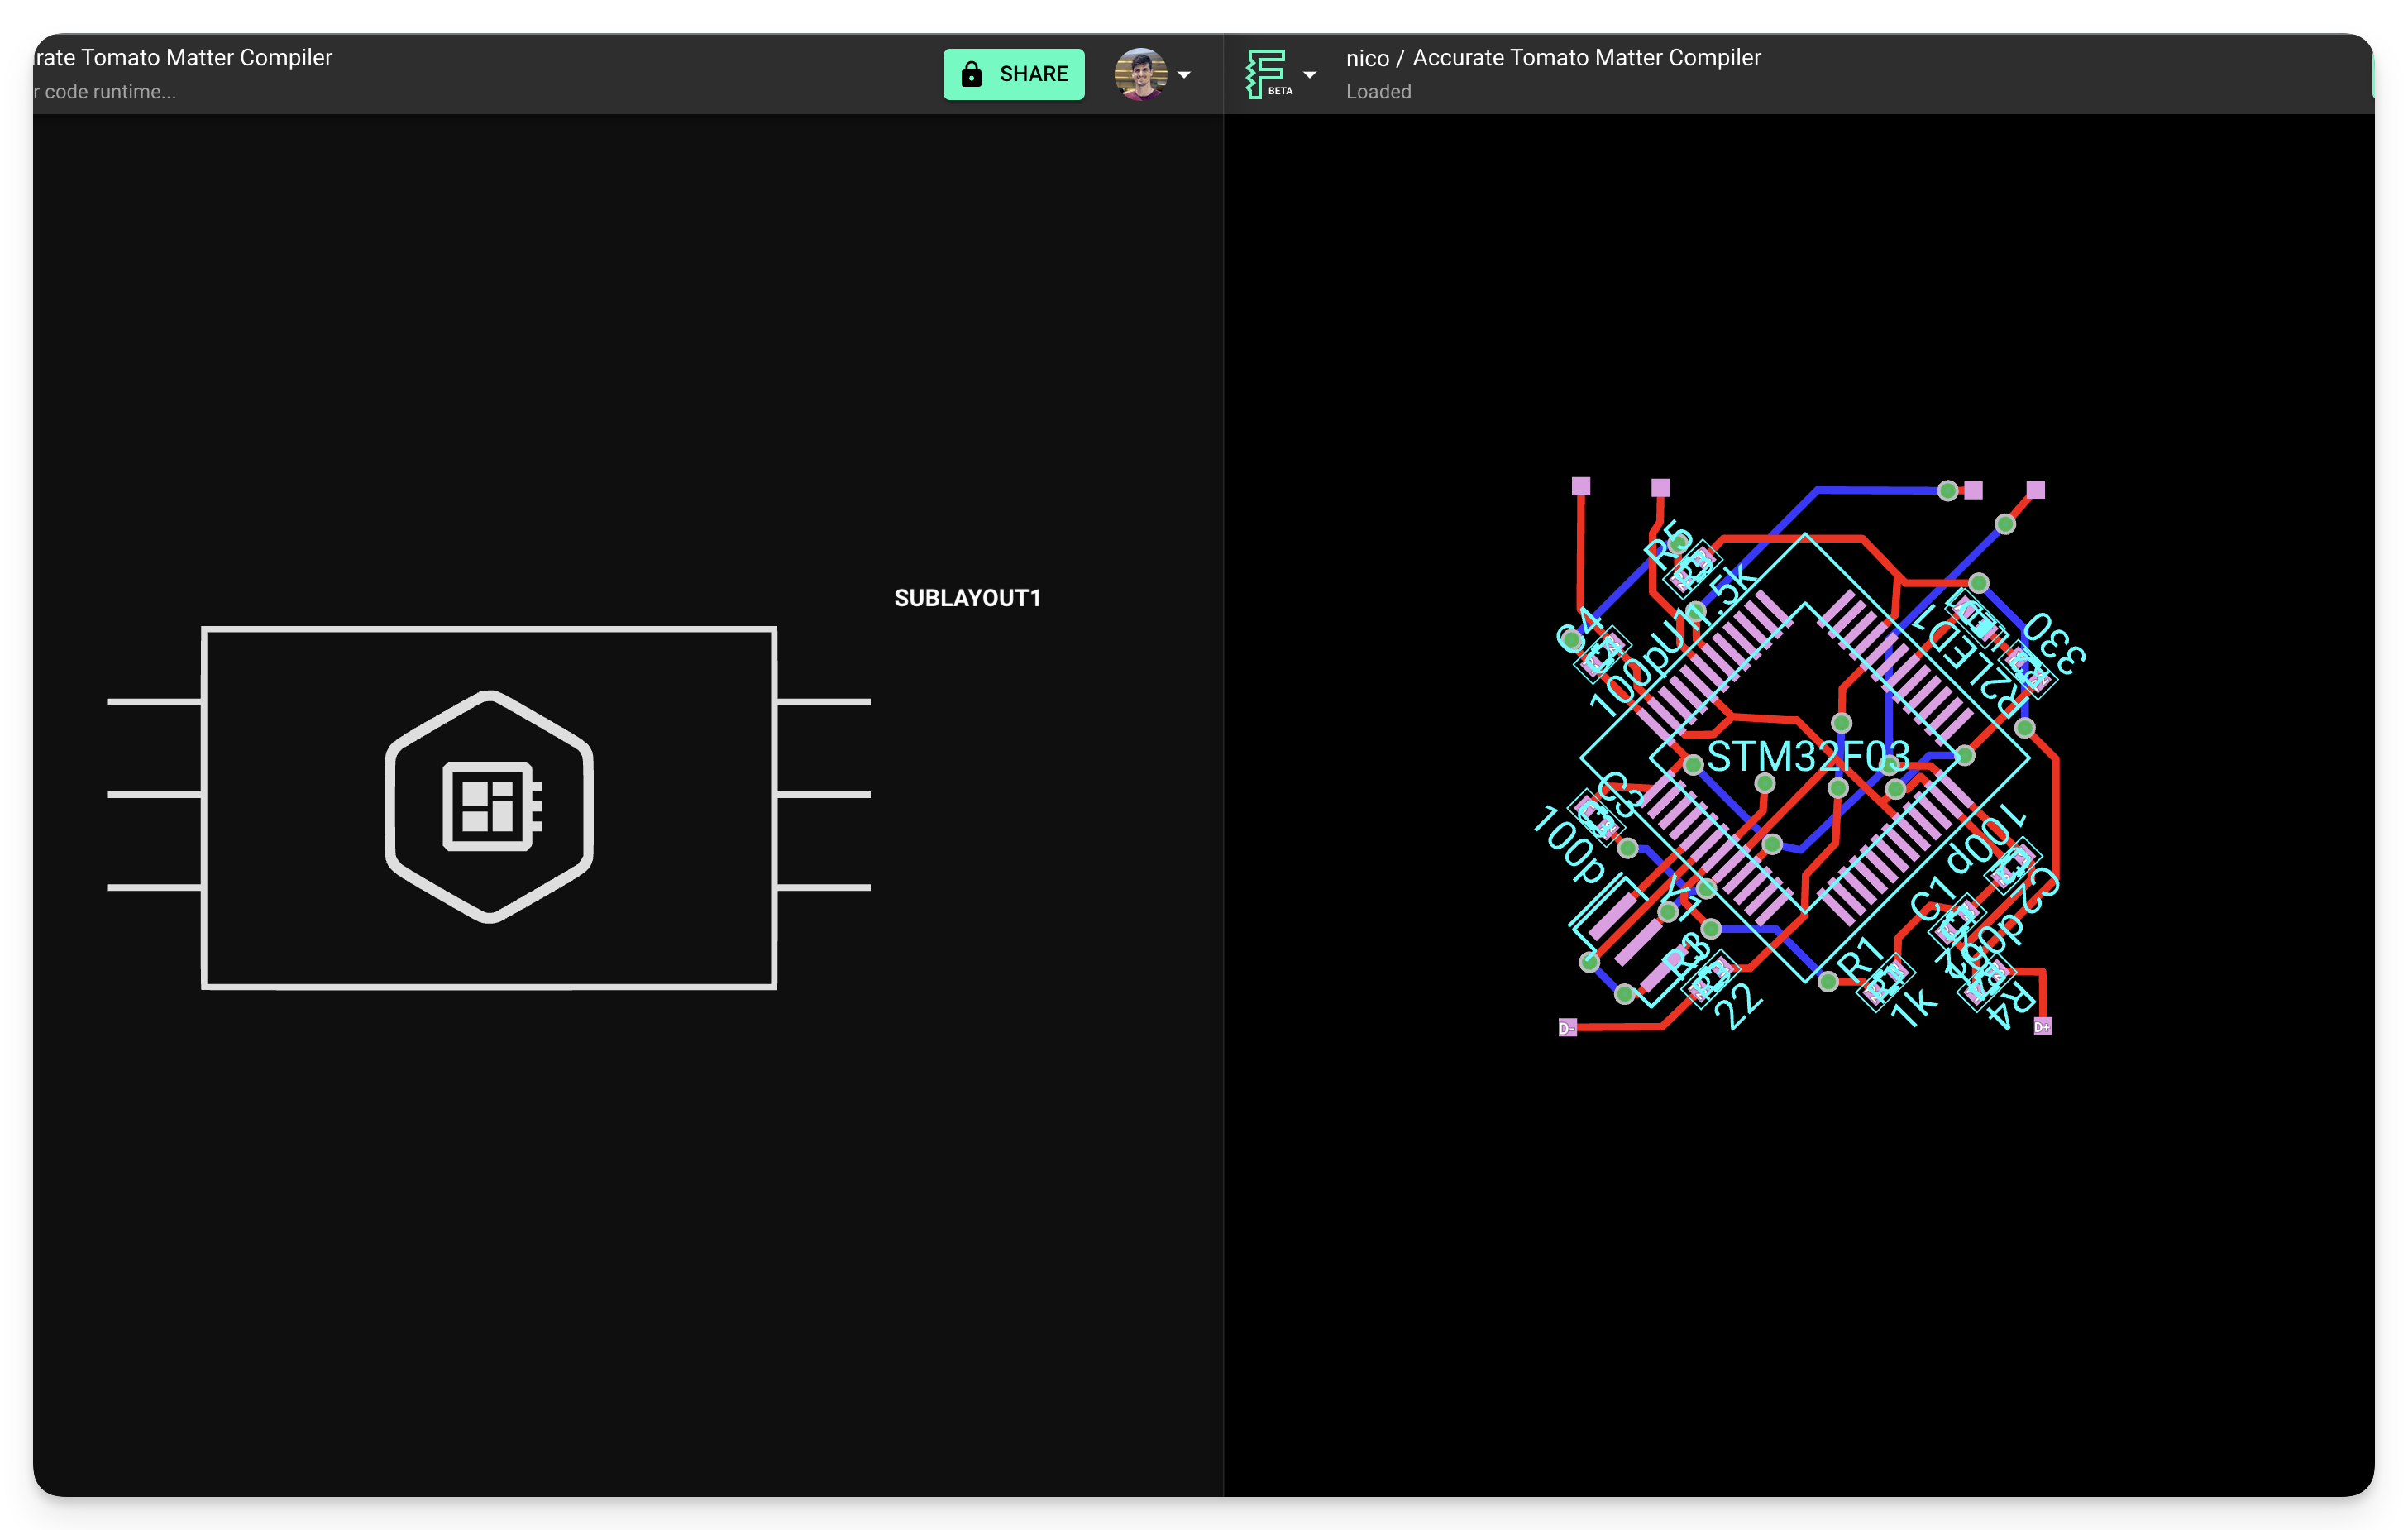
Modules in Flux: Reusing Layout Sections for Efficient PCB Design allow you to quickly reuse circuit block modules (like power converters, oscillators, and anything else you come up with) that you’ve already used in other projects. They function as complete design blocks with included parts, traces, vias, etc., that can be placed into existing projects to reuse previous designs with minimal effort.
Example projects
Electronics projects made by the community are easily accessible in Flux. You can search for available public projects in two ways:
Featured projects page: is a curated list of community projects where you'll find the best templates available.
Tip: you can also access this page from the menu in the top right of the Flux app.
The search bar in your profile: here, you'll find every project publicly available in Flux. It's useful when you clearly know what you're looking for.
Tip: you can type "#template" or "#project" to narrow down the results.
Built-in Simulator
Flux includes a built-in SPICE simulator that you can interact with directly through the AI agent. Use the @simulator command in chat to run transient, AC, DC, and operating point analyses on your circuit.
Switching from Upverter to Flux
Here’s everything you need to know to make the switch from Upverter to Flux quickly.
Unified Library
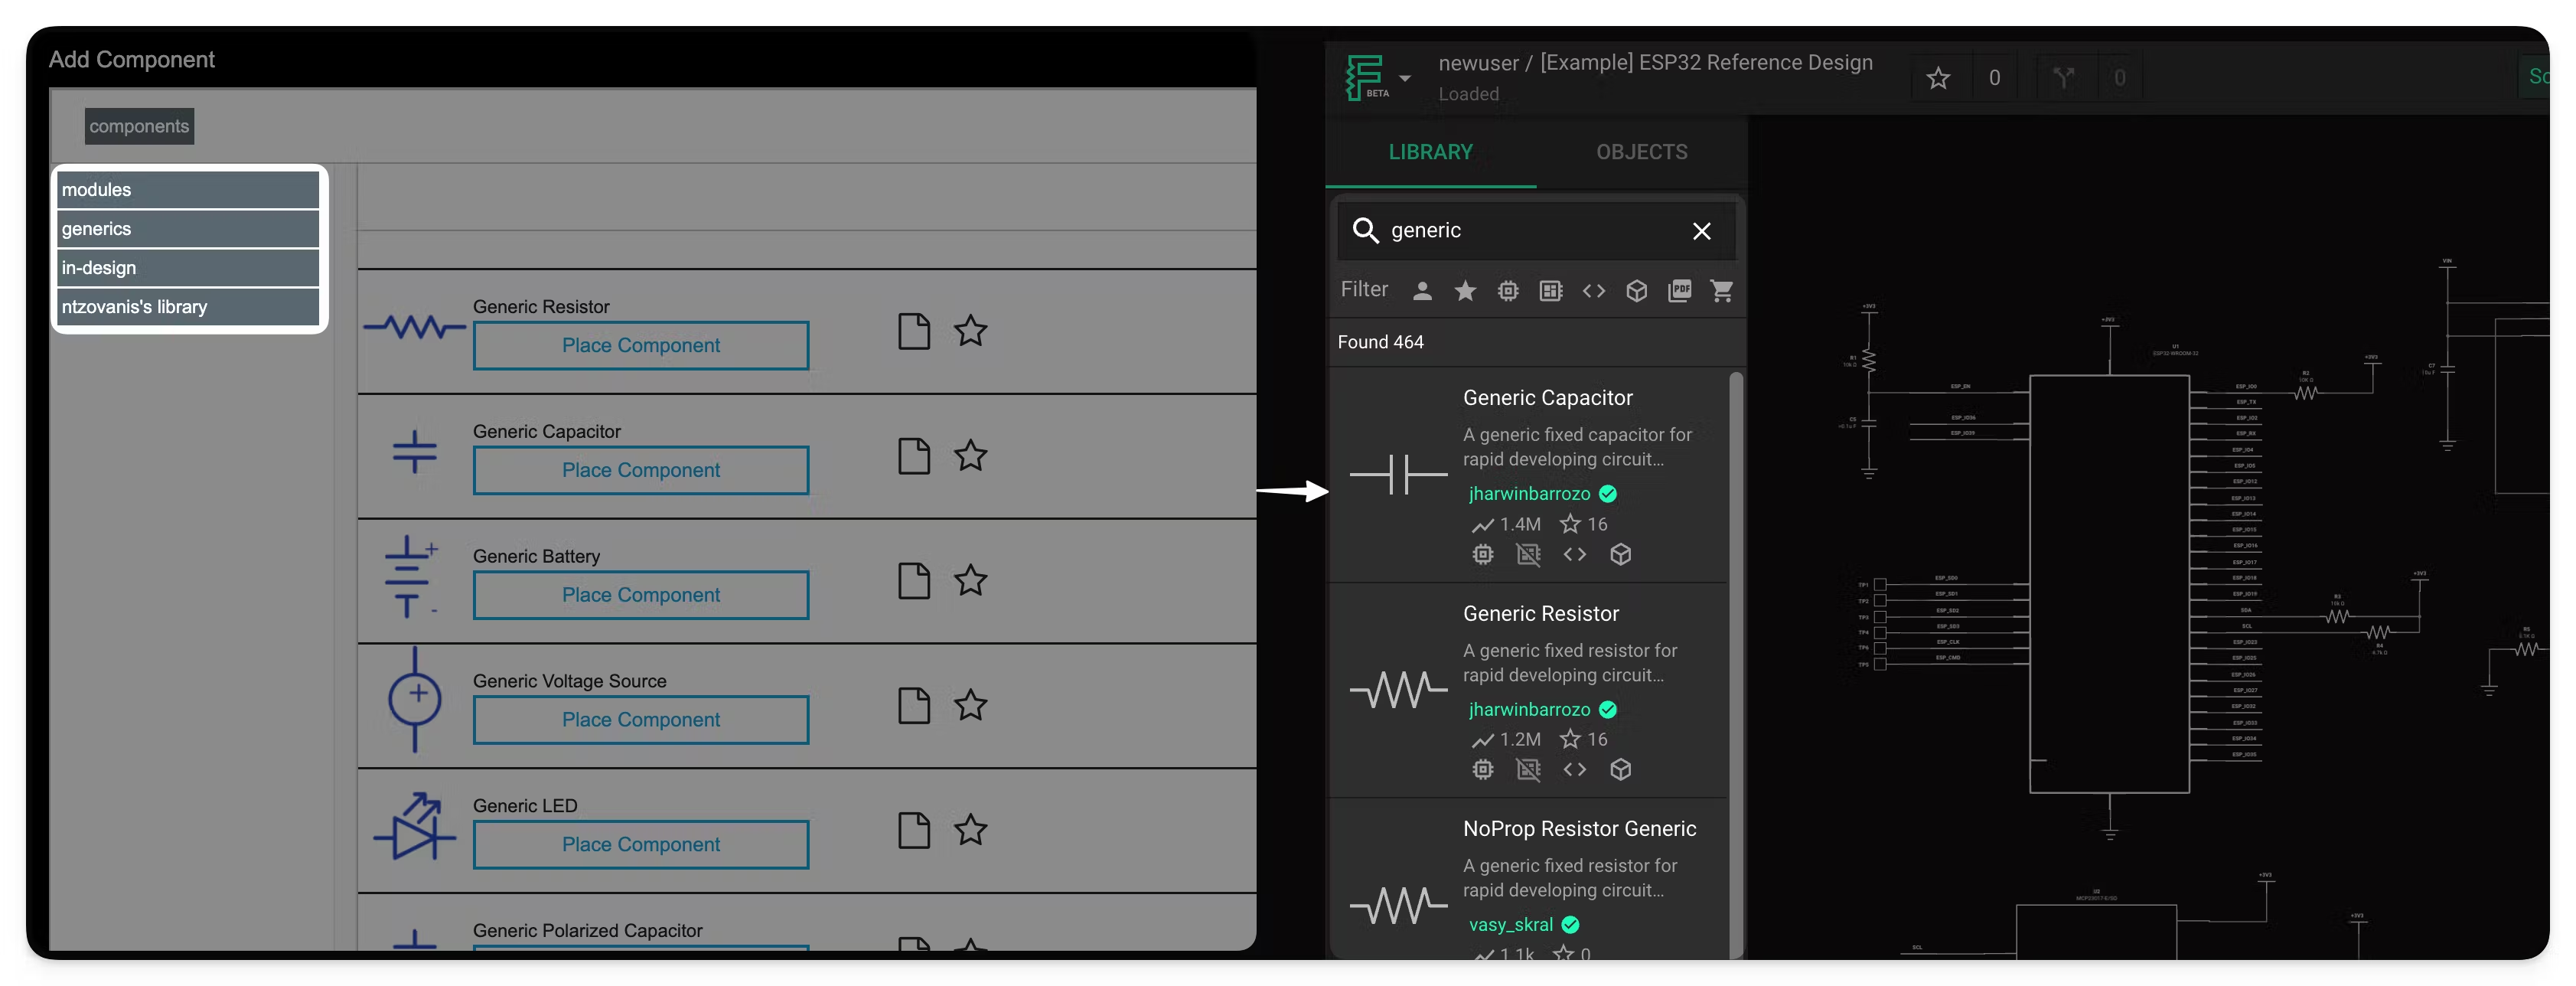
As mentioned in the previous section, Flux and Upverter both have libraries, but Flux’s works a little differently. Flux has a single library where you’ll find every part you have access to. This includes all the parts you or your team has created, whether they’re private or public, in addition to parts made by the community.
This setup makes finding parts easier and allows you to compare your parts with those created by the community to find the best match.
Part creation
The process of creating parts is a key difference between Flux and Upverter. While Upverter has a dedicated UI for creating parts, in Flux, parts, and projects are made in the same workspace. This may seem like a slight difference, but it significantly impacts how parts are created and used in both tools.
Pins and terminals
In Flux, to create a new part, you must first create a new project. Then, you can add as many terminals to the schematic as you need. Each terminal will generate a pad in the PCB editor that you can modify to create the desired footprint.
📖 Naming convention: pins (traditional) → terminals (Flux). Both have a similar function, but pins are called terminals in Flux.
Symbols
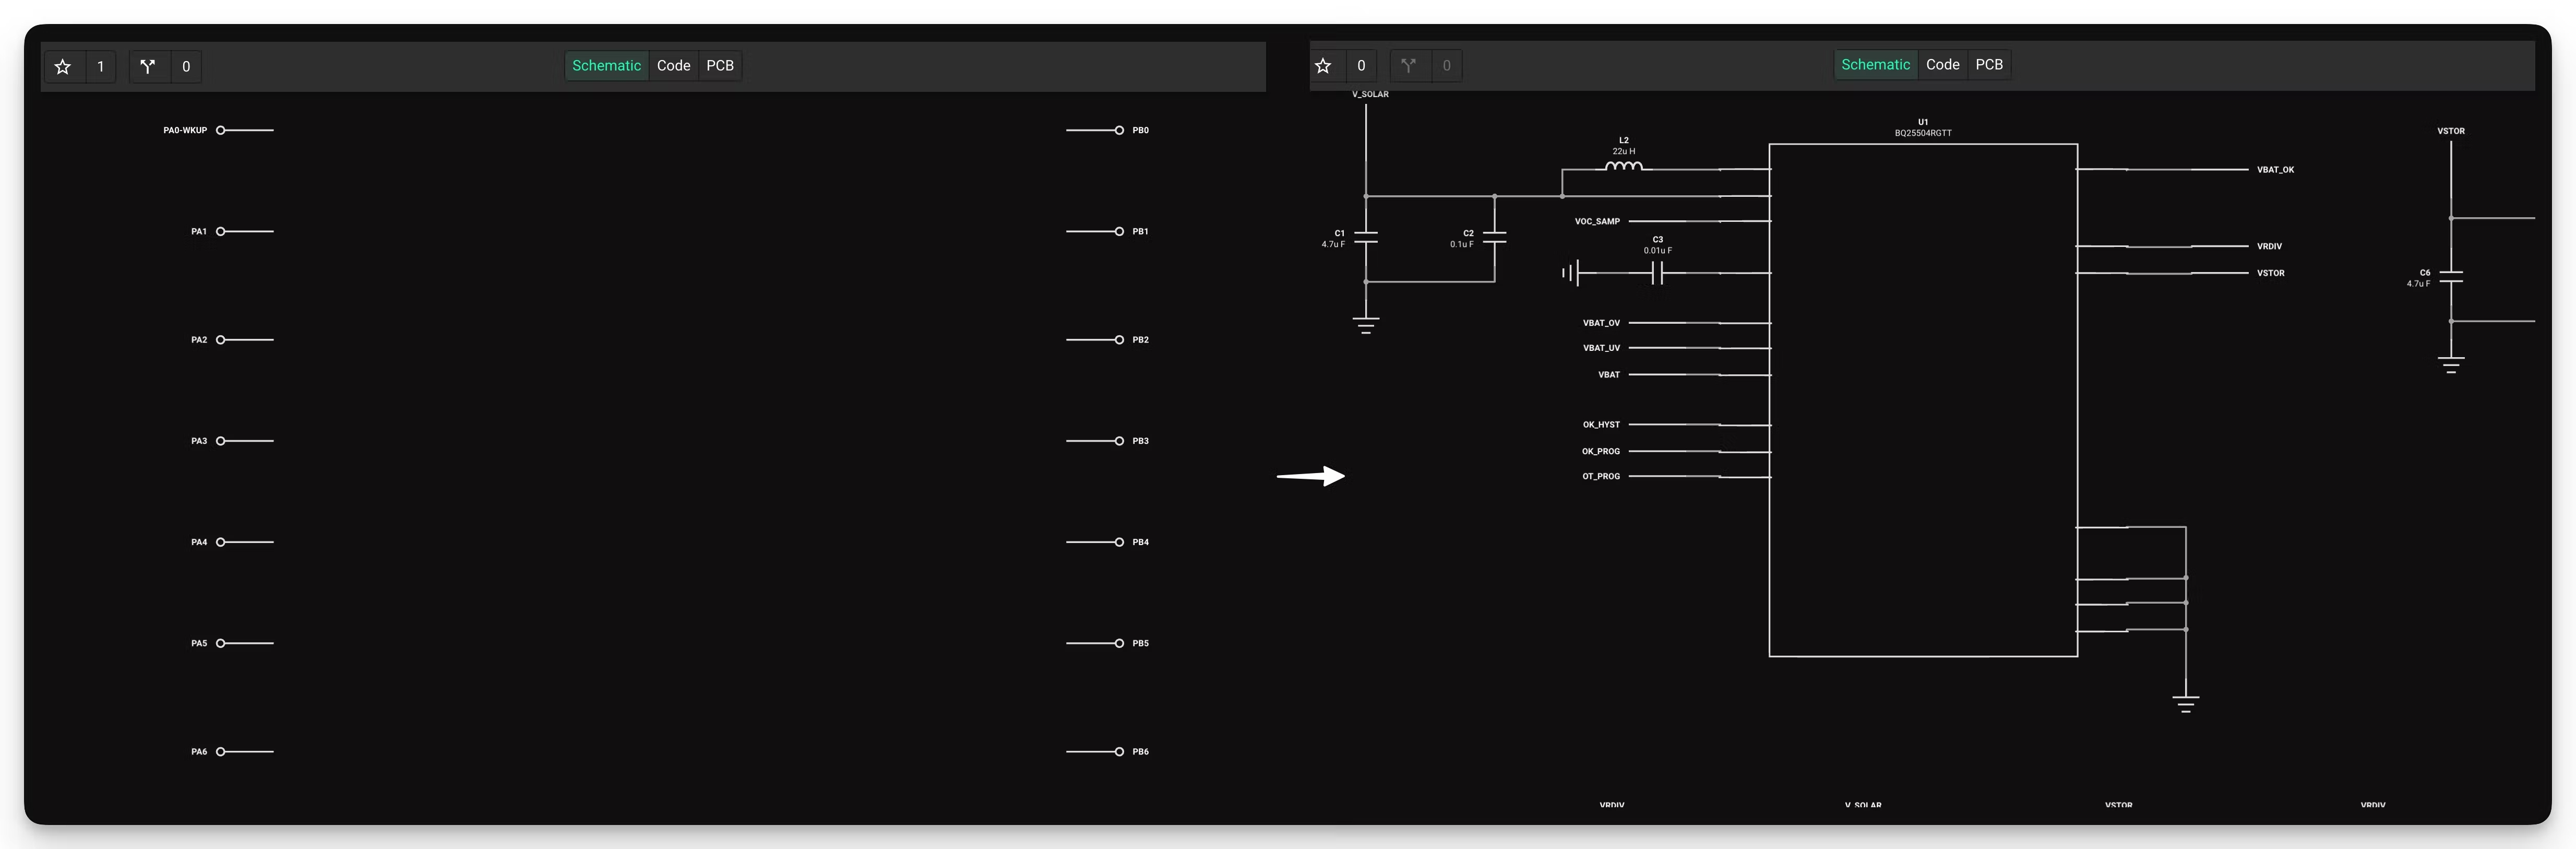
Another difference is that Flux does not display the internal components of a part or module when inserted into the schematic view --just a representational standard rectangle for parts by default. You must click into the part to see the inner working of it. Upverter, on the other hand, shows the symbol, pins and internals.
By default, Flux generates a standard rectangular symbol for each part. To use a custom symbol, you must create one yourself.
Modules
The reason why only the part’s terminals are visible on the schematic is to allow for the creation of modules. As we mentioned in a previous section, a module works almost exactly as a part, but instead of containing a footprint, it includes a complete layout.
If instead of adding only terminals to your design, you add other parts, wires, etc., you can convert your project into a module. To convert your project into a module you need to publish it to the library. Here's more information on how to create a module.
📖 Naming convention: parts and modules are collectively referred to as components. Everything that is not a part or module is called a project.
Publishing to the library
Once your component is ready, it must be published to the library, which is another crucial distinction between Flux and Upverter. Since components in Flux start as projects, publishing is necessary to convert the project into a component and make it accessible in the library.
⭐ Pro tip: every time you update a part, you must publish the changes to the library.
Part creation wrap-up
You should now have a good understanding of the key terms and differences in the part creation process in Flux. If you need any more guidance on creating a new part from scratch, we recommend you follow this tutorial.
⭐ Pro tip: before creating a part from scratch, make sure that the part isn’t available in the library. Flux also supports importing parts from KiCAD.
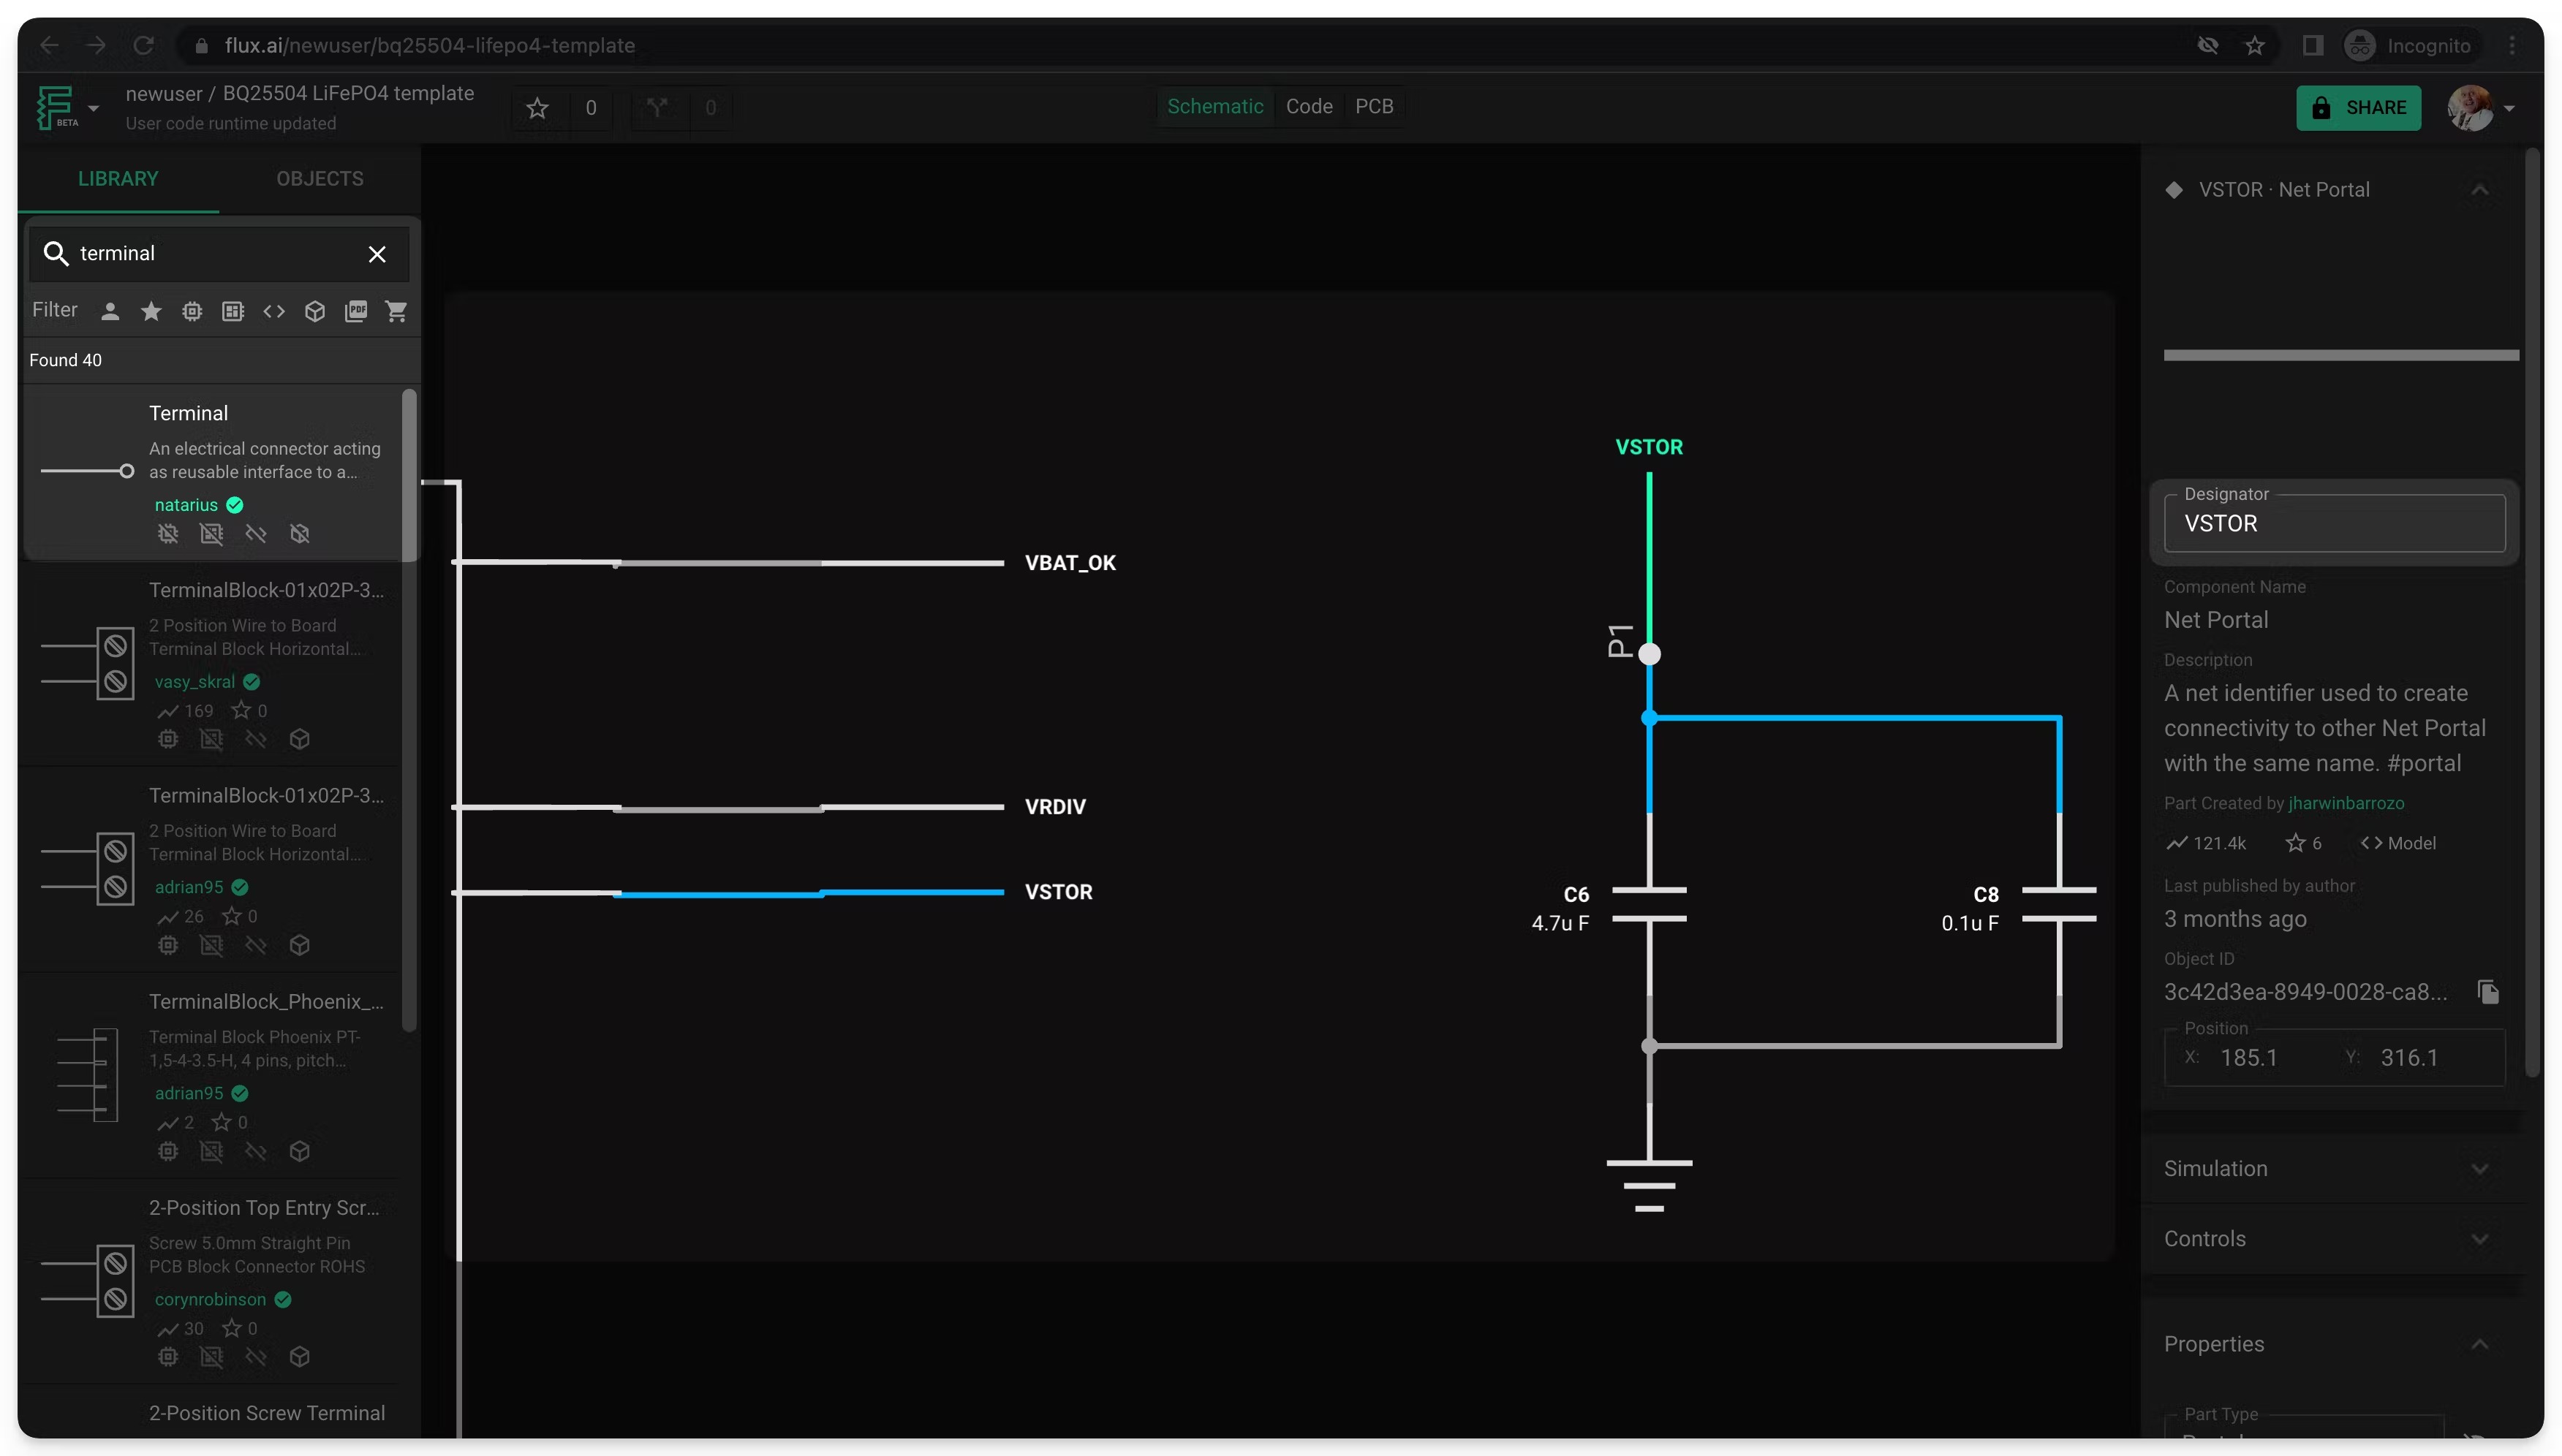
Flux Portals act as Upverter Shared Net Names
In Upverter, connecting two nets without adding a wire is done by giving them the same net name. Flux offers a specific component called a "portal" for this purpose. The process is similar: drag portals from the library, connect one to each net you want to join and assign the same designator to each portal.
⭐ Pro tip: In Flux, when you click on a net, all instances of the net will be highlighted.
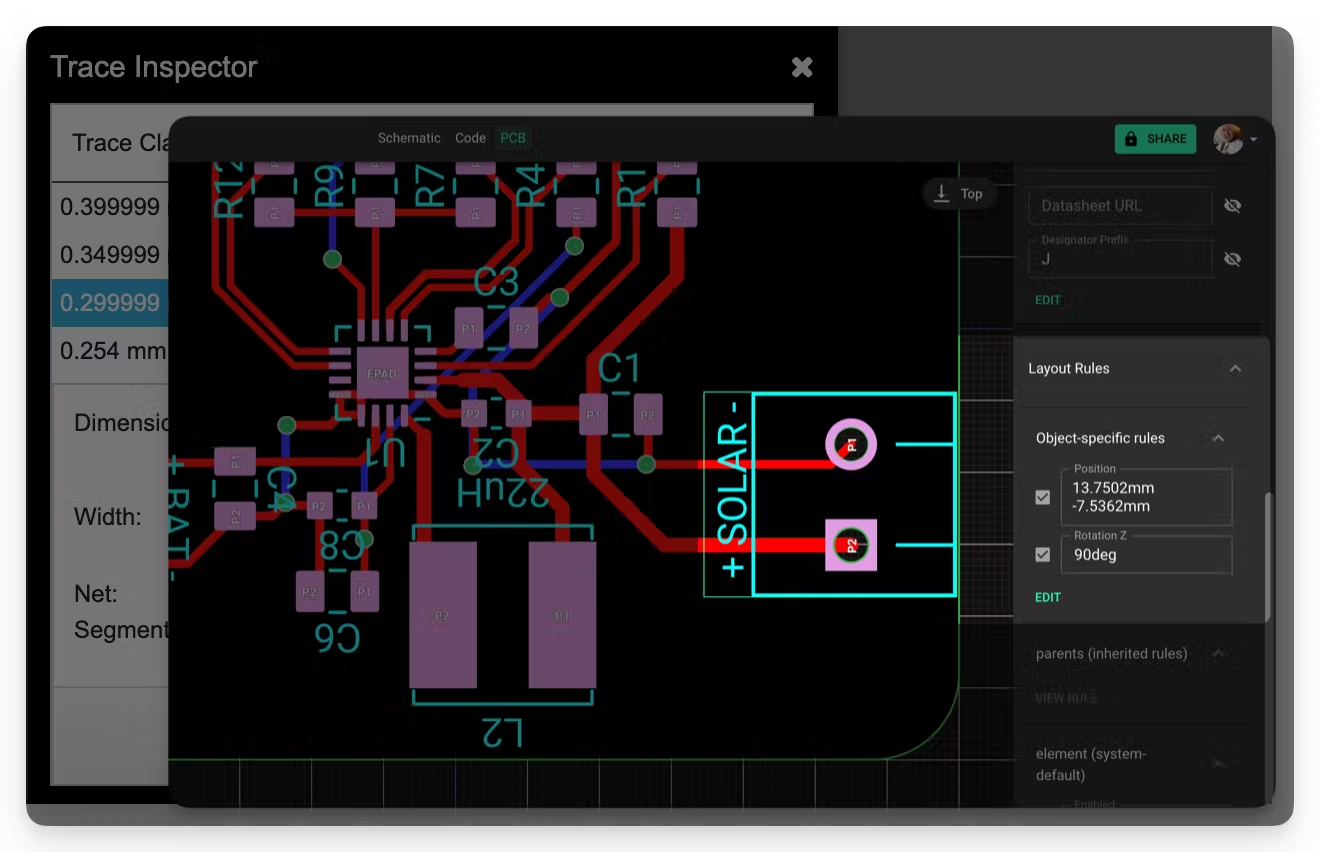
Flux Layout Rules act as Upverter Inspector Panel
Modifying component properties in the PCB editor will feel familiar to Upverter, but the way to access them and naming are different. In Upverter, a popup menu will appear when double-clicking on an element. In Flux, the layout rules menu will appear on the right when selecting an element. You can click the “Edit” button to add additional rules to modify.
We won't go too much into layout rules in this tutorial, but any characteristic of a PCB element can be modified using rules. This includes component position, rotation, trace width, etc.
⭐ Pro tip: with selector-based rules, you can generate rules that modify many elements at once - for example, changing the with of several traces in a single net.
Polygon pours
Flux supports both automatic full-board copper fills and custom-shaped copper areas using polygons. Full-board ground fills are created automatically when a ground symbol is placed in the schematic, and can be re-assigned to other nets to create power planes. For custom copper shapes — such as localized ground planes, split power planes, or RF structures — you can use polygons to define precise copper areas tied to specific nets.
To learn more about copper fills, how to enable or disable them, configure via stitching, or create custom copper shapes, refer to the copper fills documentation and the polygons reference.
Board outline
In Flux, the board outline is not just a layer in the stack like in Upverter; it’s a separate object in the object tree. You can select the board outline and edit its characteristics via rules as you do on any other object. To select the board outline, click on the “Layout” element in the canvas or find the “Layout” object in the object tree.
⭐ Pro tip: simple rectangular and circular shapes can be accomplished with the “Layout shape” rule. For custom shapes, follow this tutorial.
Navigation
Getting used to our navigation controls should be quick. To pan, utilize the middle click of your mouse, and for zooming, use the mouse wheel.
⭐ Pro tip: Flux also allows you to configure your input device depending if you use a mouse or laptop trackpad.
Shortcuts
Shortcuts are an essential part of PCB design. To access the full list of shortcuts, open the Flux menu in the top left corner and select “Keyboard shortcuts”. Here’s a list of the ones we think you’ll find most useful:
Zoom to Fit All or Selection 0
Rotate Right ]
Rotate Left [
Flip wire elbow direction /
Finish drawing a wire Double click the canvas or Click a terminal or Esc
Wrap up
We have covered all the essential concepts to help you transition from Upverter to Flux. In conclusion, switching from Upverter to Flux should be a straightforward process. With Flux's intuitive user interface, community library, collaboration mechanisms, and built-in simulator, you'll be able to design you electronics and PCBs faster and more efficiently.
Getting help
Before wrapping up, we would like to share some additional resources in case you need help:
Slack community: Ask questions directly to the Flux team and meet other engineers, designers, and hardware enthusiasts using Flux.
Found a bug? If you find any unexpected behavior while using Flux, please report it in our issue-tracking tool.
YouTube: Explore our library of video tutorials, crash courses, and recorded events. There are also some independent content creators with amazing videos on how to use Flux.
Live support: To contact us, go to our home page, scroll down to the bottom, and click on "Contact us".