Flux is your AI-powered design assistant, helping you find components, analyze datasheets, and even modify your design in real time. This guide will get you started with Flux, manage sessions, and understand key tools and UI elements.
Overview
Flux is an AI-powered assistant that speeds-up tasks, provides real-time insights, and modifies your PCB design directly. It integrates into your workflow, helping you find components, analyze datasheets, perform calculations, and make design changes more efficiently.
Key Features:
Context-Aware AI – Understands your project, components, and datasheets for more relevant responses.
Action-Driven Tools – Can modify designs, insert parts, and update component properties.
Integrated Calculations – Extracts equations from datasheets to size components accurately.
Prompt Suggestions – Guides you through the design process with recommended next steps.
This guide covers how to access and use Flux, manage sessions, and leverage its tools for more efficient PCB design.
Getting Started
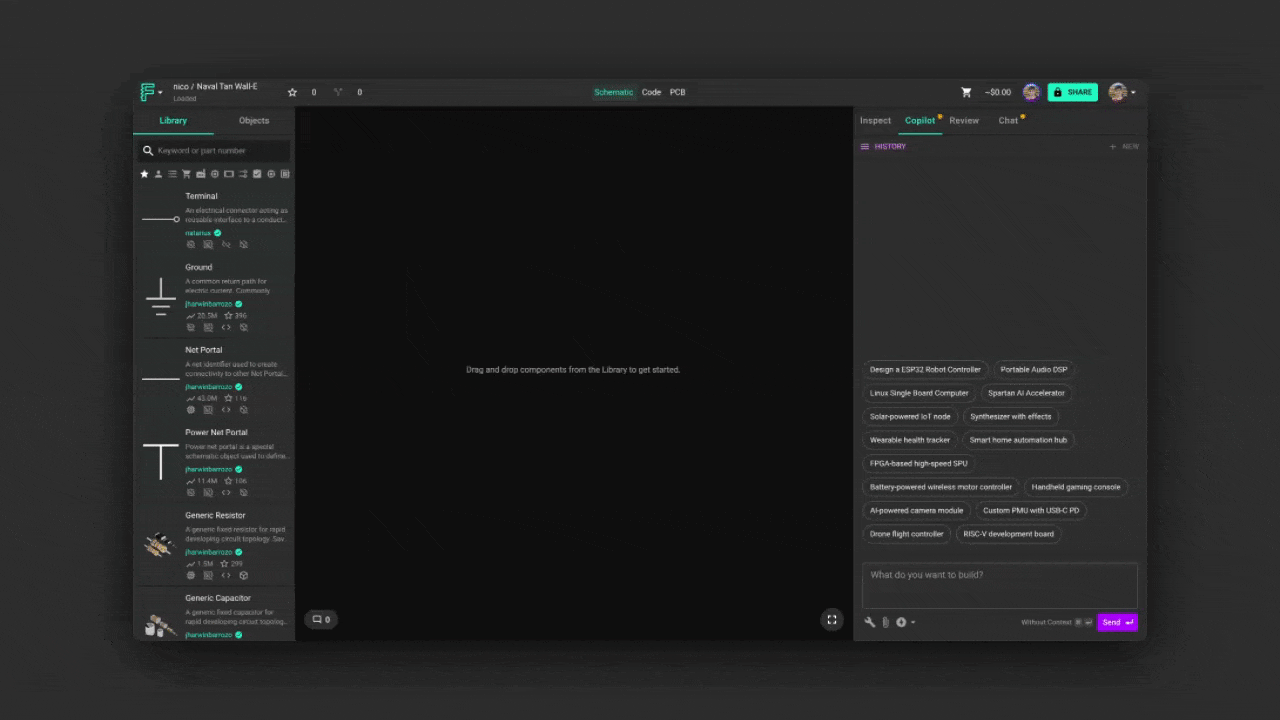
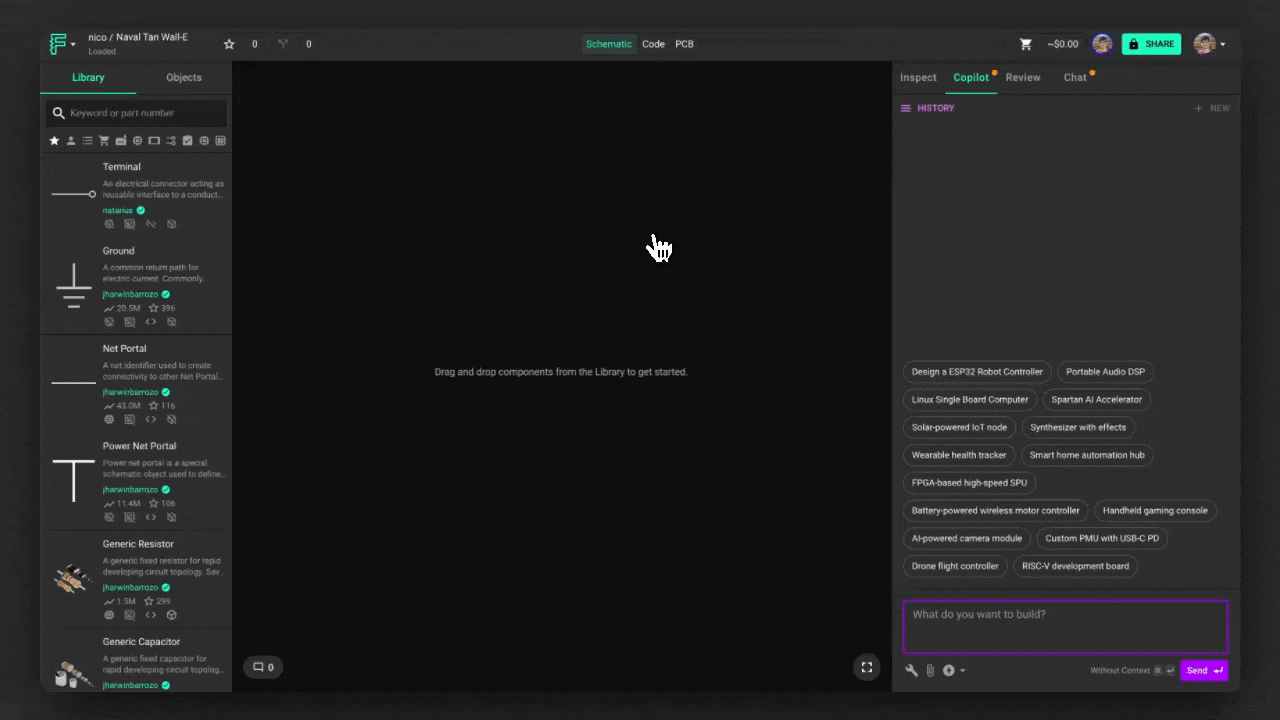
The Flux Chat tab is your main interface for interacting with Flux. To open it, click the Flux icon in the Flux Editor interface. When you open the Flux Chat tab, you'll see a set of pre-loaded prompts designed to help you explore Flux's capabilities. If you prefer to start from scratch, click the "+" button to begin a freeform conversation.
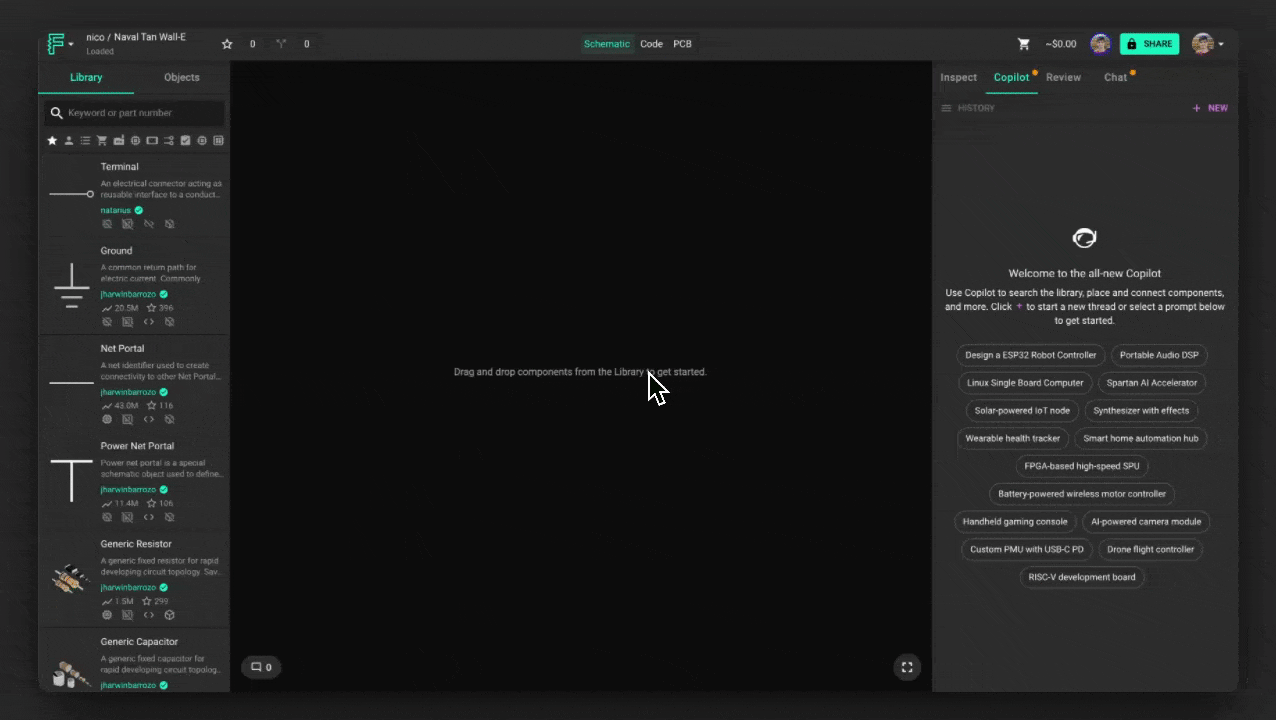
When the chat opens, you'll see a set of pre-loaded prompts to help you get started. Select one to begin, or click the "+" button to start a freeform conversation. Once you enter a prompt, Flux will generate responses in real time, streaming text as it processes your request.
Managing Sessions & Chat History
Flux maintains context within an active session, allowing you to refine responses and build on previous interactions.
To start a new session, click the "+" button to reset Flux's memory and begin a fresh conversation. If you want to continue a previous session, simply scroll through the chat history at the left of the "+" button, or reopen an older chat.
Using Flux
Flux provides several ways to refine its responses and guide how it interacts with your project. These menus allow you to choose AI models, upload reference files, and specify how Flux should process your requests.
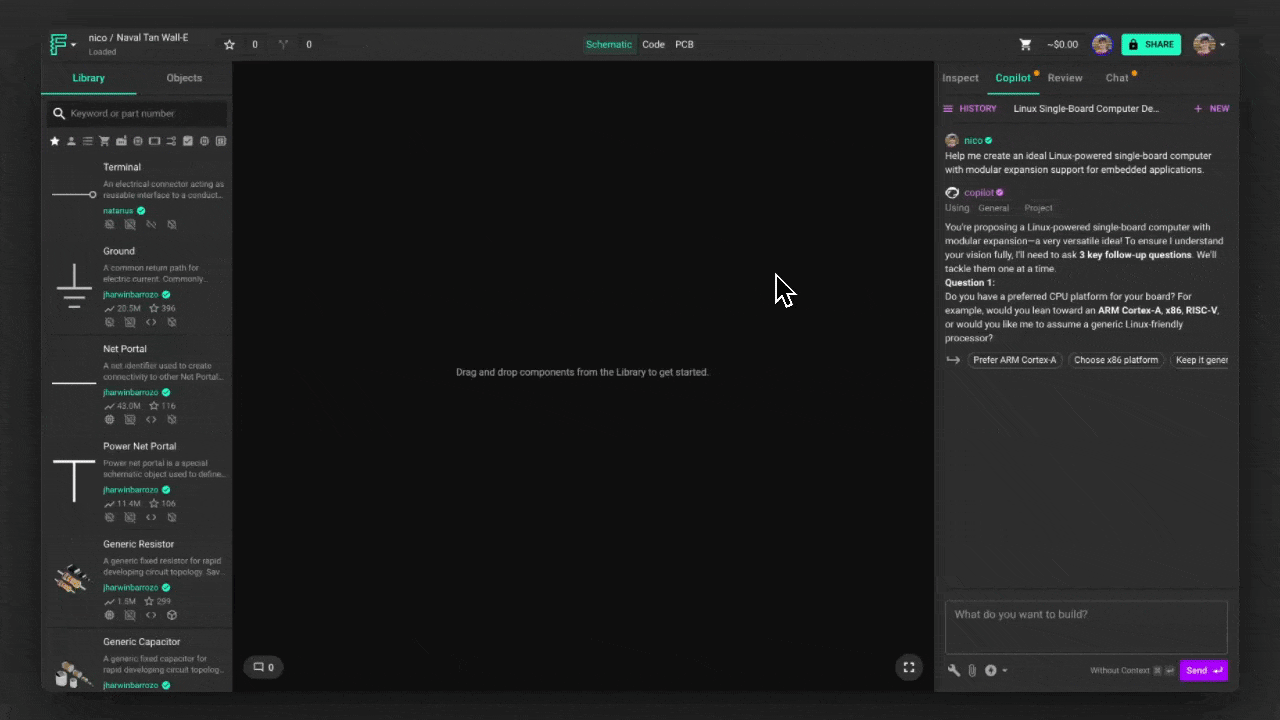
Flux Execution Plan
Flux creates a step-by-step plan before making changes — so you’re always in control.
Flux outlines all proposed modifications before executing them in the editor. This gives you complete visibility into what’s about to happen and the chance to review, adjust, or reject any part of the plan.
How it works
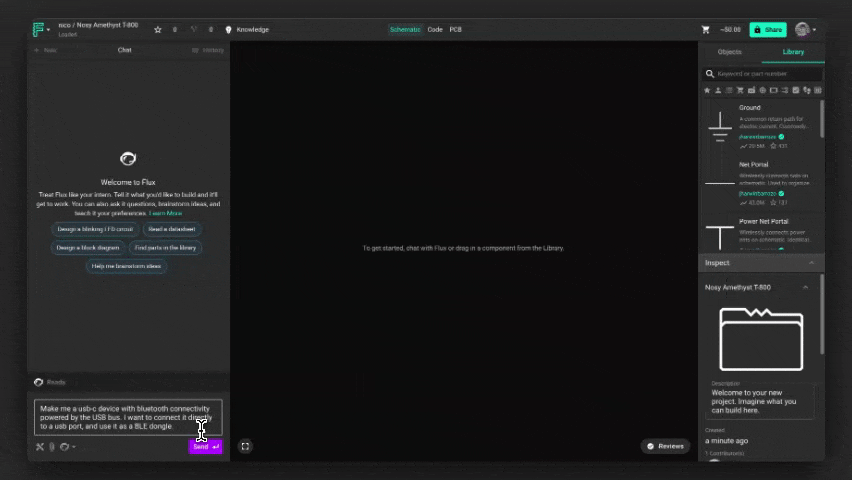
Initiate a task Start by asking Flux to make a change — like
Make me a usb-c device with bluetooth connectivity powered by the USB bus. I want to connect it directly to a usb port, and use it as a BLE dongle.Flux responds with a plan Before applying any changes, Flux will generate a plan. This plan includes all the design actions Flux intends to take.
Review the plan Read through the proposed steps. Each one is explained clearly and linked to the part of the design it affects. You can expand steps for more details or collapse them to scan quickly.
Edit or reject parts of the plan Use the chat to suggest changes to the plan, or provide additional context. You can also reject the whole plan if it’s off track.
Approve to execute Once you’re happy with the plan, hit Start. Flux will carry out the changes in the Flux Editor exactly as described — no surprises.
Tool Context Menu
The Tool Context Menu lets you guide Flux's responses by specifying the type of information it should reference or generate. While Flux automatically selects the best tool for your request, you can manually control it using the @ symbol in your query:
@file – Access attached datasheets and project files. Learn more.
@library – Search the Flux Editor component library for part selection. Learn more.
@calculator – Extract equations from datasheets for calculations. Learn more.
@code – Generate Python scripts and charts. Learn more.
@help – Search Flux Editor documentation for guidance. Learn more.
Using the right tool ensures that Flux provides more precise and relevant responses.
Referencing Specific Parts
You can directly reference specific components in your design by using @ followed by the part's designator (e.g., @U1). This tells Flux to pull all available information about that component, including datasheet details, pin configurations, and electrical characteristics.
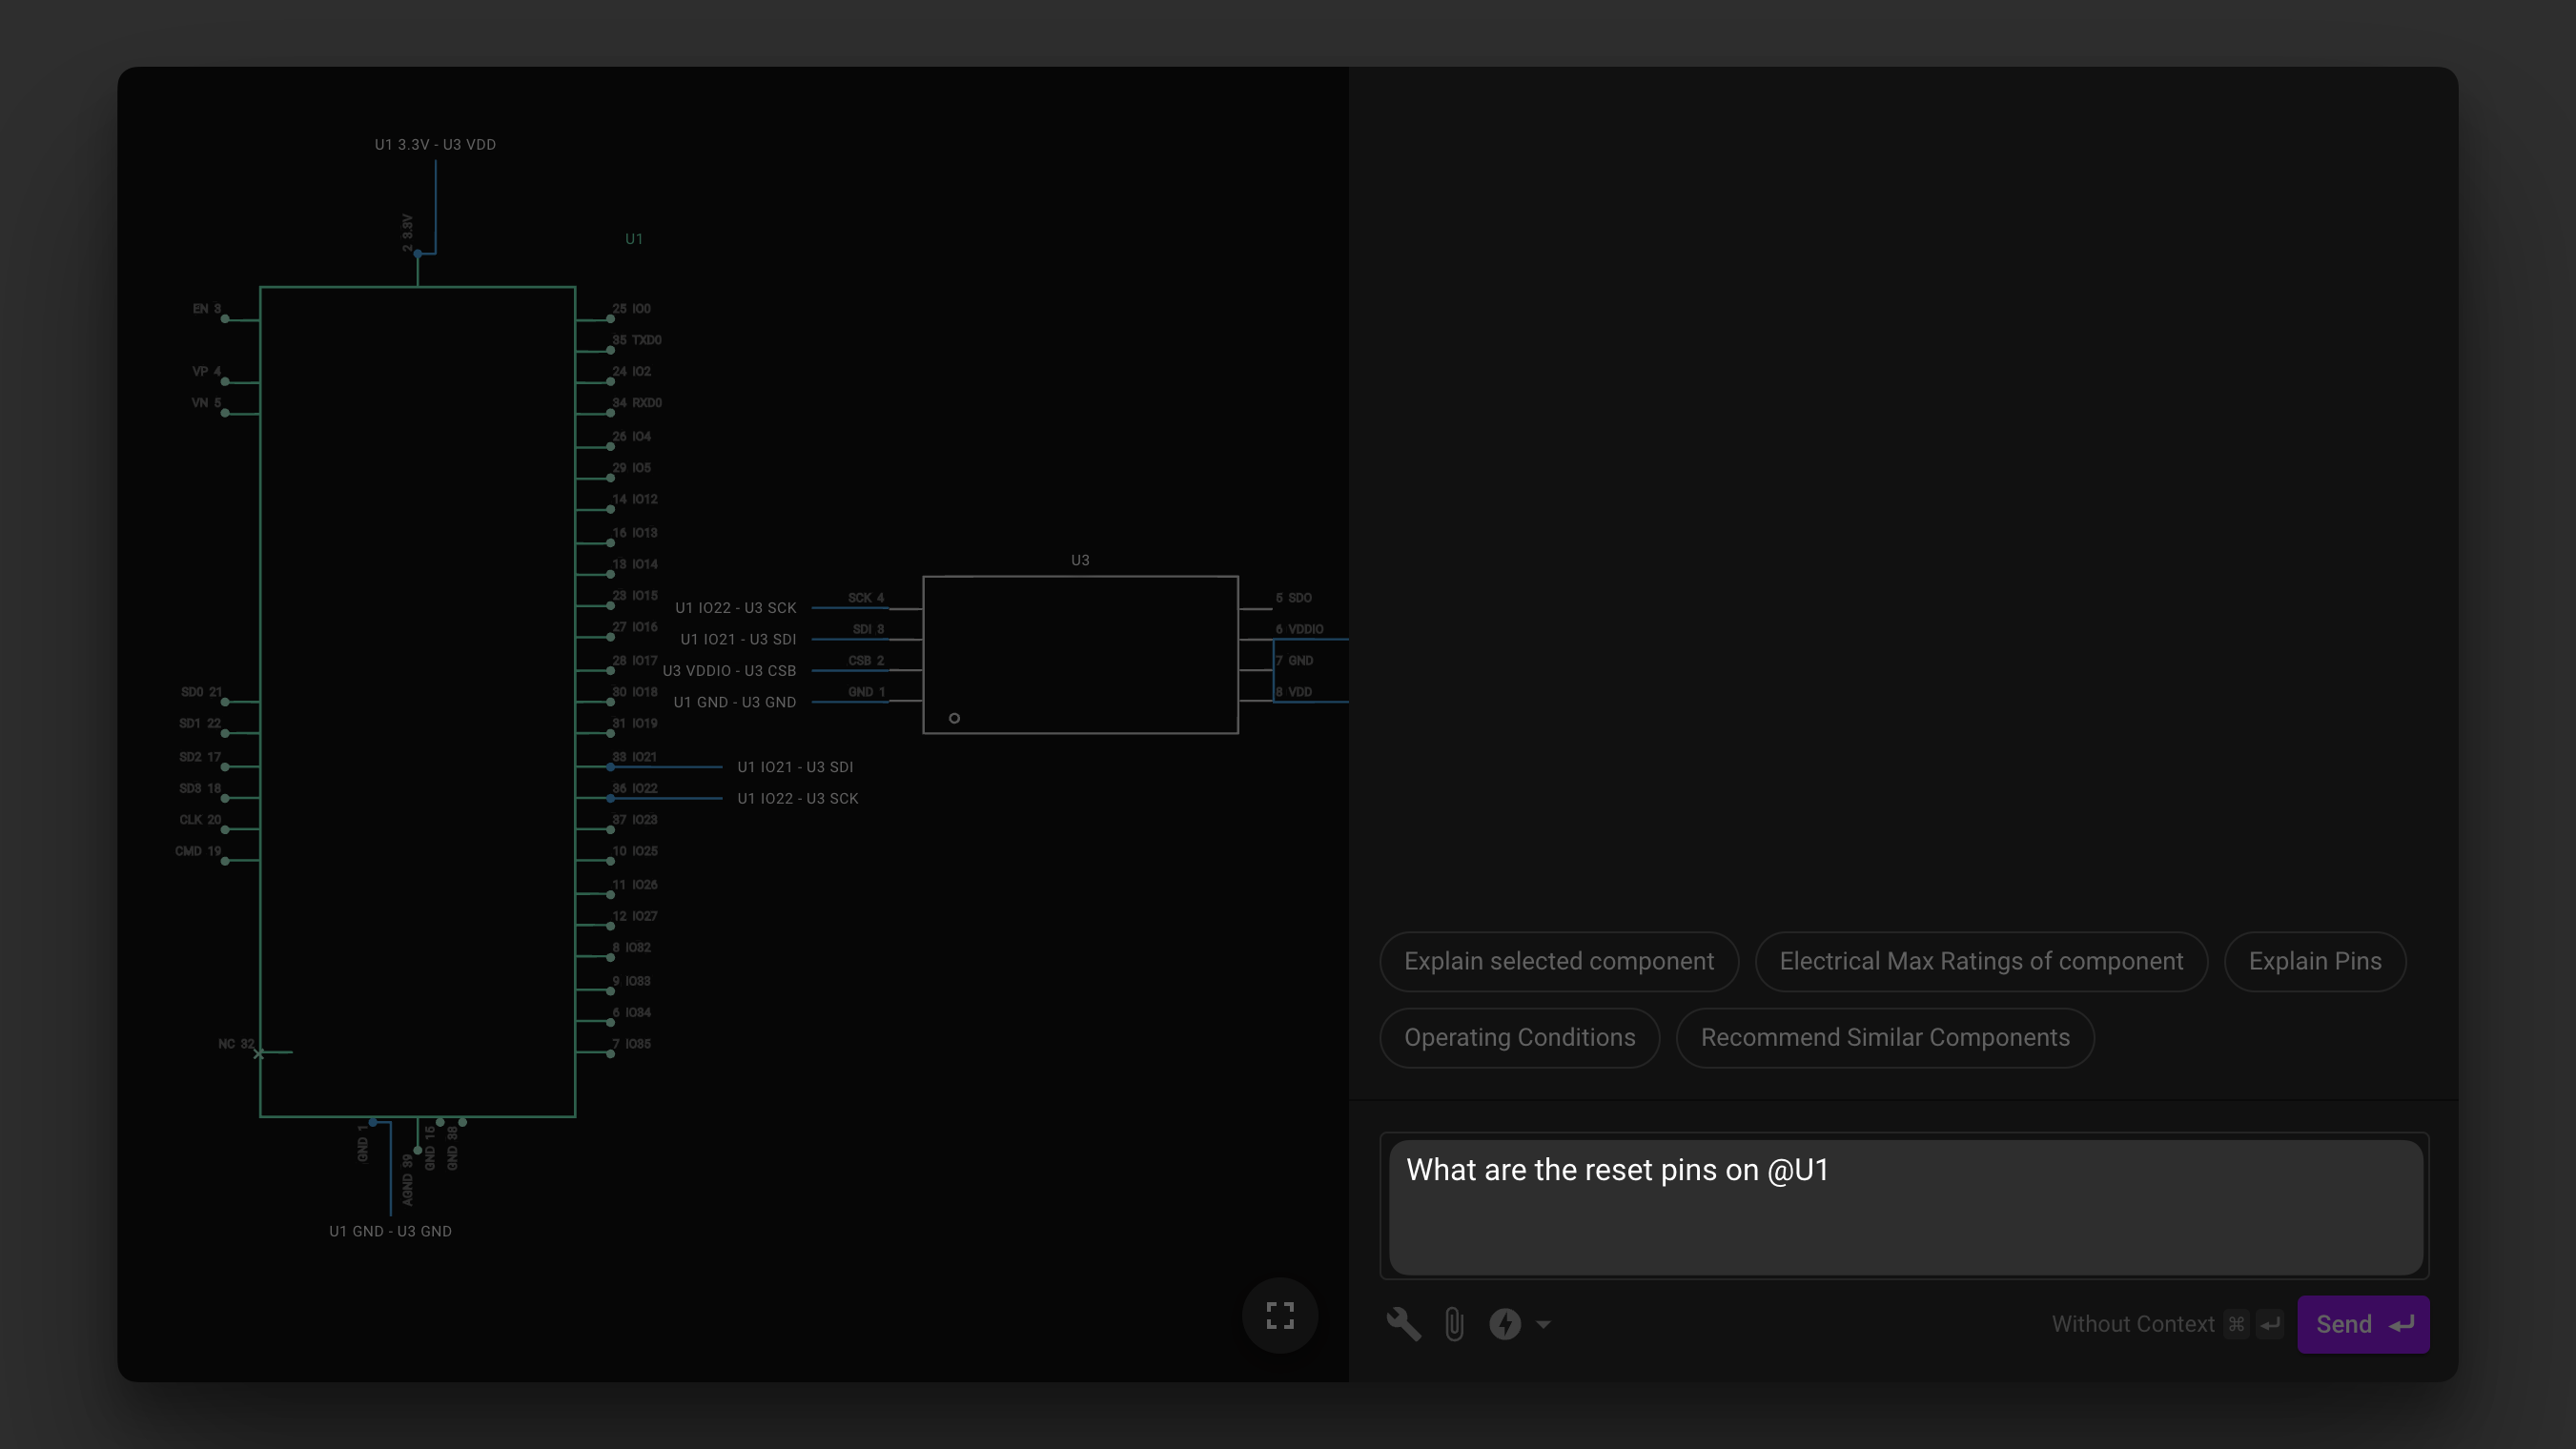
Why Use @part_name?
Ensures Flux pulls data specifically from the selected part, especially its datasheet when available.
Helps Flux provide more precise answers about the component's specs, usage, and constraints.
Makes troubleshooting and part comparisons more accurate.
Model Menu
The Model Menu allows you to choose the AI model best suited for your task. Flux will default to the most appropriate model, but you can manually switch if needed:
Advanced Reasoning – Slower, but more capable for complex problem-solving and analysis.
General – A balance of speed and capability, best for most design tasks.
Speedy – The fastest model, best for quick responses and simple queries.
To switch models, open the model selector in the Flux Chat tab and select the desired model.
File Upload Menu
The File Upload Menu allows you to attach additional reference materials, such as PDF datasheets, images, or diagrams, for Flux to analyze.
To upload a file:
Click the File Upload button in the Flux Chat tab.
Select a PDF, image, or diagram from your computer.
Once uploaded, use @file in your query to reference the document.
To get the best out of Flux's image processing, make sure you follow these best practices:
Image Clarity: For optimal analysis, ensure the images uploaded are clear and legible.
Focused Queries: To get the most relevant responses, frame your questions or requests in context with the uploaded image.
Flux's Context Chips
When Flux responds to a prompt, it displays a set of context chips that indicate what information it used to generate its answer. These chips help you understand Flux's reasoning, verify its sources, and troubleshoot unexpected responses.
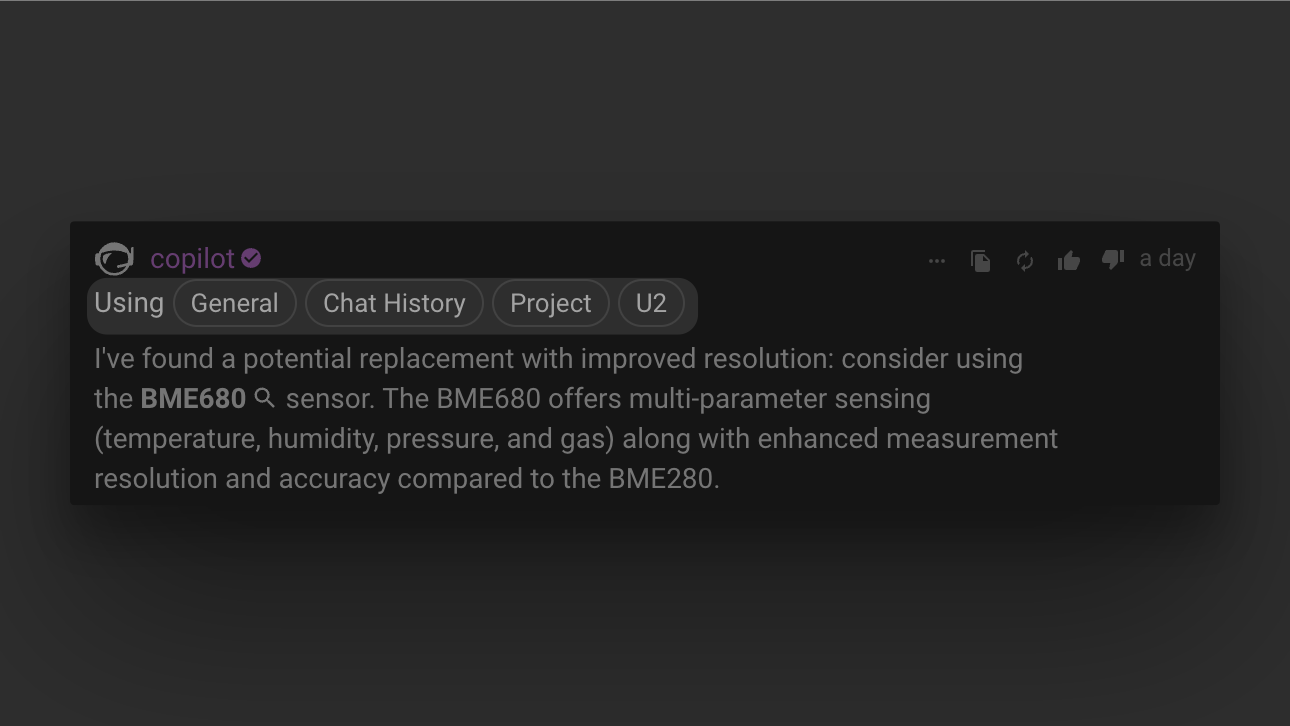
What Are Context Chips?
Context chips appear at the top of Flux's response and represent the different data sources it referenced. They can include:
General – Flux used general AI knowledge and reasoning, without referencing specific project data.
Chat History – Flux incorporated previous messages from the current conversation. (This chip won't appear in a new chat.)
Project – Flux used information from your current schematic, such as net connections and component placements.
C1, C2, C3, etc. – Flux referenced specific components in your design (e.g., C1 for a capacitor or U2 for an IC).
File – Flux used an uploaded file, such as a datasheet, image, or document.
Why Context Chips Matter
Understanding these chips helps you determine what information Flux used and troubleshoot any inconsistencies.
If a component isn't listed in the chips – Flux might be missing its datasheet or part data. Try using
@part_name(e.g.,@U1) to force it to reference that component.If the "Chat History" chip is missing – You're in a new chat, so Flux isn't considering past messages.
First Things to Try
To get started with Flux, try these common use cases and see how it can assist in your design workflow:
1. Try a Pre-Loaded Prompt
When you open the Flux Chat tab, you'll see a set of pre-loaded prompts designed to help you explore Flux's capabilities.
👉 Click on any prompt to have Flux guide you through a design.
If you prefer to start from scratch, click the "+" button to begin a freeform conversation.
2. Look Up a Component's Datasheet
Ensure Flux references the correct datasheet by mentioning a specific part in your design:
👉 Tip: If the component has a Datasheet URL in Flux Editor, Flux will automatically read it.
3. Find a Suitable Component from the Library
Ask Flux to search the Flux Editor component library for parts that meet your requirements:
👉 Tip: You can refine your request by specifying parameters like footprint, power rating, or manufacturer.
4. Perform a Quick Calculation
Use Flux to size components or check circuit parameters with on-the-fly calculations:
👉 Tip: Flux extracts equations from datasheets for more precise calculations.
5. Upload a Datasheet and Extract Information
Upload a PDF datasheet and ask Flux to pull relevant details:
👉 Tip: This is especially useful when working with custom components or lesser-known parts.
6. Get Help with Flux Editor Features
If you're unsure how to perform a task in Flux Editor, Flux can guide you:
👉 Tip: Flux can reference Flux Editor documentation to provide accurate answers.
What's Next
Now that you understand how to use Flux, you might want to explore:
Adapt Flux to Your Goals - Learn how to customize Flux for your specific design needs
Flux Use Cases - Discover different ways to leverage Flux in your workflow
AI for Hardware Design - Understand how AI can enhance your hardware design process
Ready to try Flux for yourself? Fork this example project to see what Flux can do!