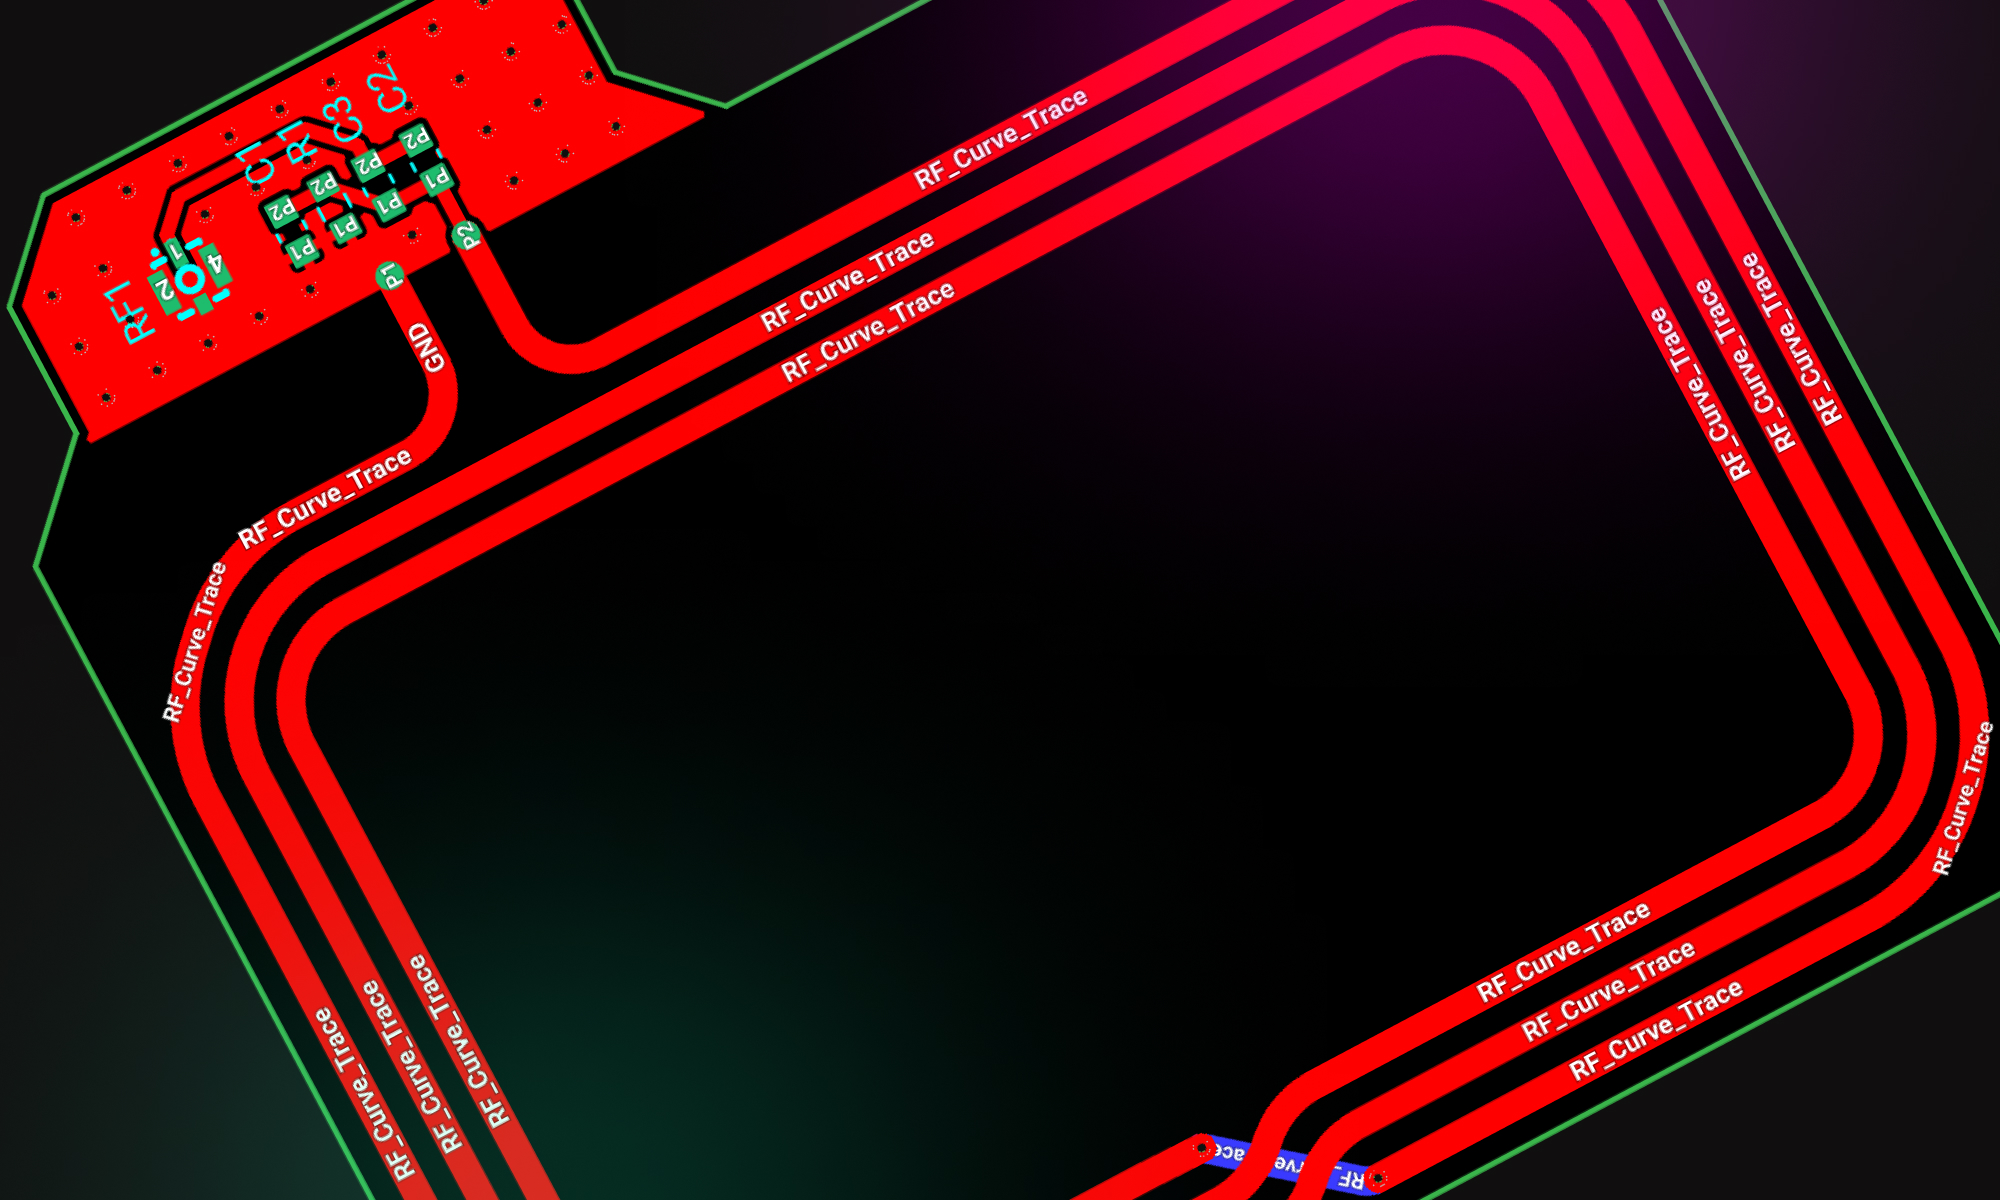
Curved Traces lets you switch from rigid 90-degree routing to smooth, arcing trace segments.
Overview
With Curved Traces, you can define how sharp or smooth your trace corners should be—globally across the board, per net, or down to individual segments. It’s driven by rules like trace shape and trace corner radius, giving you precise control over trace curvature. This makes it easier to design flexible PCBs or improve signal integrity in high-speed traces.
The system is rule-based, so once it’s set up, the heavy lifting happens automatically. You choose whether corners should be straight or curved, and you define how round they should be.
Getting Started
Curved Traces are controlled using layout rules. You can apply these rules at different levels. Here's how to get started:
1- Layout-wide
Best for flex boards or any project where you want all traces to curve by default.
Set the default trace style on the board
- Navigate to the "Objects" menu and select the
Layoutelement. - Add a
Trace Shaperule. - Set it to
curvedto apply a curved style to all trace segments across the board.
- Navigate to the "Objects" menu and select the
Define the corner radius
- Add a
Trace corner radiusrule. - This value defines the minimum radius for any curve (default is ~500µm).
- You can increase or decrease it depending on your board’s needs.
- Add a
2- Net-specific
Great if only certain signals are in a flexible area or need rounded routing.
Set the default trace style for the net
- Navigate to the "Objects" menu and select the
netyou want to modify. - Add a
Trace Shaperule. - Set it to
curvedto apply a curved style to all trace segments that belong to that net.
- Navigate to the "Objects" menu and select the
Define the corner radius
- Add a
Trace corner radiusrule. - This value defines the minimum radius for any curve (default is ~500µm).
- You can increase or decrease it depending on your board’s needs.
- Add a

3- Segment-specific (fine-tuning)
Only use this when you need to override the behavior for a single segment.
Making both corners of a segment curved
Select the target segment
- Navigate to the "Objects" menu and select the target segment
- Add a
Trace Shaperule. - Set it to
curvedto apply a curved style to both corners.
Define the corner radius
- Add a
Trace corner radiusrule. - This value defines the minimum radius for any curve (default is ~500µm).
- You can increase or decrease it depending on your board’s needs.
- Add a
Use
trace-shape,trace-shape-start, ortrace-shape-endon specific trace segmentsJust know that
curvedalways overridesstraightif both are applied
Making a single corner of a segment curved
- ** Select the target segment
**
1. Navigate to the "Objects" menu and select the target segment
2. Add a Trace Shape Start and Trace Shape End rules.
1. Trace Shape Start and Trace Shape End override corners at the beginning or end of a trace segment, but it's not always obvious which one is which. Use trial-and-error or visual cues to identify the direction.
3. Set it to curved to apply a curved style to both corners.
- Define the corner radius
- Add a
Trace corner radiusrule. - This value defines the minimum radius for any curve (default is ~500µm).
- You can increase or decrease it depending on your board’s needs.
- Add a
Understanding Priorities
- Curved traces take priority: If one segment is
curvedand the other isstraight, the resulting corner will be curved. - Radius Rules Conflict: If two connected segments have different
trace-corner-radiusvalues, one will take priority—usually the one withstartdefined. (We're working on making this more predictable.)
Tips & Tricks
- To create a seamless 90° curve, make sure your segments intersect at a right angle.
- Use the visual inspector or hover over segments to debug which shape or radius rules are active.
- Curves are clamped by trace length. A tight corner won’t allow a large radius, no matter what rule you set.
- Traces only curve at segment junctions. If you have a straight segment between two curves, it won’t auto-bend.