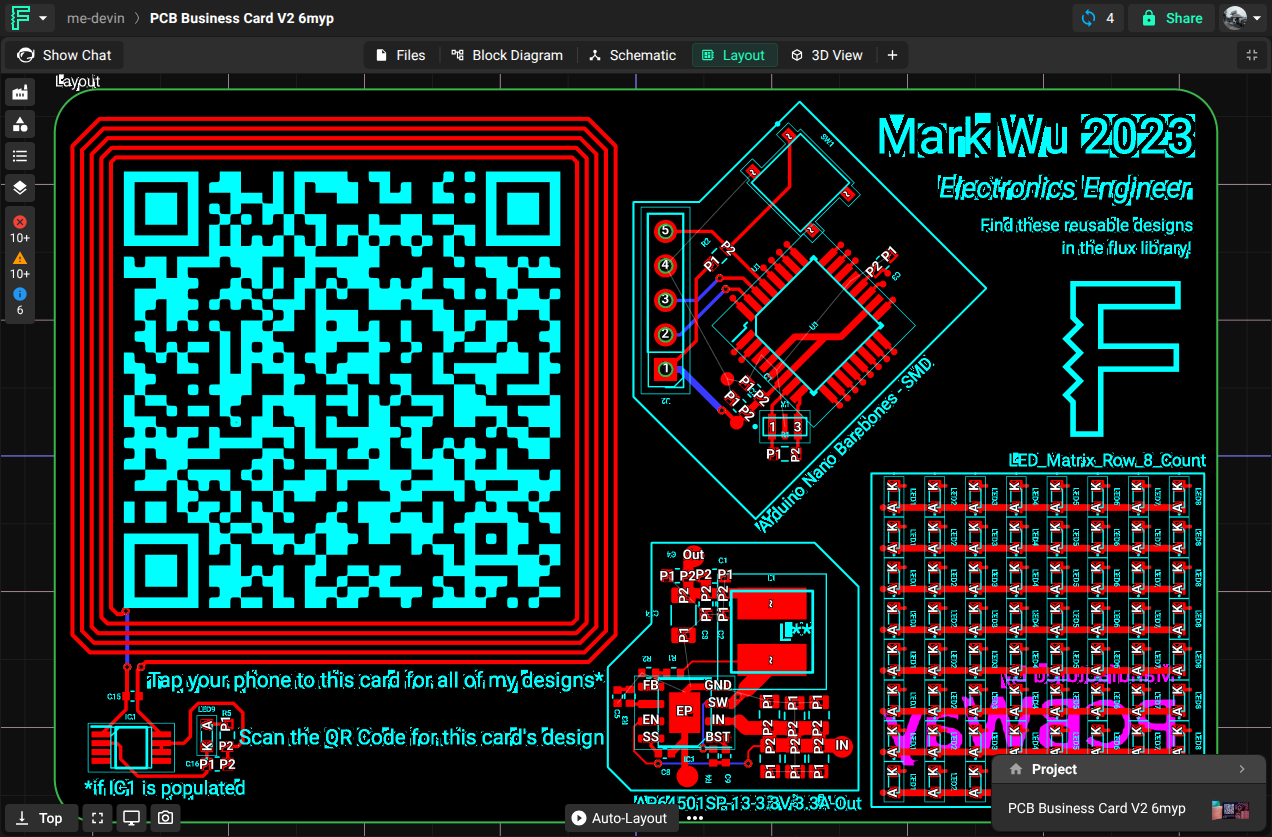
Use any shape on your board, from a custom pad to a curved board outline.
Create custom shapes for pads, symbols, silkscreen and board layout.
Overview
IC footprints, antennas, and connectors can need specific pad shapes. Symbols and board outlines can also need custom shapes.
This page shows how to create custom shapes and add them to pads, silkscreen, board layout, and zones.
Creating a Custom Shape
Ask Flux to create the shape for a pad, a silkscreen line, or a zone. Flux can make the shape from a description, an SVG path, a DXF file, or an image that you attach to the chat.
To create the shape in another tool:
Flux uses DXF and SVG files as input for custom shapes. You can use any CAD or drawing tool to make these shapes. For example, use Onshape for DXF files or Inkscape for SVG files.
Shape Requirements
For shape file requirements, see file requirements.
Creating DXF Shapes with Fusion360
The video below covers how to create DXF shapes using Fusion 360 for a symbol, but the same process can be used to create a shape for any other element (pad, footprint and layout):
Creating SVG Shapes with Inkscape
Inkscape is an open source tool, and it's available for most platforms. Even if you're unfamiliar with SVG files, the video below shows how to create your first shape.
The video below covers how to create a custom symbol shape, but the same process can be used to create a shape for any other element (pad, footprint and silkscreen):
Importing the Shape into Flux
Ask Flux to import the shape. Attach the DXF or SVG file to the chat, and tell Flux which element gets the shape.
You can also do it in the editor:
There are two ways of adding generated shapes into Flux:
Using an asset: Use this method for every element type, with DXF or SVG files
Injecting code directly on a shape rule: Use this method for SVG path code on pads, layouts, lines, and zones
Option 1: Using an Asset File
Ask Flux to add the file as an asset and link it to the element.
To do it in the UI:
You can use an external DXF or SVG file to dictate the shape of a pad. This is a two-step process; first, you must add the SVG or DXF as an asset via the File tab and then link the asset to the target pad.
Step 1: Adding DXF/SVG Files as Assets
Ask Flux to add the file to the project assets.
To do it in the UI:
To add an external file as an asset:
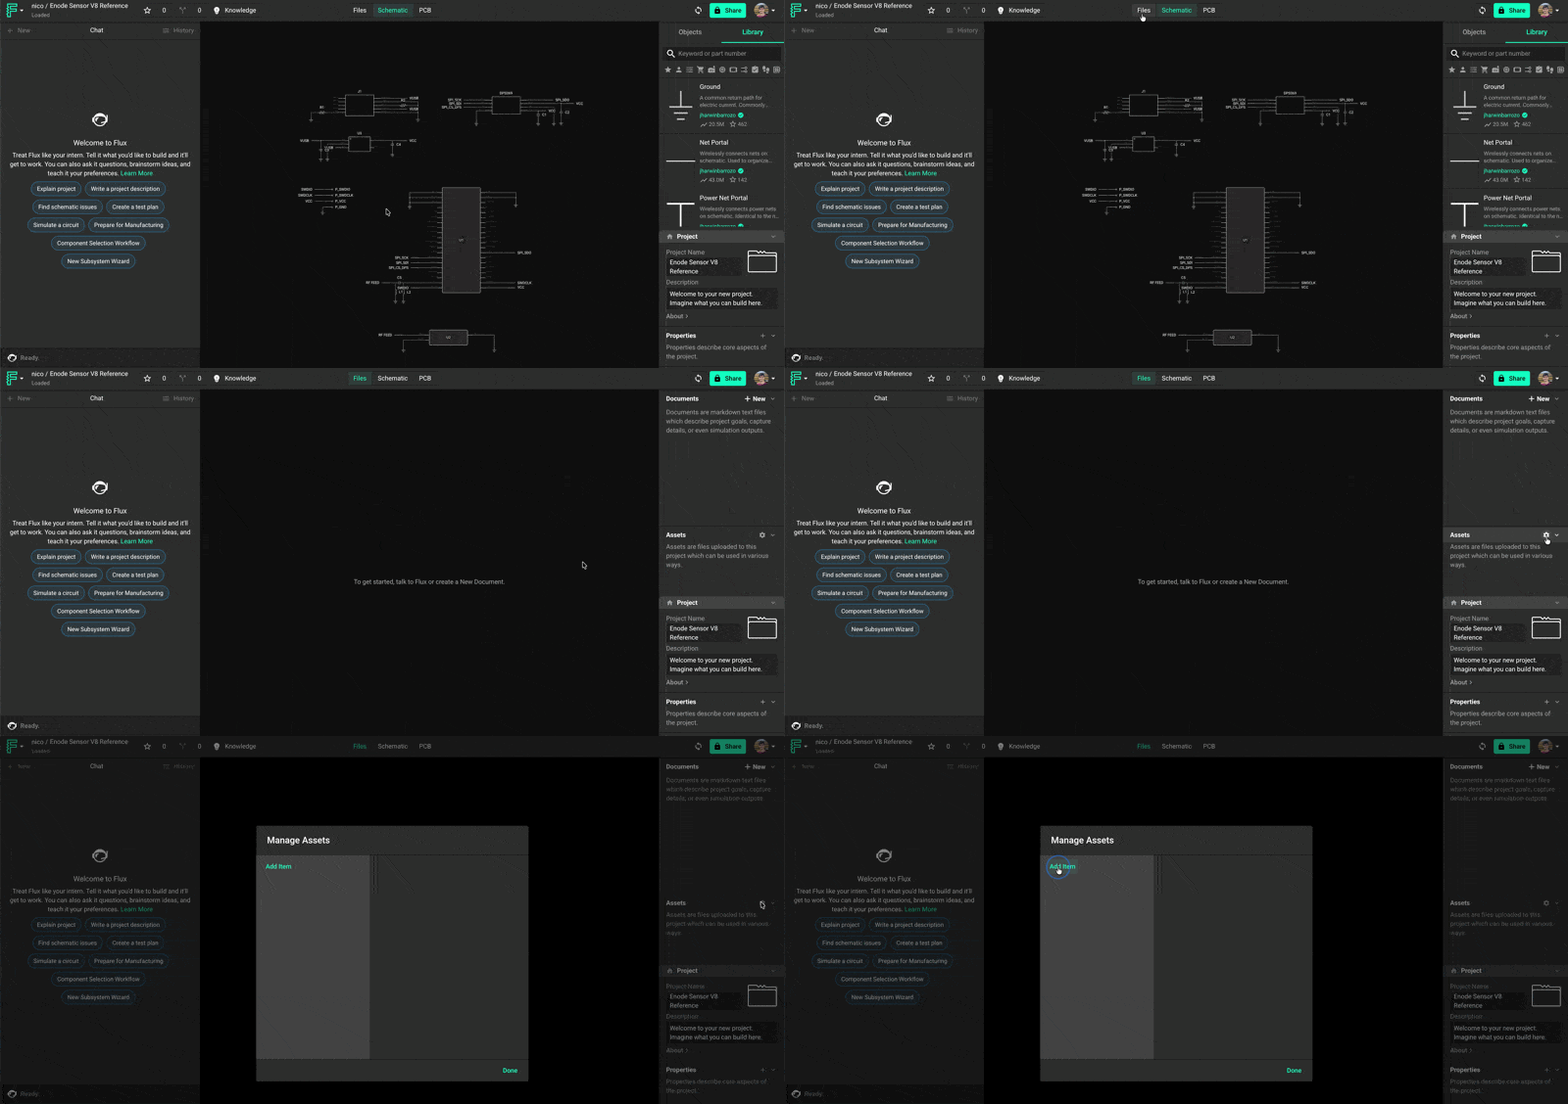
Open the "Files" tab on the top center of the app.
On the right drawer, scroll down until you find the assets panel. Click on the cog-like icon to manage your assets.
Then click on "Add item" and select the file from your local drive.
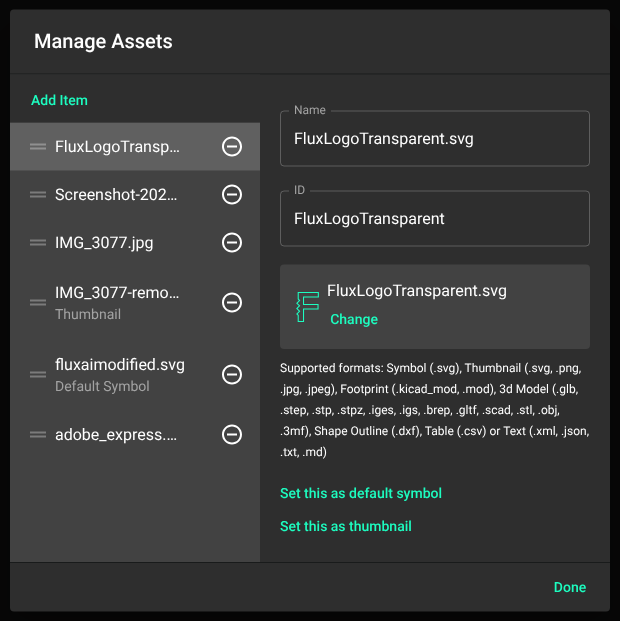
If you're creating a custom symbol and have added multiple assets, click the "Set this as default symbol" button.
Step 2: Link the Asset to the Target Element
Ask Flux to link the asset to the element.
To do it in the UI:
Once you've added the SVG or DXF file to the asset list, then link the asset to the target element.
Skip this step if you're creating a custom symbol.
To link an asset to an element:
Select the element you want to make into a custom shape
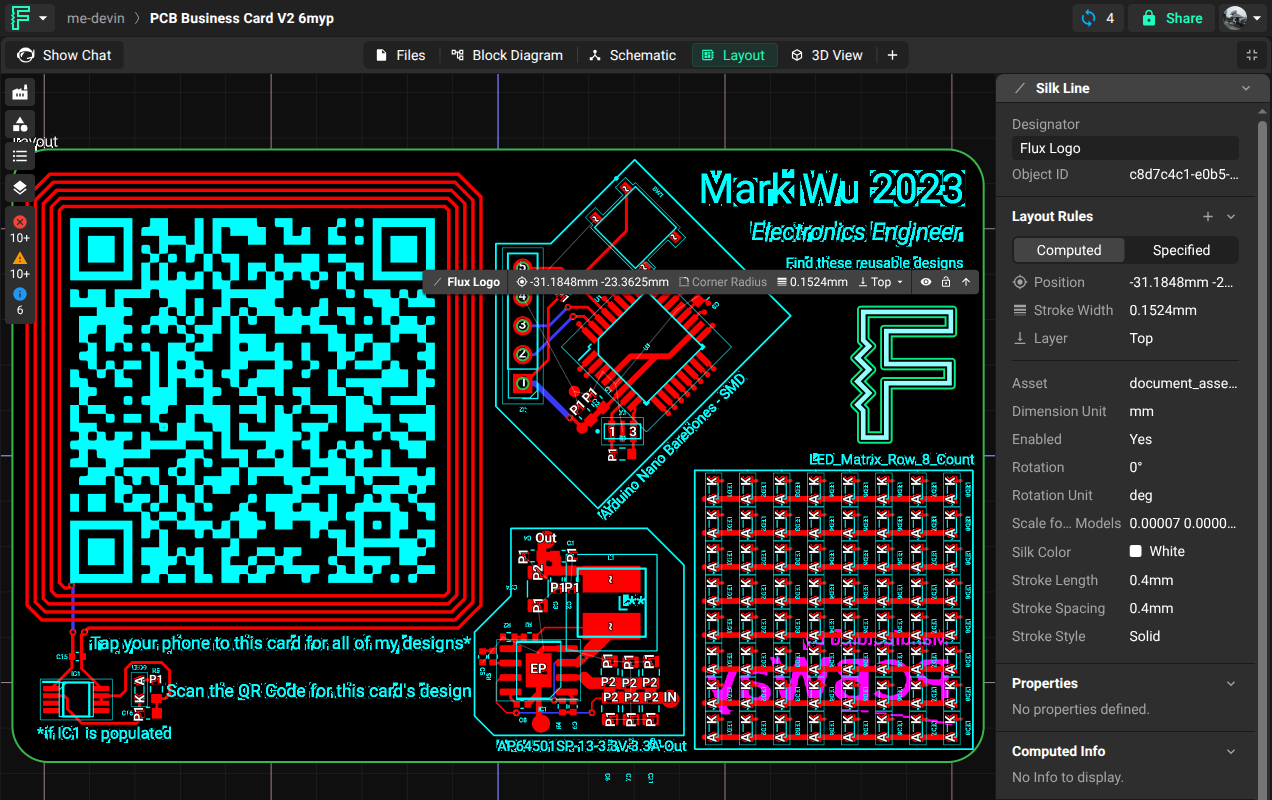
Silkscreen: Object type -> Silk Line
Board shape: Object type -> Layout
Pad: Object type -> Pad
Zone: Object type -> Zone
Locate the "Layout rules" drop-down menu on the right-side panel
Find the "Object-specific rules" submenu
Click on "Add"
Find and add the "Asset" rule
Inside the "Asset" text box, select the SVG/DXF file added in the previous step from the list
Step 3: Scaling an Asset
Ask Flux to set the scale of the asset.
To do it in the UI:
By default, Flux assumes the imported file will be in meters. You might need to adjust the scale of the asset using a scale rule.
Option 2: Using the Shape Rule for SVG Code
Ask Flux to write the SVG path to the shape rule.
To do it in the UI:
You can add SVG code directly into the shape rule of a pad, layout, line, or zone. To create a custom symbol shape, use the asset method in Option 1. To add the SVG code directly into a shape rule:
Open the PCB editor
Select the element you want to convert to a custom shape
Locate the "Layout rules" drop-down menu on the right-side panel
Find the "Object-specific rules" submenu
Click on "Add"
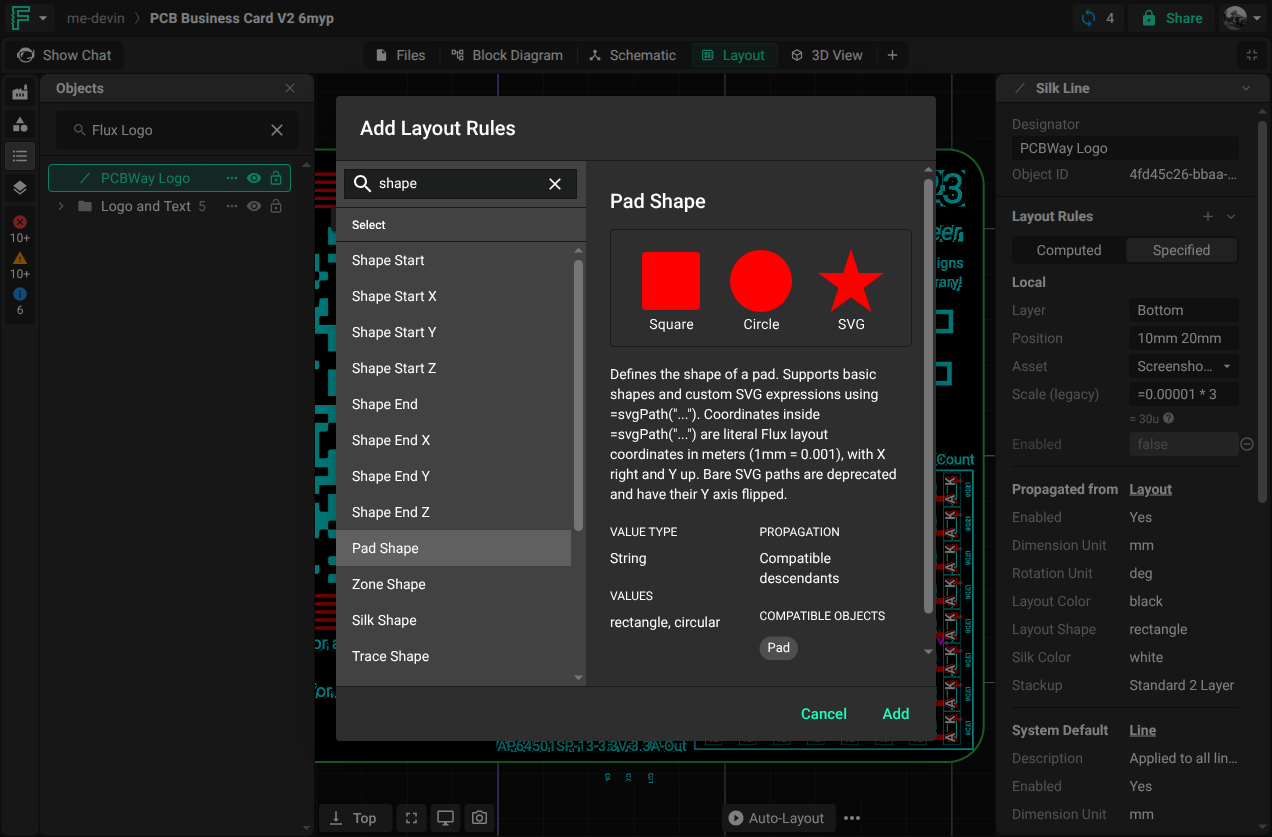
Find and add the corresponding "Pad shape", "Line shape", "Zone Shape", or "Layout Shape" rule
Inside the rule's text box, paste the SVG code. See the SVG code below as an example