
Flux is an AI hardware engineer. It creates the fabrication drawing of your board with the fabrication notes, so that your fabricator gets the drawing together with the Gerber, drill, and ODB++ files.
The fabrication drawing is a PDF file, fabrication-drawing.pdf. Flux adds it to the manufacturing files of every board. The drawing has these pages:
Page | Content |
|---|---|
Assembly | Top and bottom views with part outlines, reference designators, and pin 1 markers. The fabrication notes. |
Drill | A drill view with one symbol for each drill tool, and the drill legend. |
Stackup | One table for each stackup, with the finished thickness. |
Regions | The area of each stackup on the board, with dimensions and the region legend. |
Layers | One view for each copper layer. |
Realistic | 3D pictures of the top and bottom of the assembled board. |
A flex or rigid-flex board also has a page for each coverlay layer, each stiffener layer, and each board side with Flex Edge Glue.
Get the fabrication drawing
Ask Flux to export the manufacturing files. Flux adds the fabrication drawing to the ZIP file.
To do it in the UI:
Open the PCB of the project.
Select Flux menu → Export → Electronics → Manufacturing Files (Gerbers, etc) (.zip) or Flux menu → Export → Electronics → ODB++ (.zip).
Open the ZIP file. The manufacturing files ZIP has
fabrication-drawing.pdf. The ODB++ package hasuser/fabrication-drawing.pdf.
The IPC-2581C export of a board with Stackup Areas is also a ZIP file with fabrication-drawing.pdf.
Fabrication notes
The NOTES box on the Assembly page has the fabrication notes for the fabricator. Flux writes the notes from the board:
The units of the drawing (millimeters).
What the finished thickness includes: copper, dielectric, solder mask, and coverlay. It does not include solder paste or silkscreen.
For a board without bend areas, a note that the design defines no bend areas.
For a board with areas without solder mask, a note that the solder mask files have openings over these areas.
For a board with coverlay, stiffener, or Stackup Area layers, the name of each Gerber file of these layers, or a note that the drawing shows their locations.
Ask Flux to add your own fabrication notes to the project, for example the material, the surface finish, the solder mask color, or the IPC class.
Assembly page
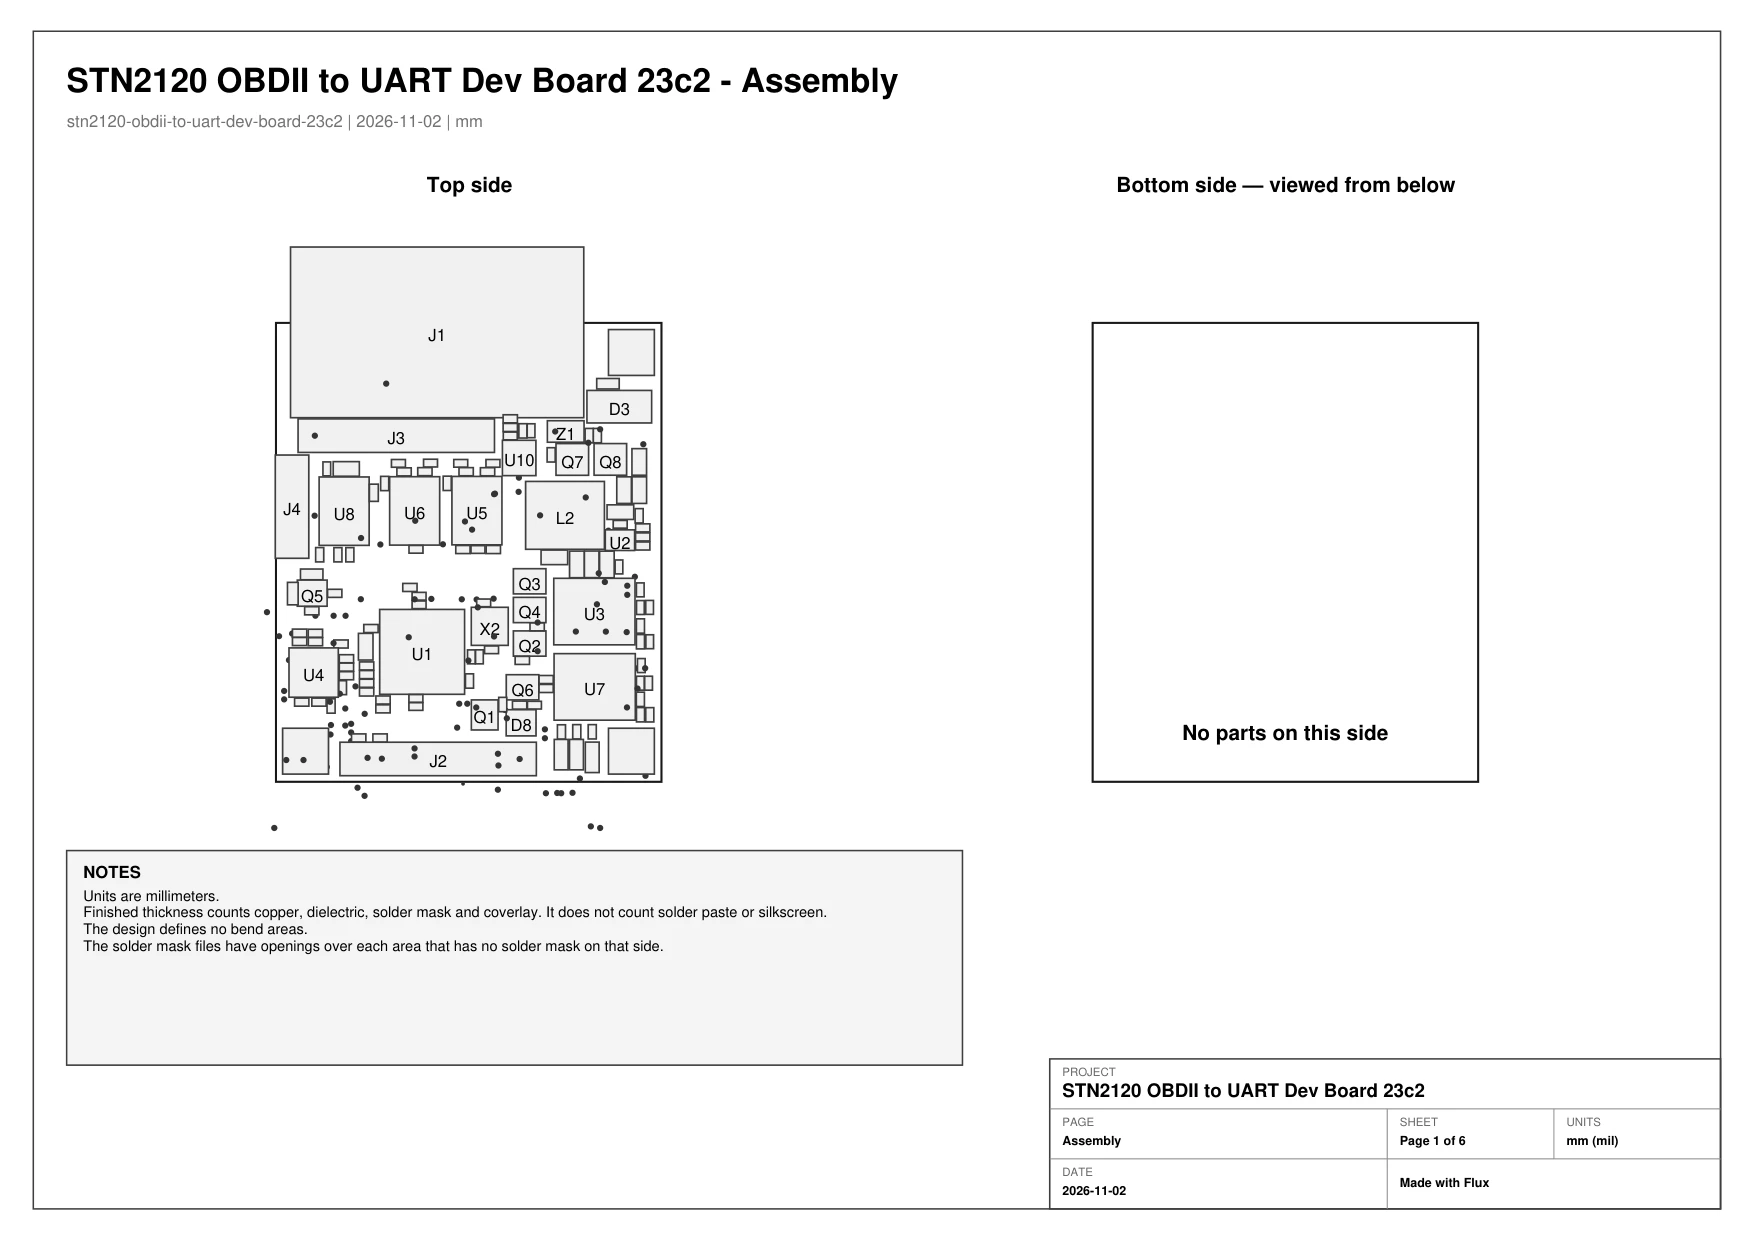
The Assembly page shows the top side and the bottom side of the board. The bottom side is mirrored, as you see it from below.
Each part has:
An outline from its pads and its silkscreen.
Its reference designator, when the designator fits in the outline.
A pin 1 marker.
Drill page
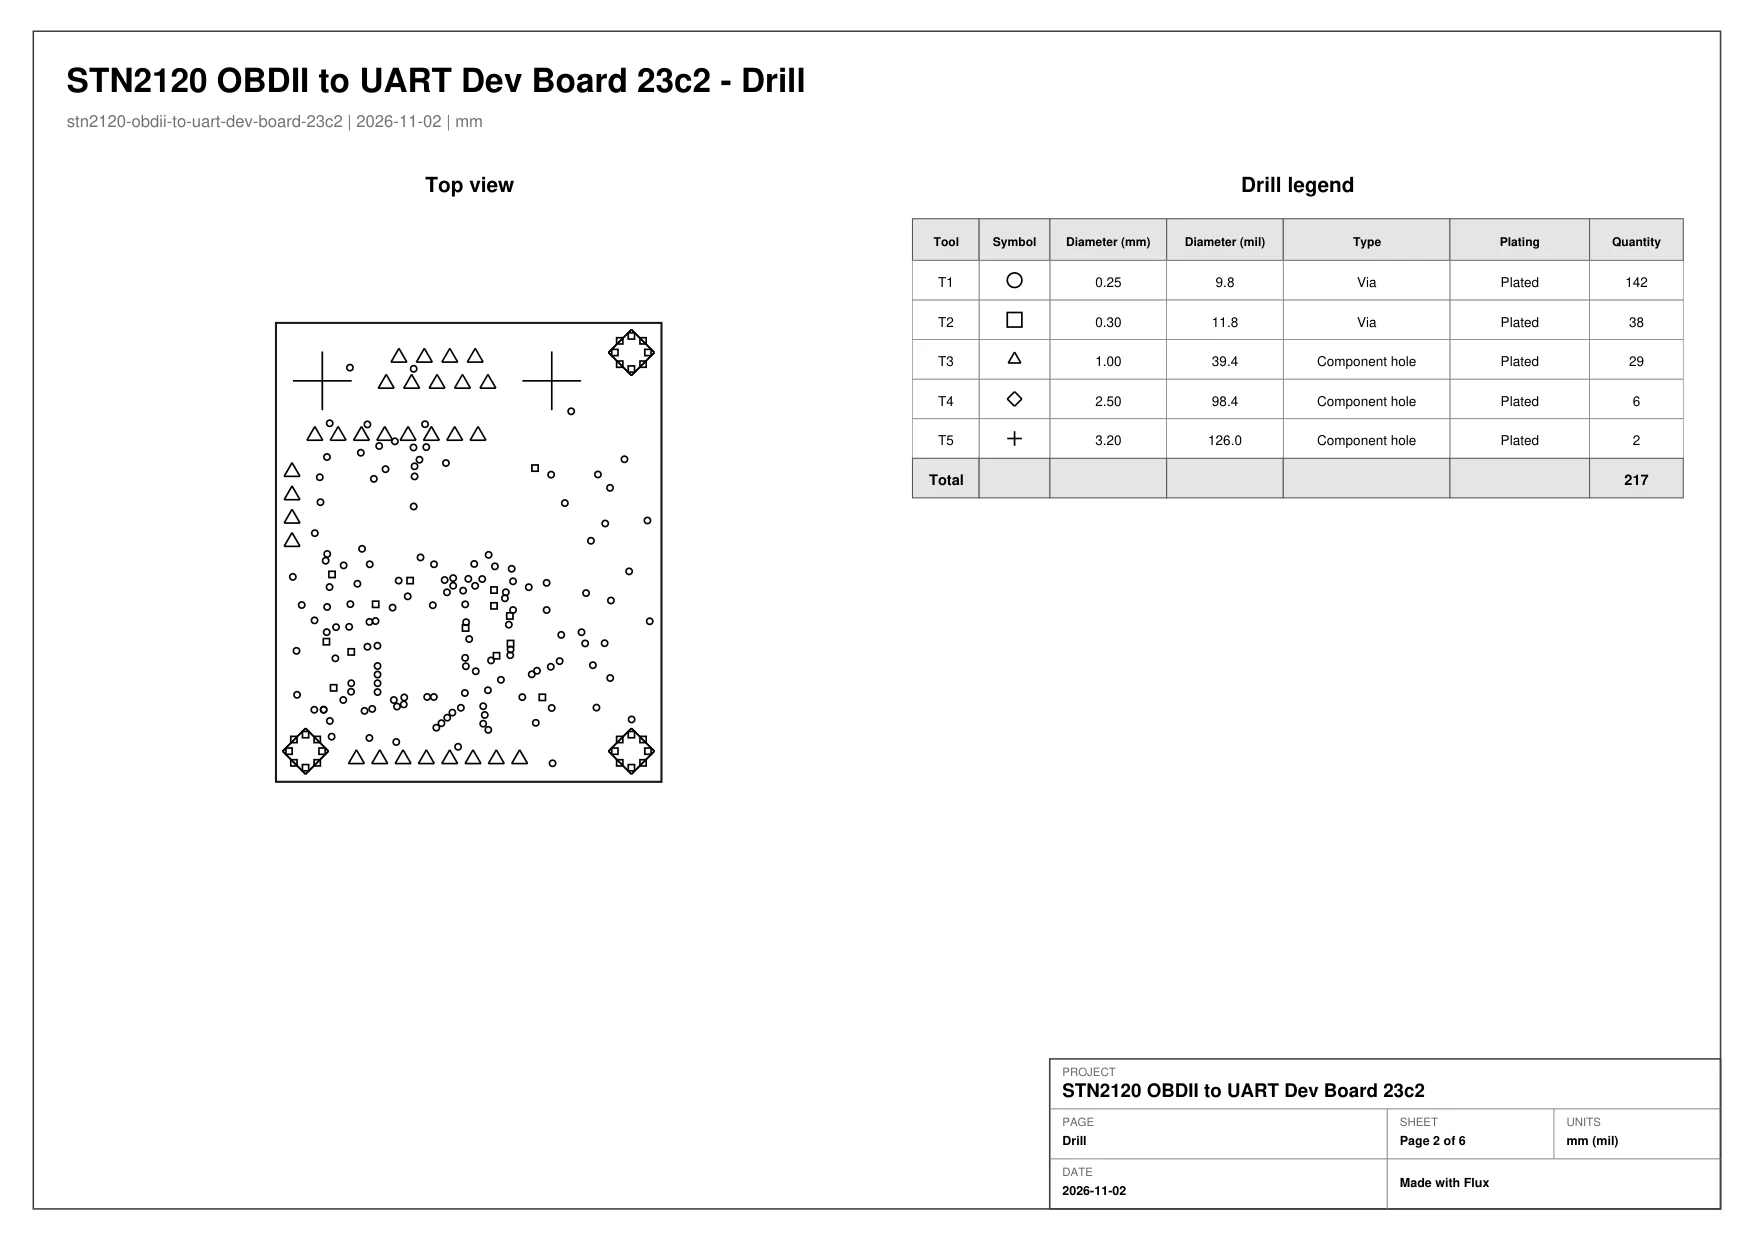
The Drill page shows a top view of the board with a symbol at each hole. Each drill tool has its own symbol.
The drill legend lists each drill tool with:
The tool number and the symbol.
The diameter in mm and in mil.
The type: via, component hole, mounting hole, or slot.
The plating: plated or non-plated.
The quantity of holes.
The last row has the total number of holes. The drill legend counts the same holes as the drill files, including the vias of copper fills. When a board has many drill tools, the legend continues on the next page.
Stackup page
The Stackup page has one colored table for each stackup of the board. A rigid board has one stackup. A rigid-flex board has one stackup for each area stackup.
Each table lists the type, the material, and the thickness in mm and in mil of each layer. The table also gives the finished thickness of the stackup, and the finished thickness with the stiffener when the stackup has a stiffener. When a stackup has many layers, the table continues on the next page.
To change the stackup, see Stackup Editor.
Regions page
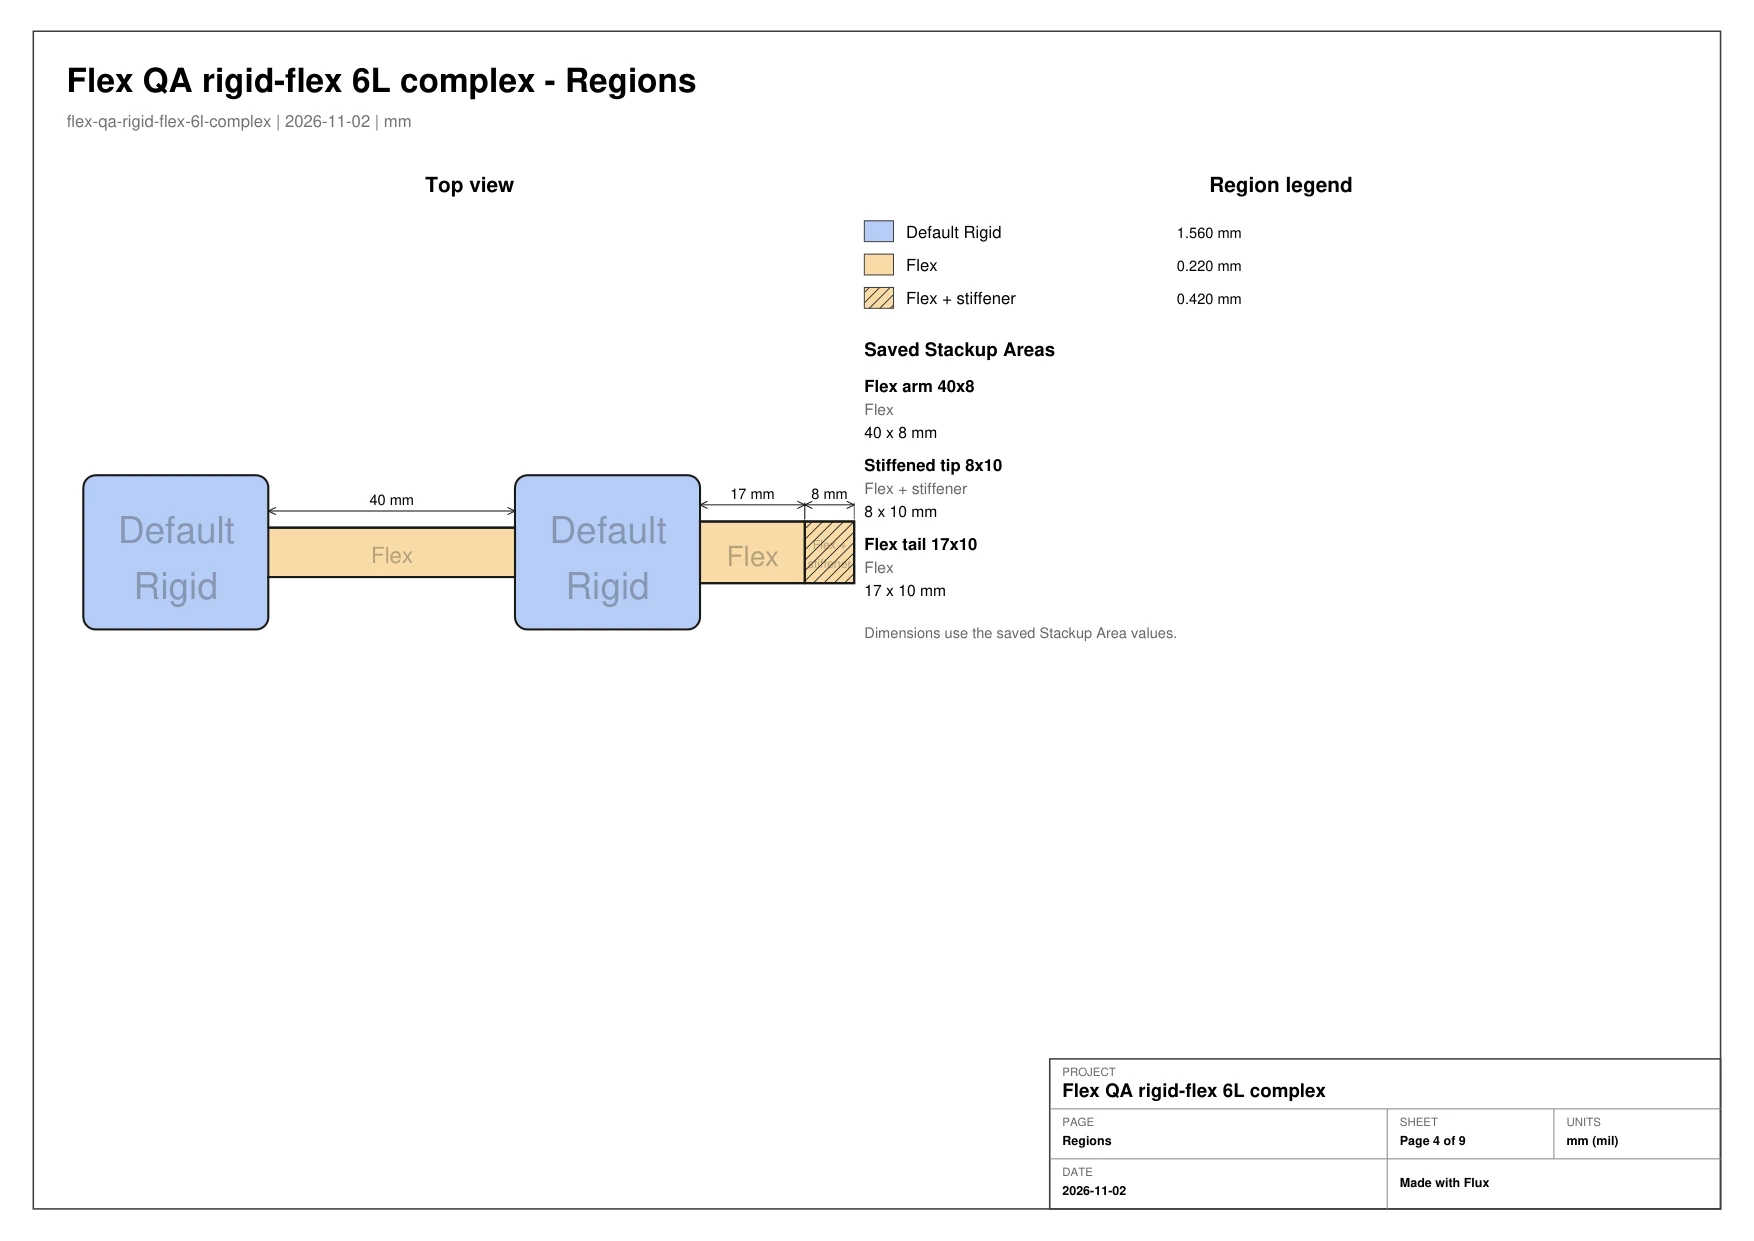
The Regions page shows a top view of the board with the area of each stackup. Each area has a fill color and the name of its stackup. The dimensions show the size of the board and the size of each Stackup Area.
The region legend lists each stackup with its finished thickness. It also lists each saved Stackup Area with its size. See Flex and Rigid-Flex Boards.
Layers page
The Layers page shows one panel for each copper layer, with its tracks, pads, vias, and copper fills. Each panel uses the color of the layer in the PCB editor. A page holds six layers. A board with more copper layers continues on the next page.
Realistic page
The Realistic page has 3D pictures of the top side and the bottom side of the assembled board, with the silkscreen on. The pictures come from the 3D view of the project.
Title block
Each page has a title block with:
The project name.
The page name.
The page number and the number of pages.
The units: mm (mil).
The date of the export.
Flex and rigid-flex pages
The fabrication drawing of a flex or rigid-flex board also has:
A page for each coverlay layer and each stiffener layer, with the shaded area of the layer and the name of its Gerber file.
A page for each board side with Flex Edge Glue, with the glue beads and a specifications list.
See Export a flex or rigid-flex board.
Send the drawing to your fabricator
Send the fabrication drawing with the Gerber and drill files, or with the ODB++ package. Ask Flux to get a quote and order the board.